Introduction
- The Journey Builder is our no-code drag and drop tool with which you can create complex flow charts describing which users should get messages and when they should receive them.
- We call each flow chart a “journey” and a journey has 2 main components, **steps and messages **, and triggers. A journey can be made up of as many of those components as you want, can include time delays, branching and enough logic to include complex rules.
- We also require each journey to specify a “segment.” A segment is group of users to which the journey could apply. A segment is defined by user properties, you don’t need to specify the actual list of users, and a segment can be as specific or broad as you want meaning it a journey could affect your entire user base if you wanted.
- Designing the journey in our editor
- Defining the customers who can enroll
- Reviewing the journey and setting it live
Examples:
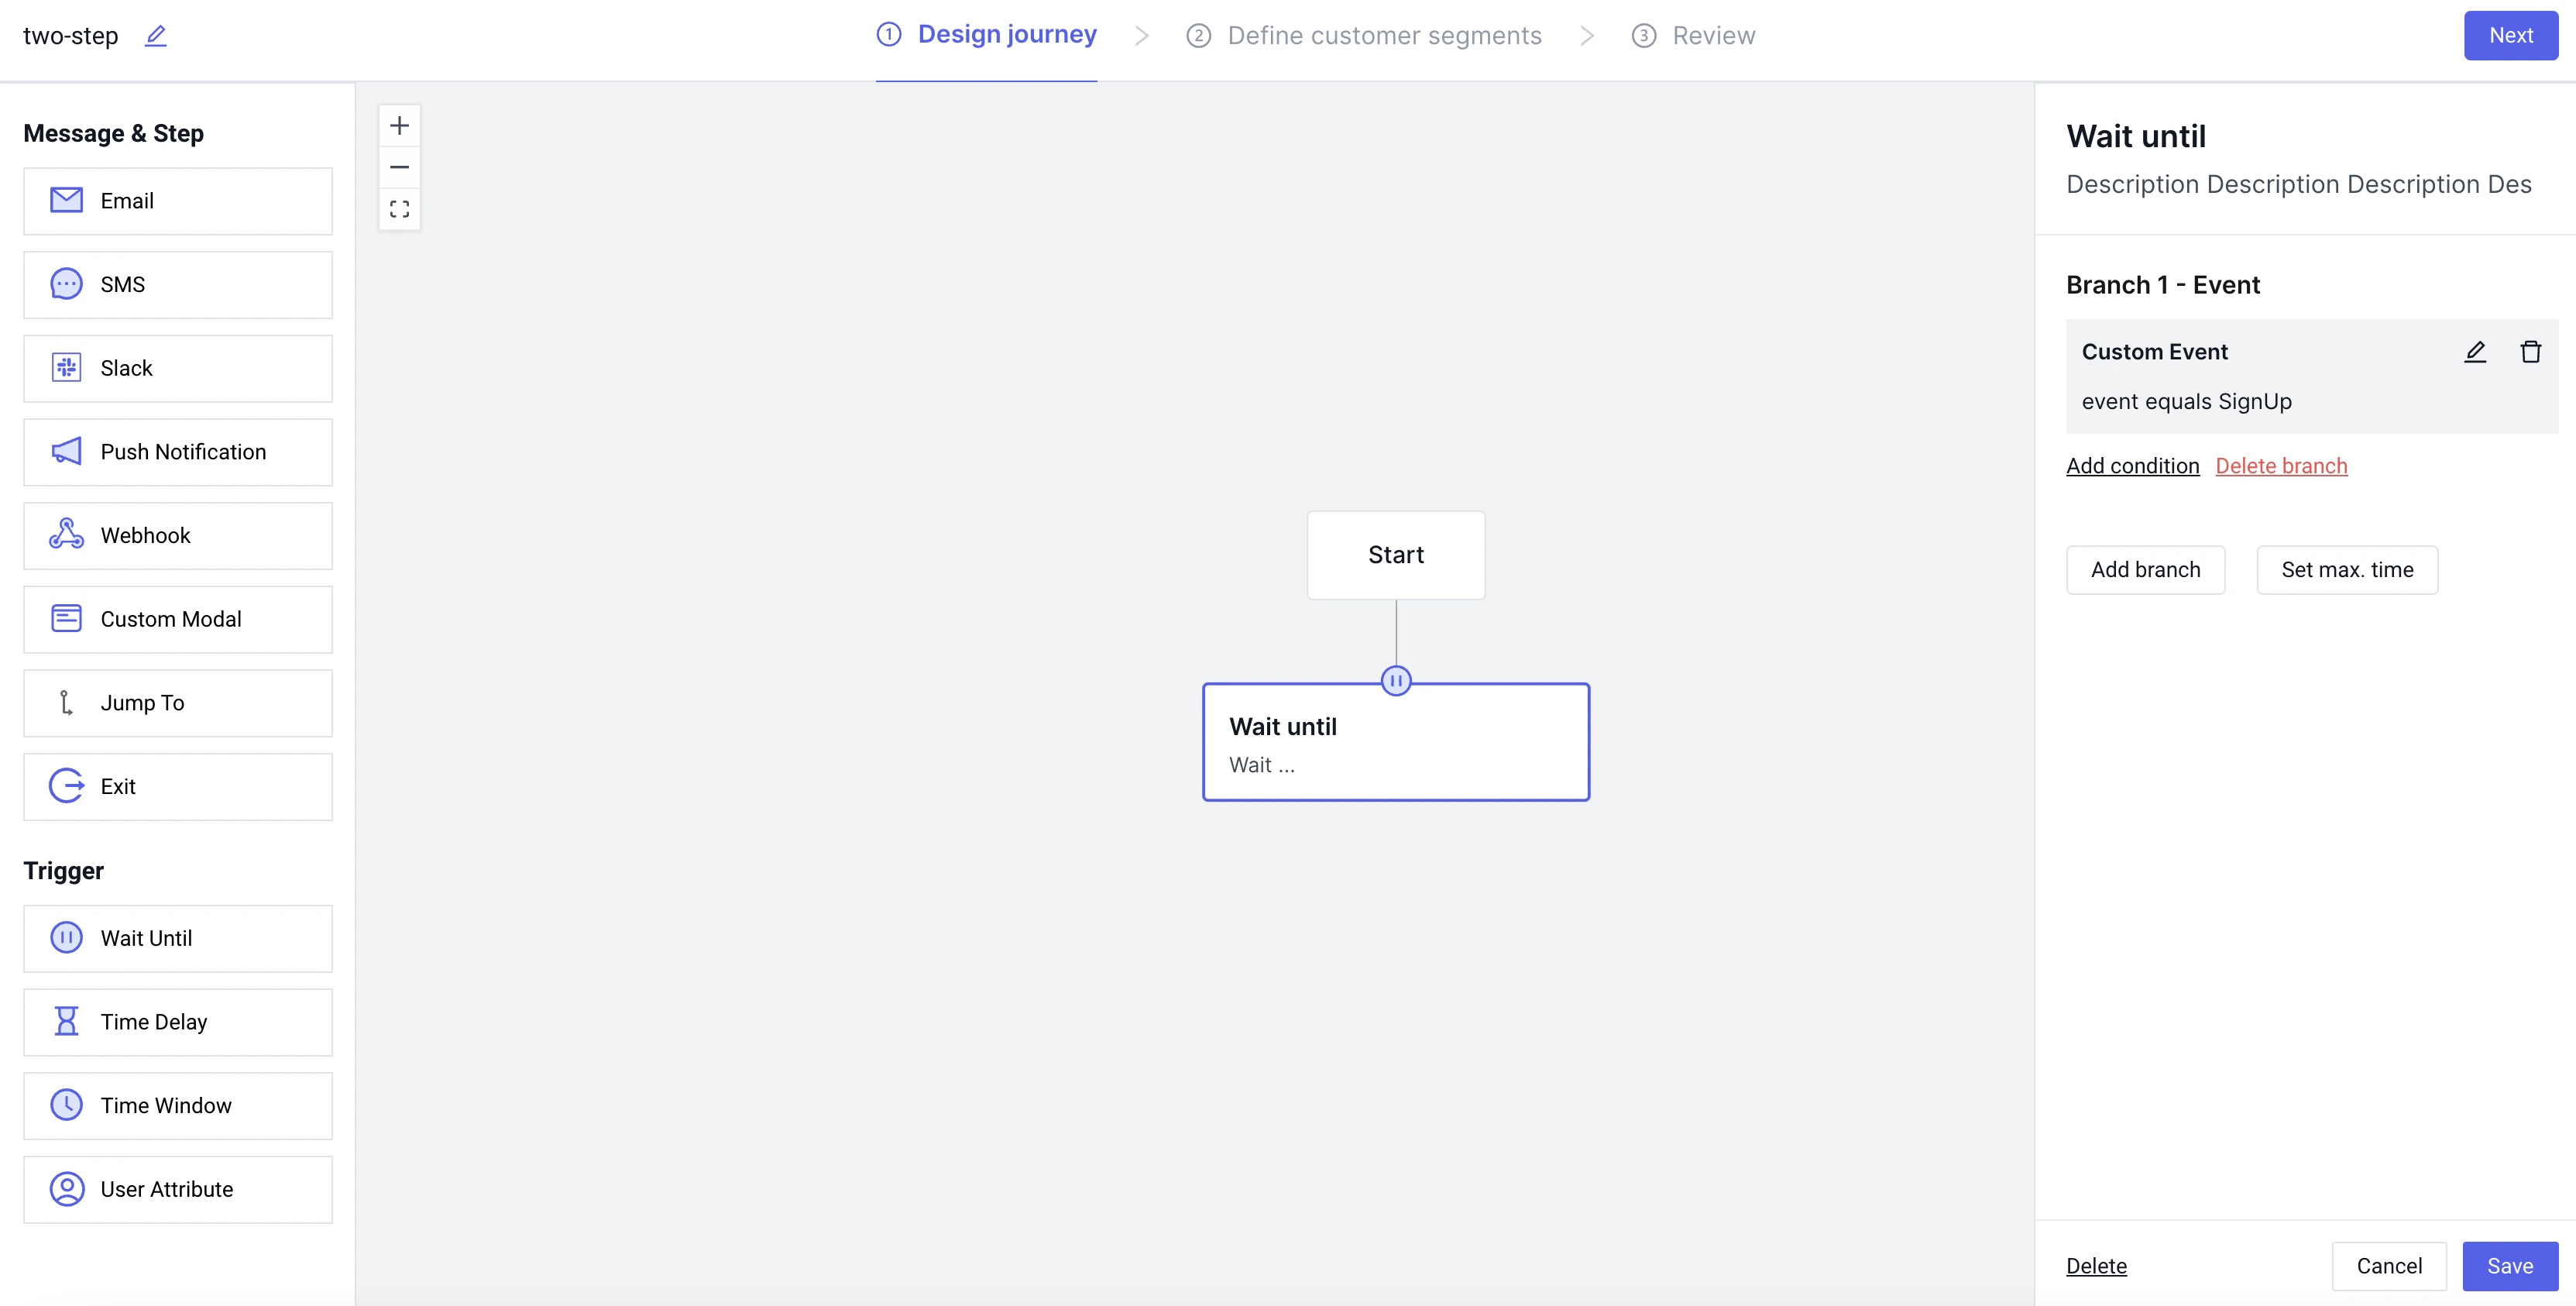
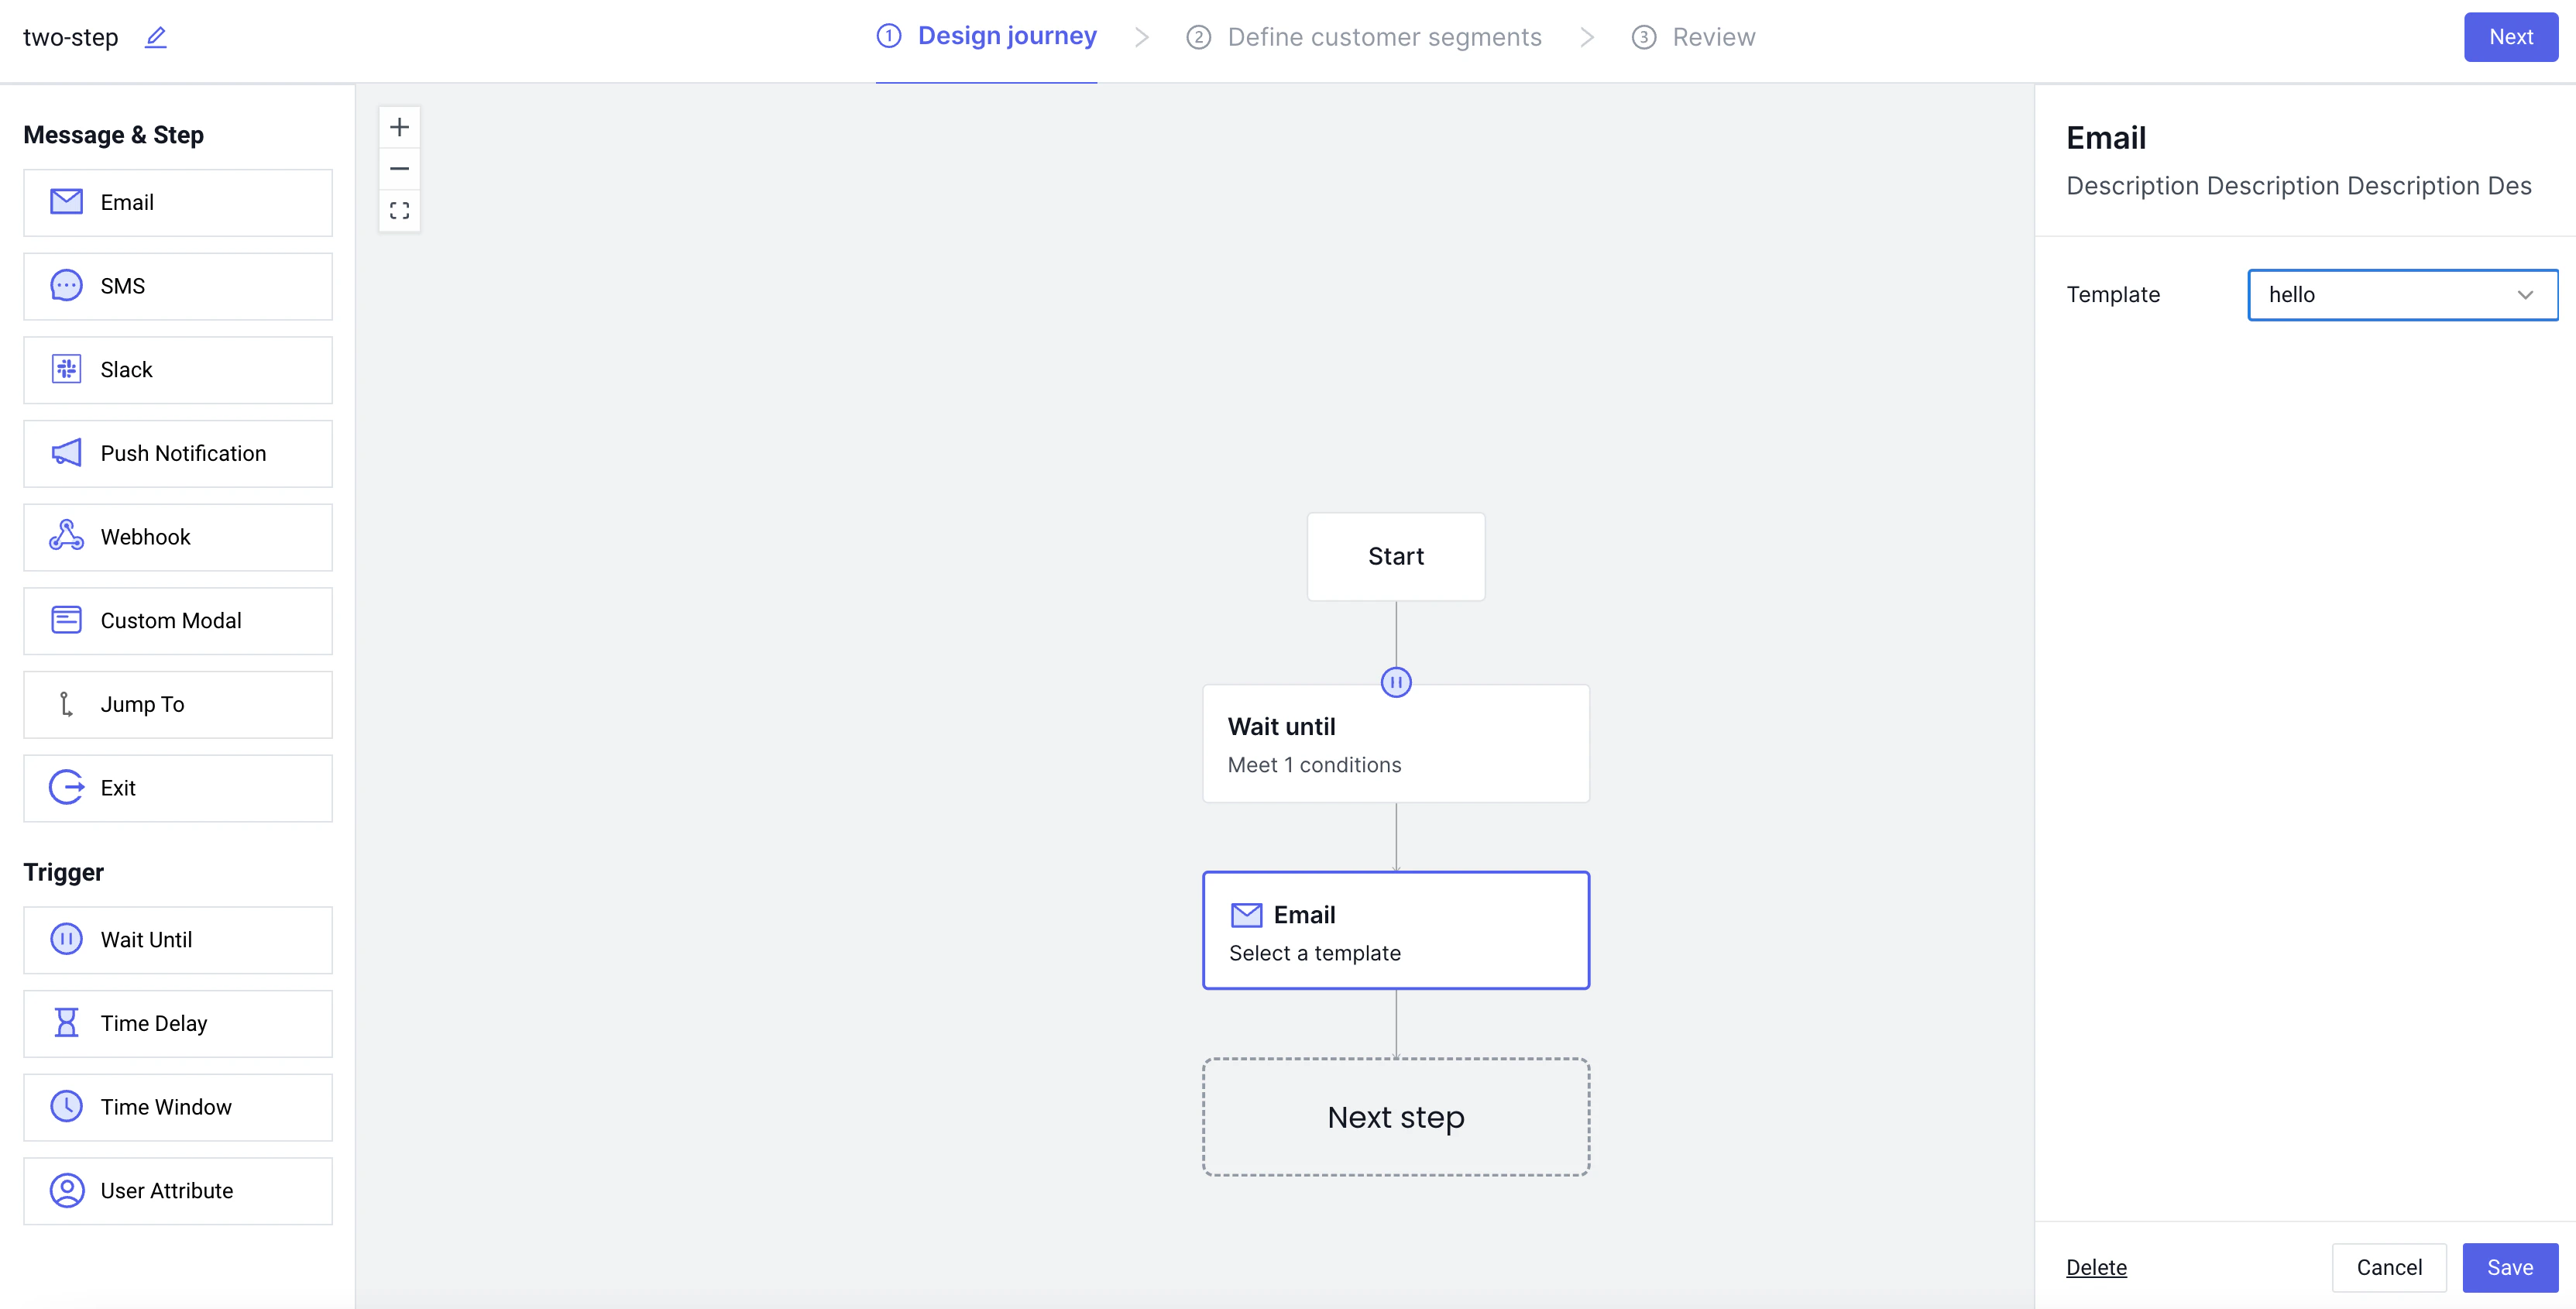
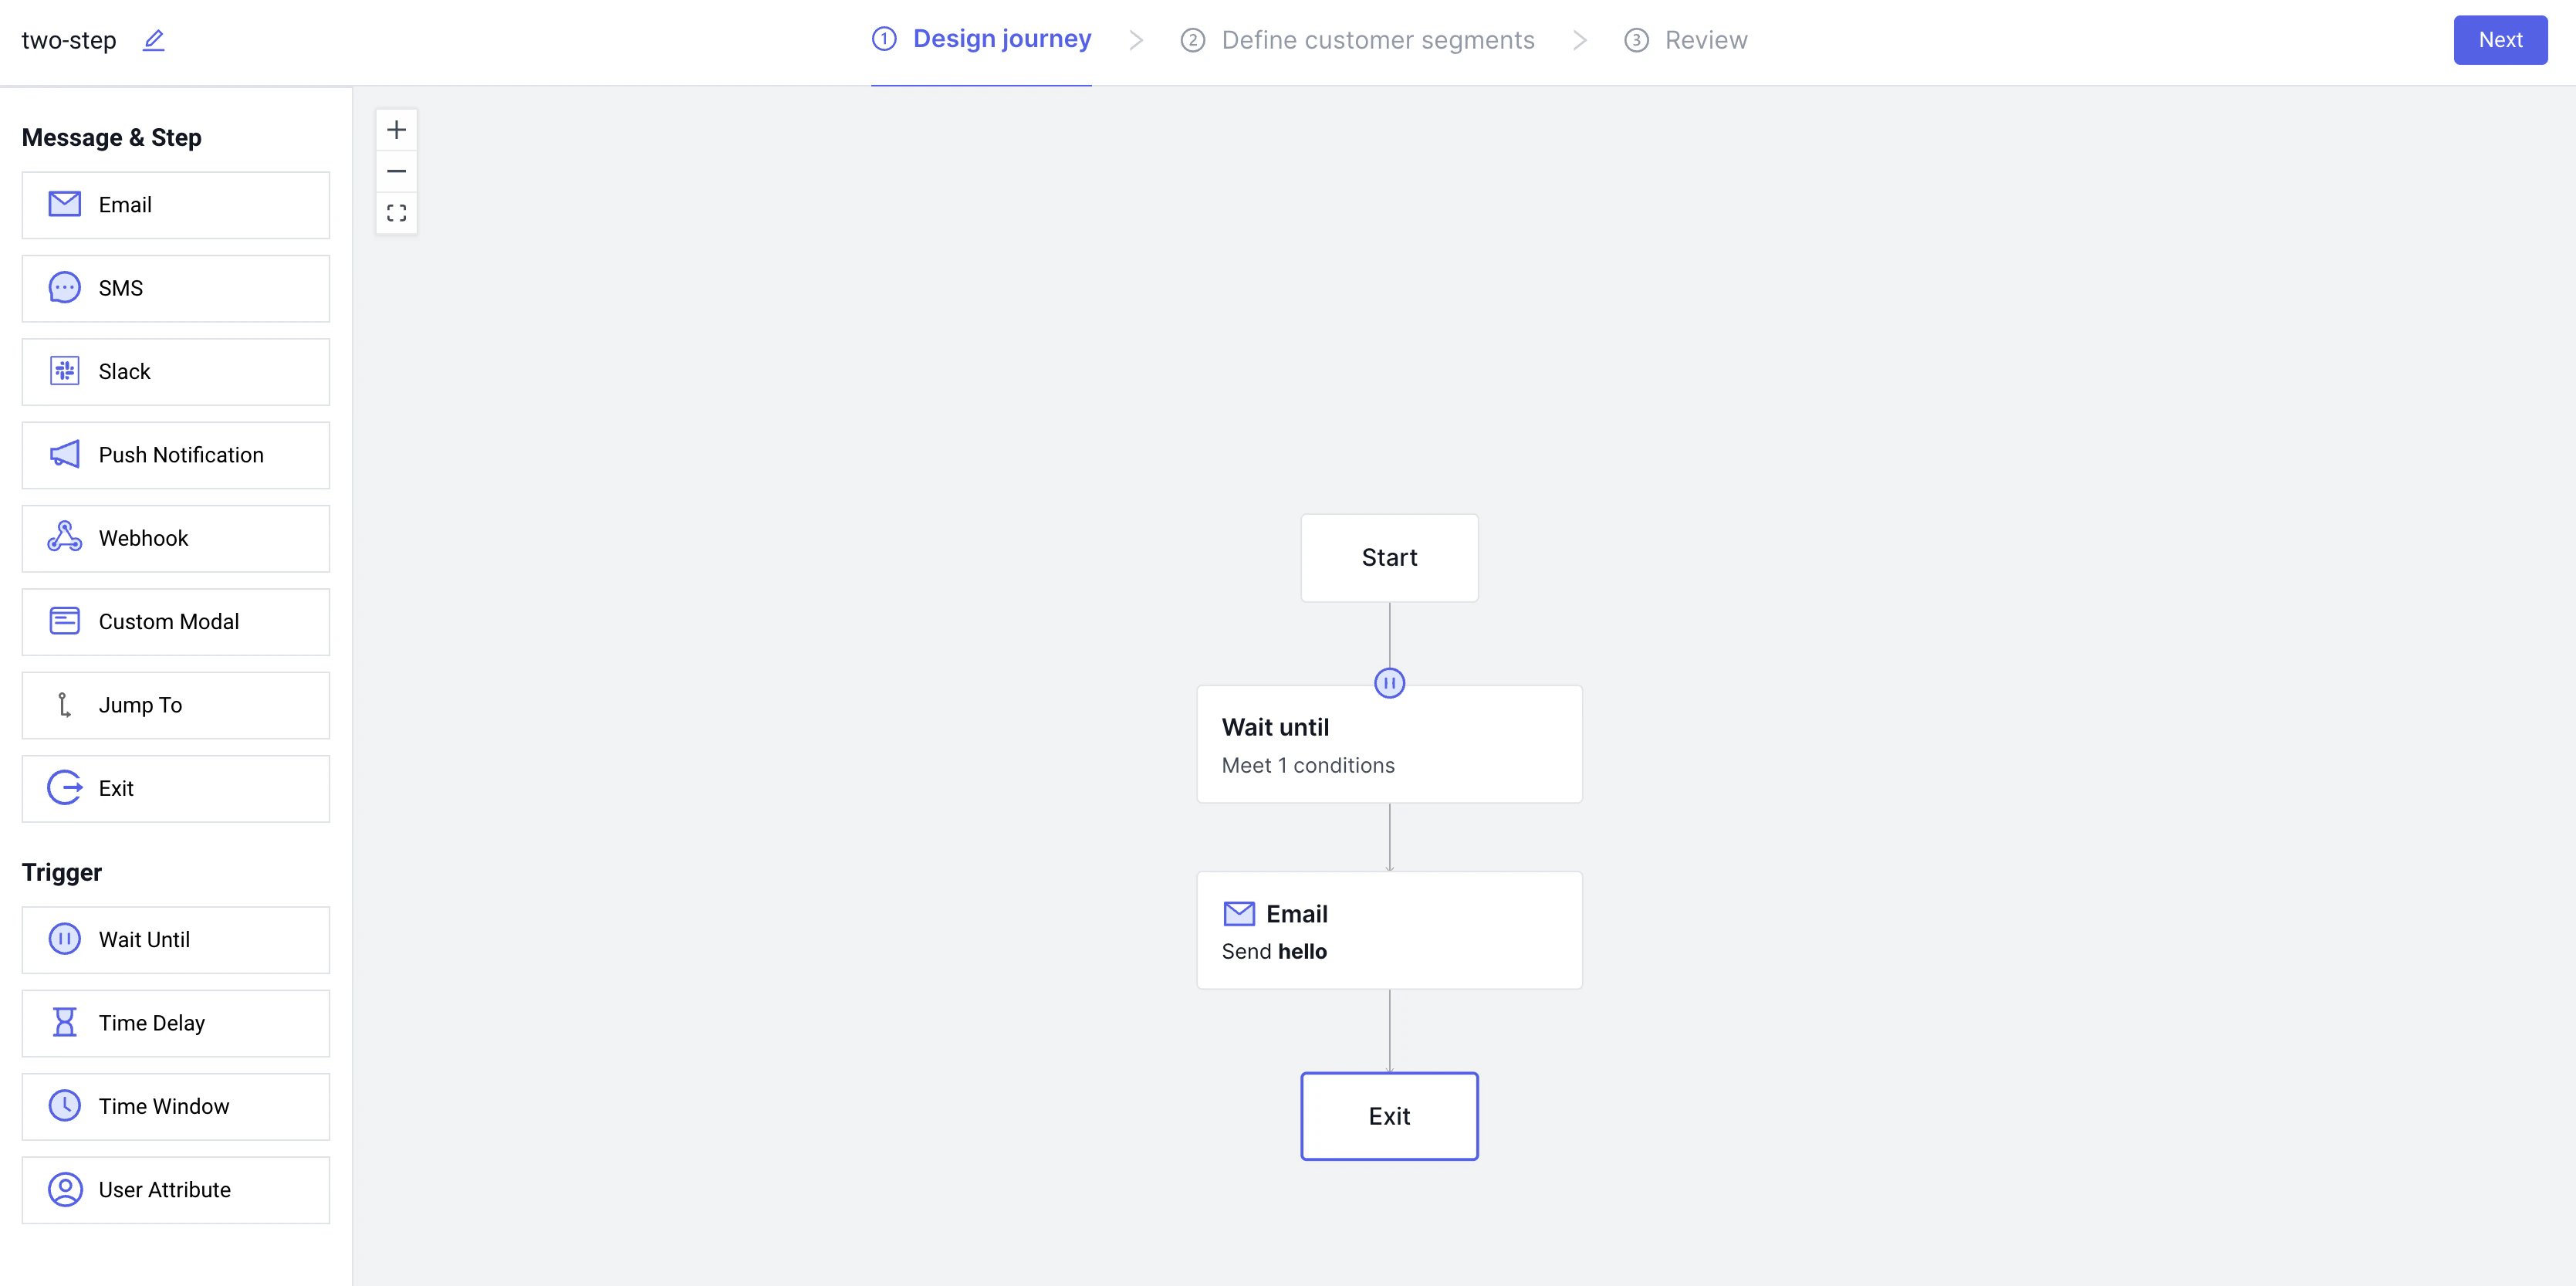
Let’s go through an example journey, where we want to send a user who signs up on our site an email.Creating the Journey
Every journey begins with a start block - this is simply a visual aide so we know where the journey begins. Below the start block we will drag a wait until trigger. This trigger is where we define which event we wait for before sending a message.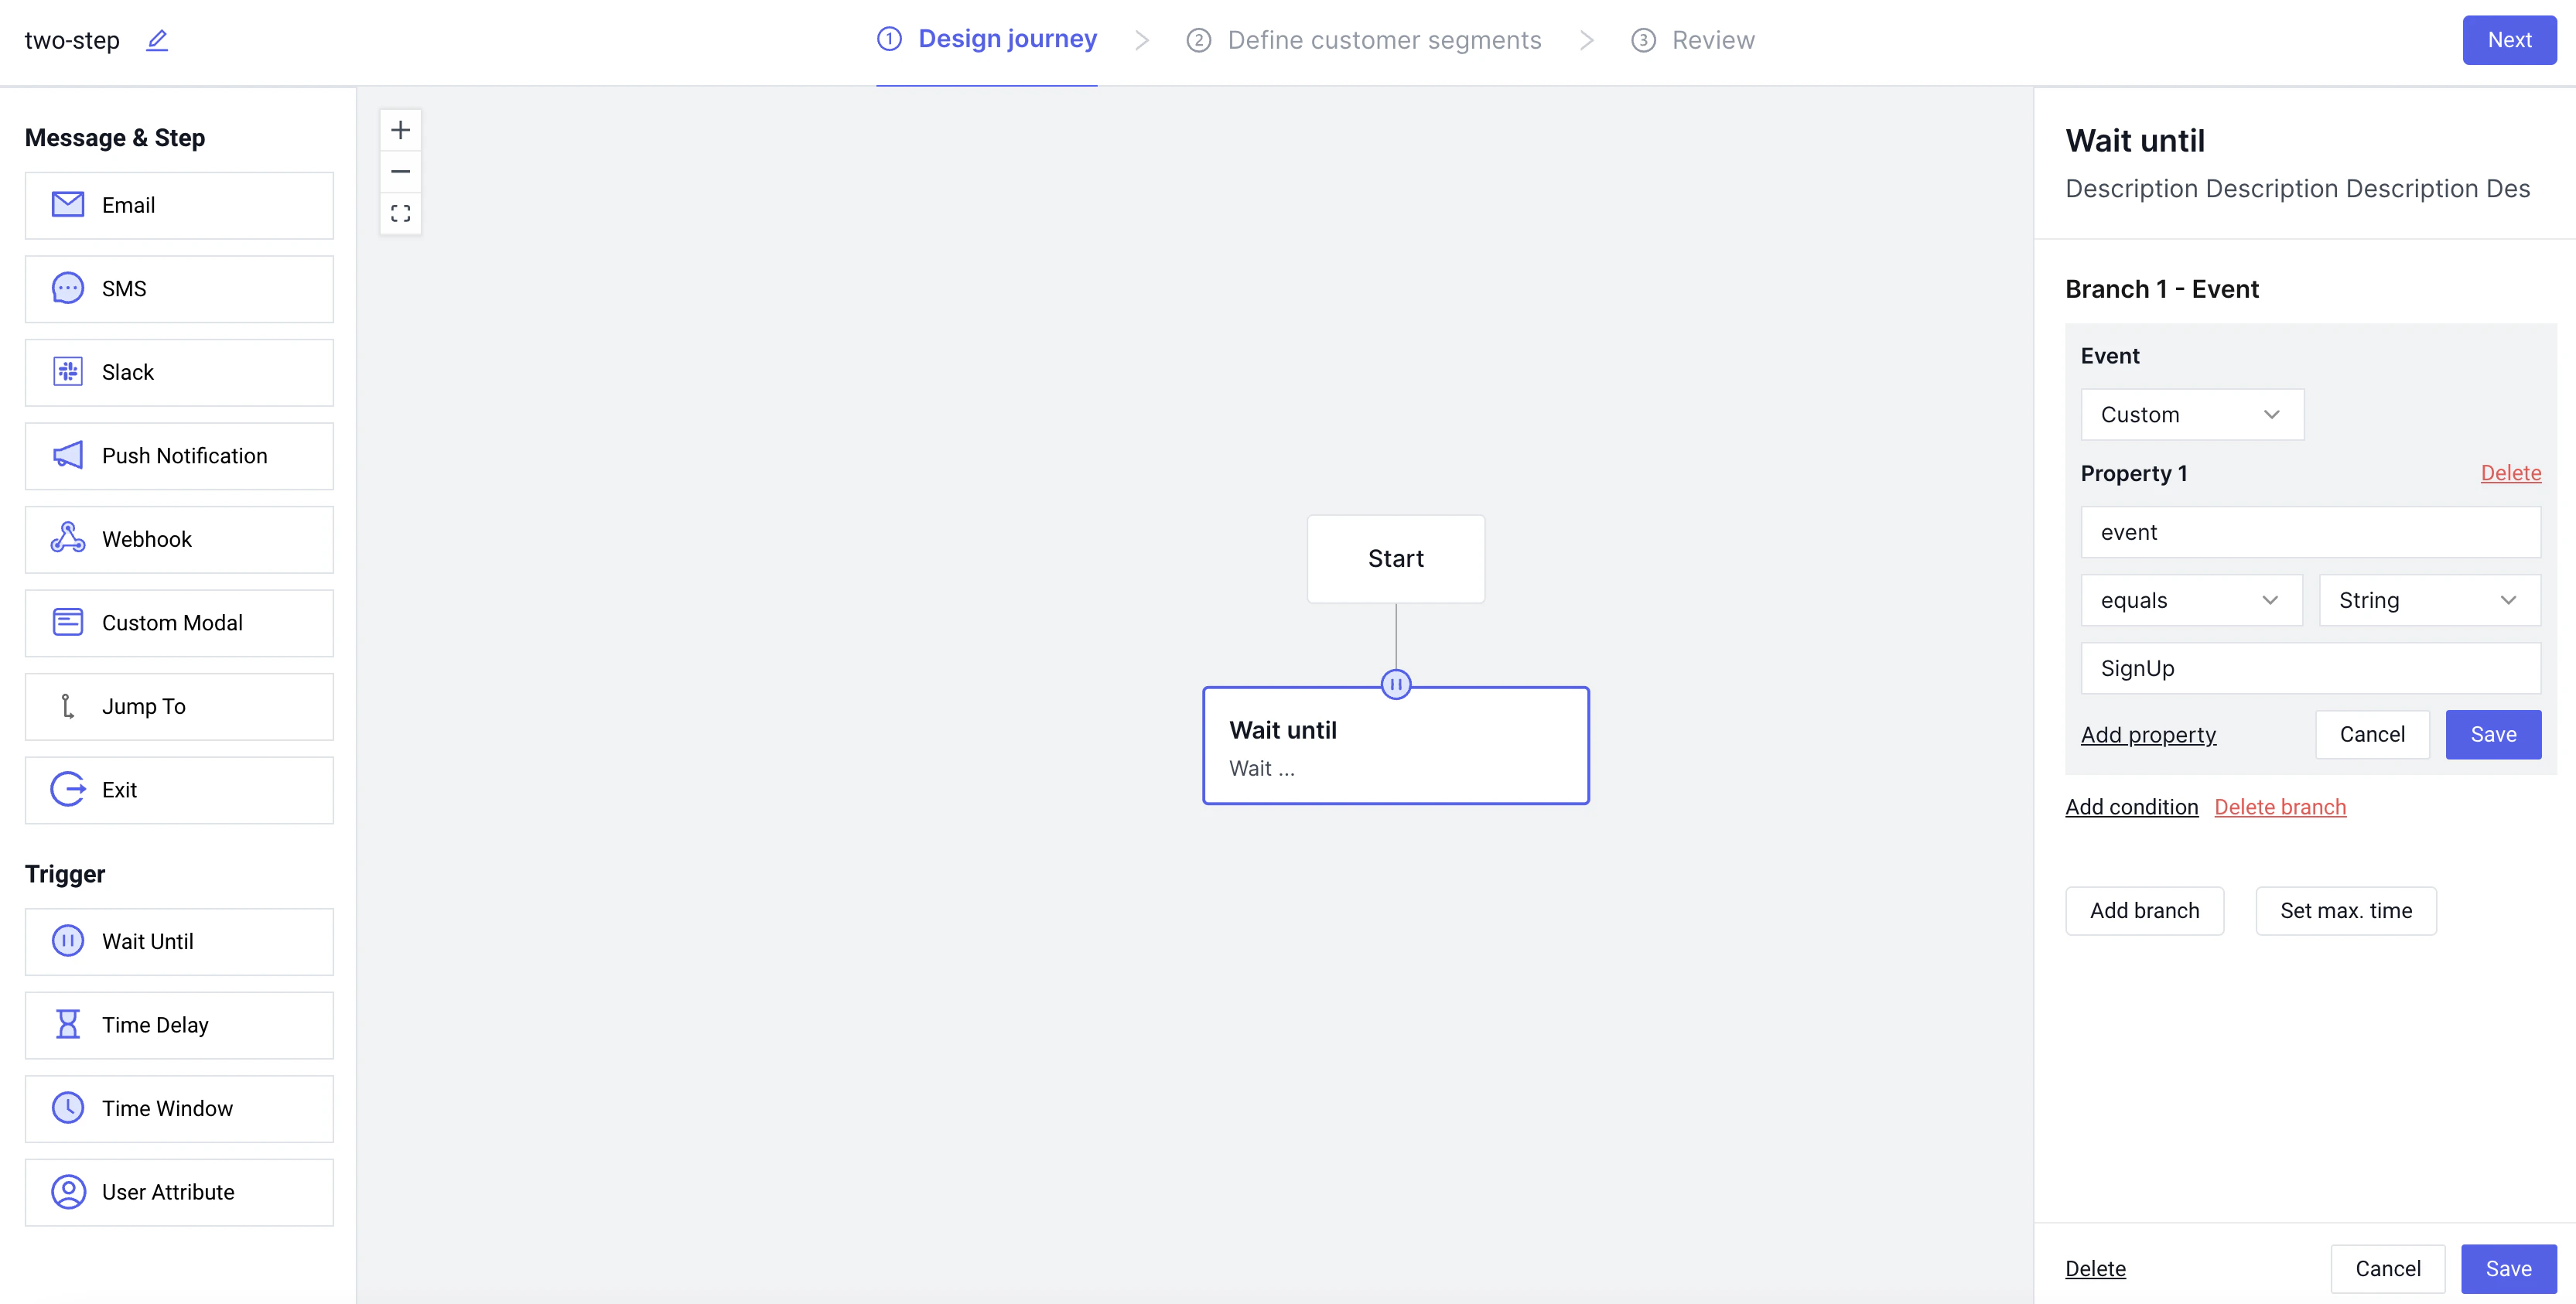
Defining a segment
Before starting this journey the next step would be to define which users you actually want to be eligble to even be enrolled. You can either allow any user to be enrolled, or you may want to test this journey on some subset of users with a specific property or who have completed a specific action. This step of the journy builder allows you to do that: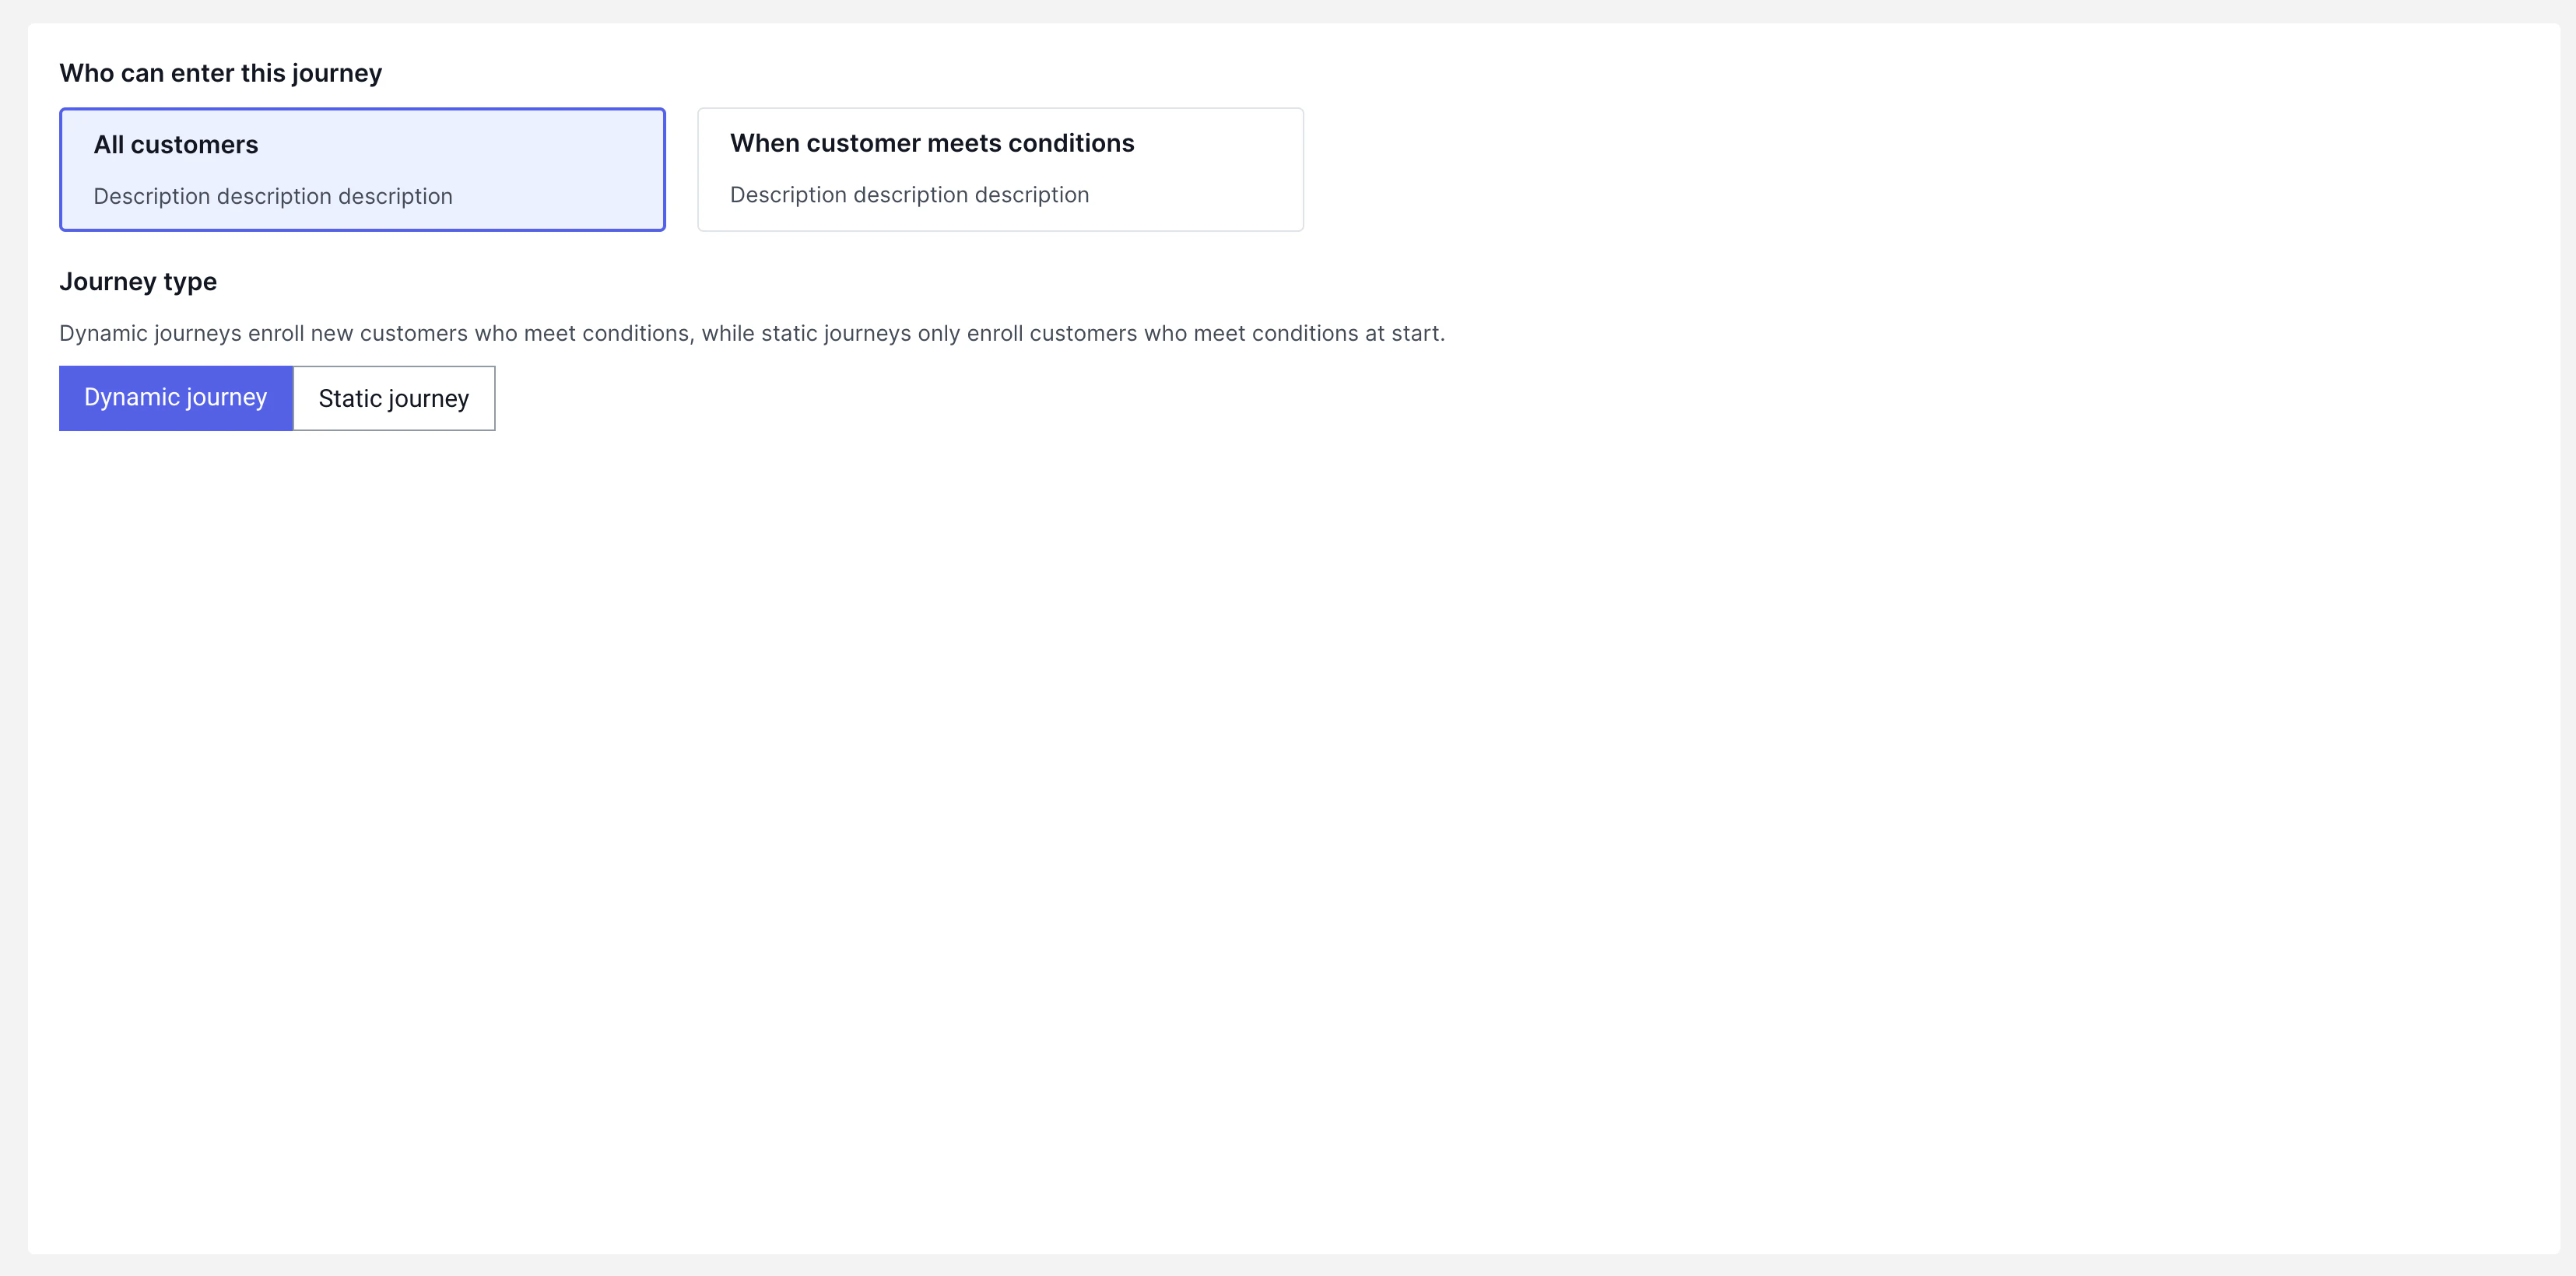
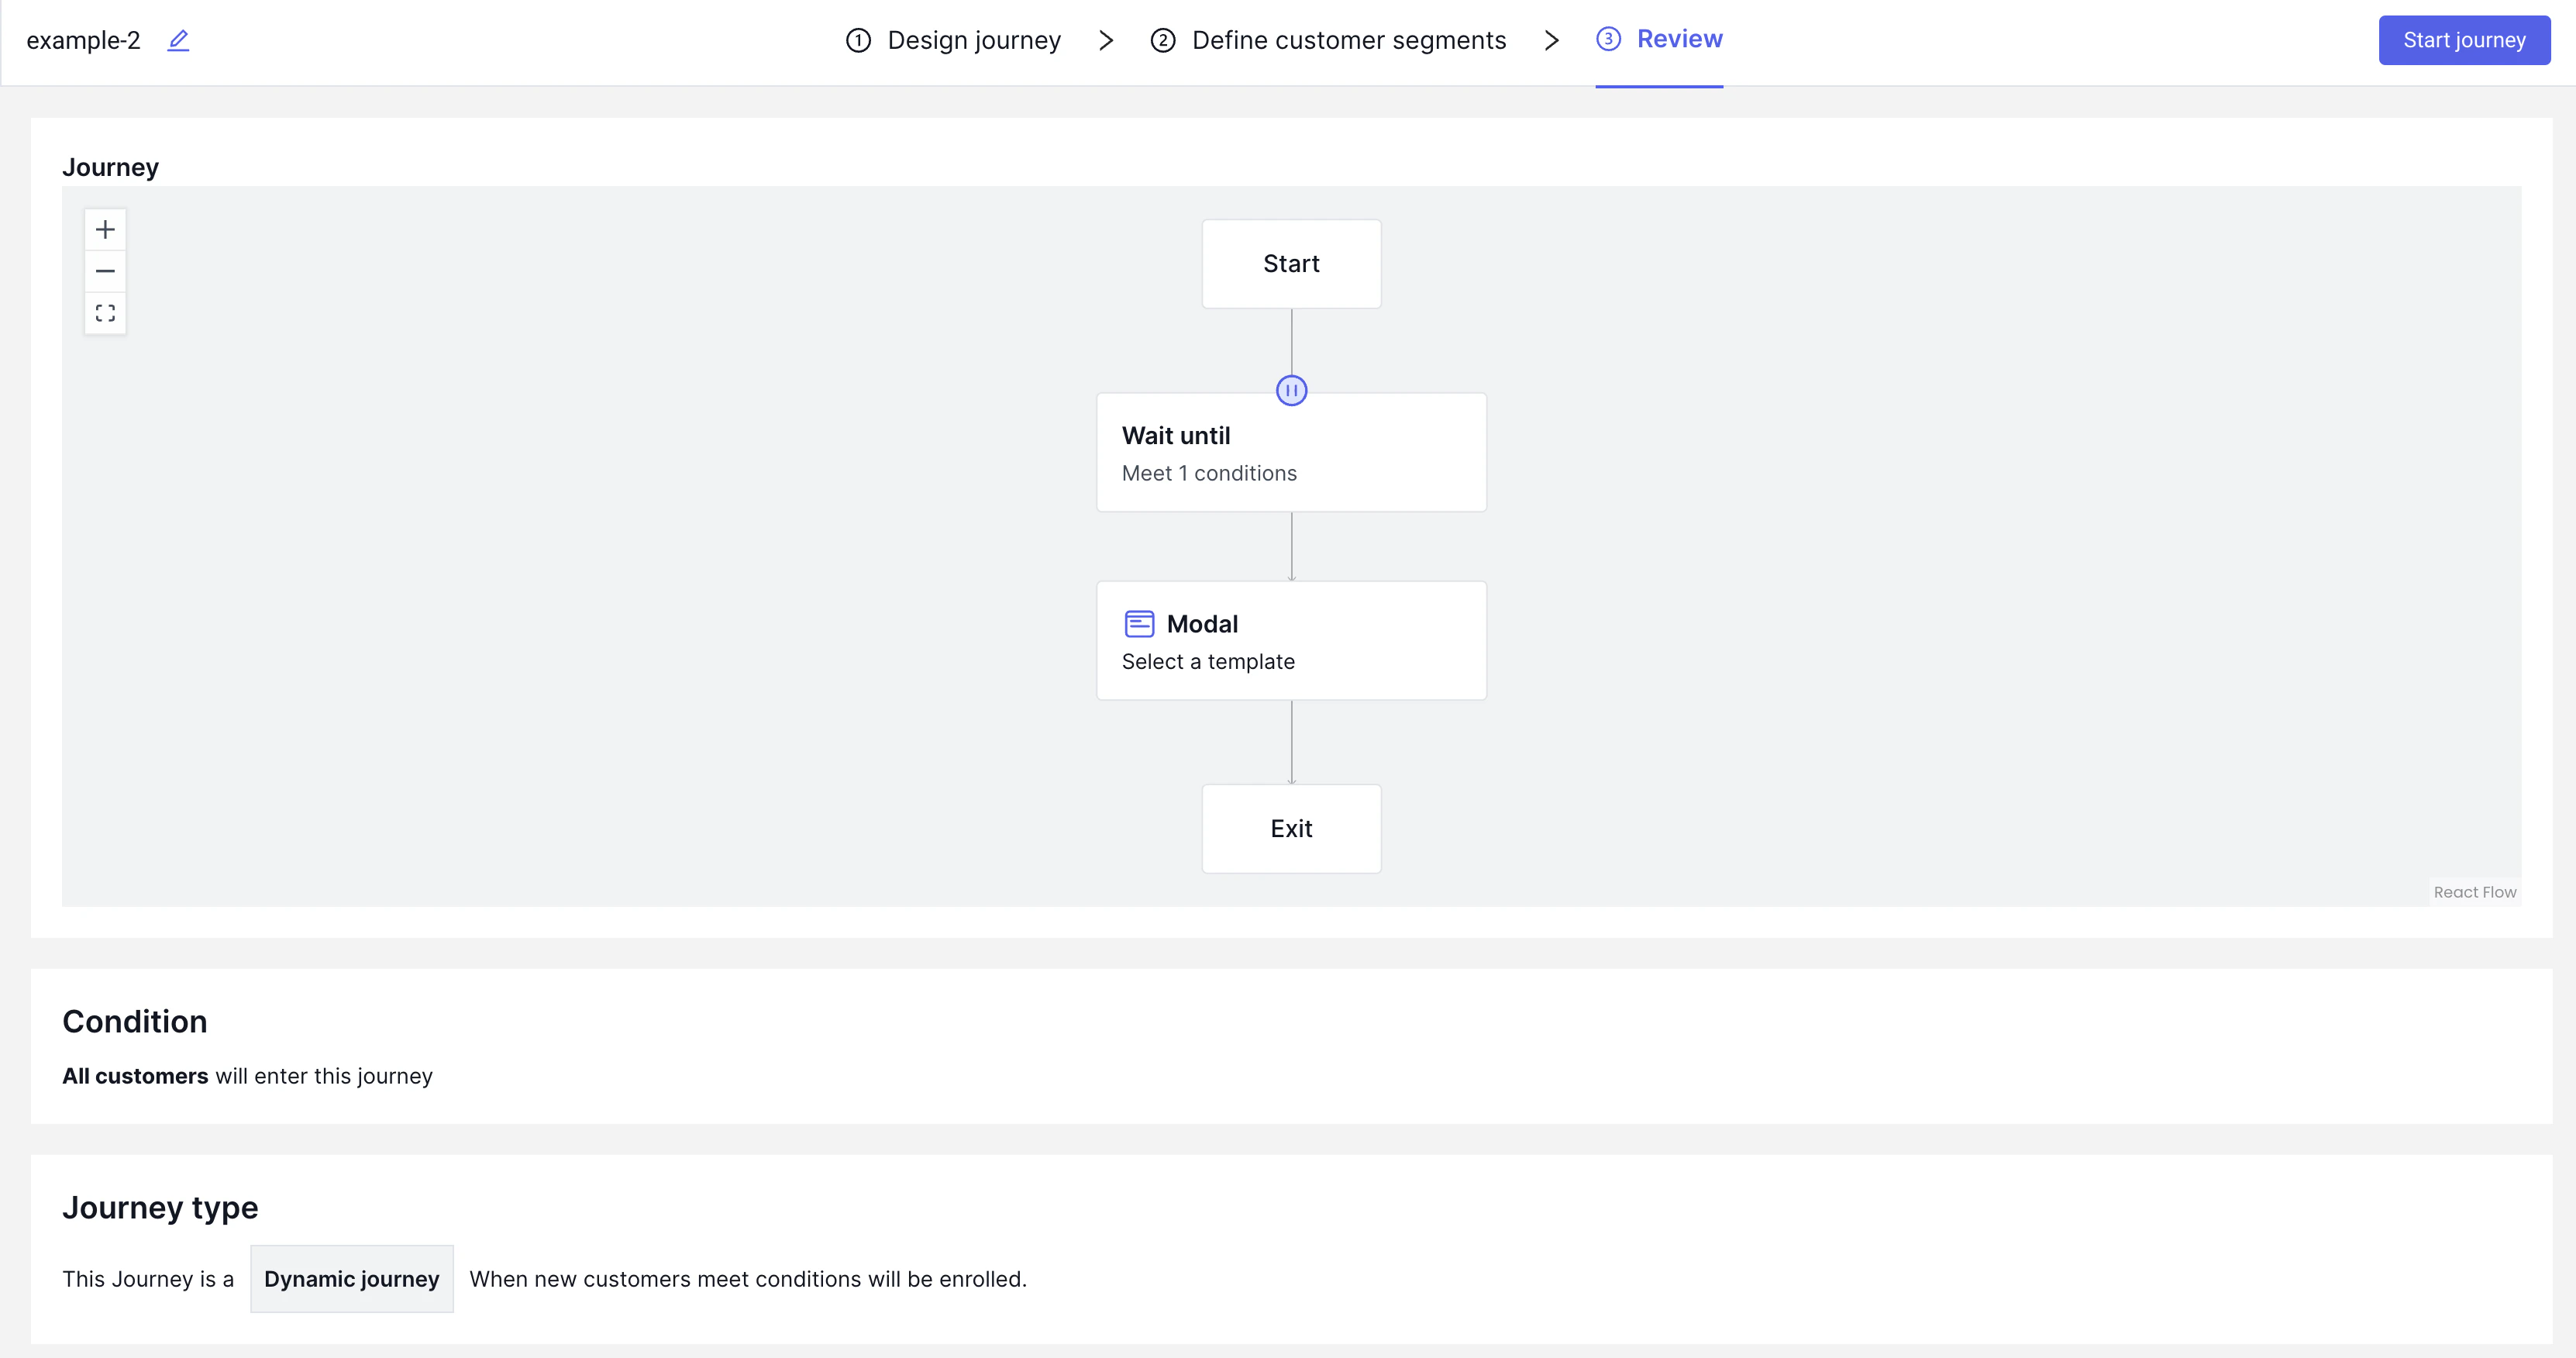
Review
The final stage before setting up a journey live is to review. Here you have the chance to see the journey design and the segment defintion.