> ## Documentation Index
> Fetch the complete documentation index at: https://laudspeaker.com/docs/llms.txt
> Use this file to discover all available pages before exploring further.
# Mailgun
Laudspeaker customers can use their [Mailgun](https://mailgun.com) account to send email through Laudspeaker, as well as keep track of email sending metrics like open and click-through rates.
Mailgun offers both an SMTP client and an HTTP API. If you wish to use Mailgun's SMTP client, see our SMTP connection docs [here](/docs/integrate/messaging-channels/email/smtp). For connecting with the Mailgun HTTP API, follow the guide below.
## Before We Begin: Creating an account
Before we can send emails using Mailgun, we must create a Mailgun account. Go to Mailgun's [signup page](https://signup.mailgun.com/new/signup) and fill in the required information.
Mailgun requires new users to enter their payment information. For a completely free option, check out Laudspeaker's [email sandbox channel](/docs/integrate/messaging-channels/email/sandbox).
## Registering Sending Domains and Adding Authorized Recipients
### Sandbox Domain
Each new Mailgun account is automatically provisioned with a *sandbox domain* of the form `sandbox@mailgun.org`. This domain allows you to perform all the core actions Mailgun offers without having to purchase or setup your own domain. All of Laudspeaker's functionality remains accessible using a sandbox domain.
Once you are ready, you can verify a domain for sending emails in production using the Mailgun [domain verification documentation](https://documentation.mailgun.com/en/latest/user_manual.html#verifying-your-domain-1).
### Adding Authorized Recipients
If you are not using a sandbox domain, you can skip this step.
If you are using a sandbox domain, you will have to create *authorized recipients* in Mailgun. These are verified emails that you can send to using the sandbox domain, and you can have up to five of them.
To add an authorized recipient, follow the instructions in [this article](https://help.mailgun.com/hc/en-us/articles/217531258-Authorized-Recipients).
## Activating Webhooks
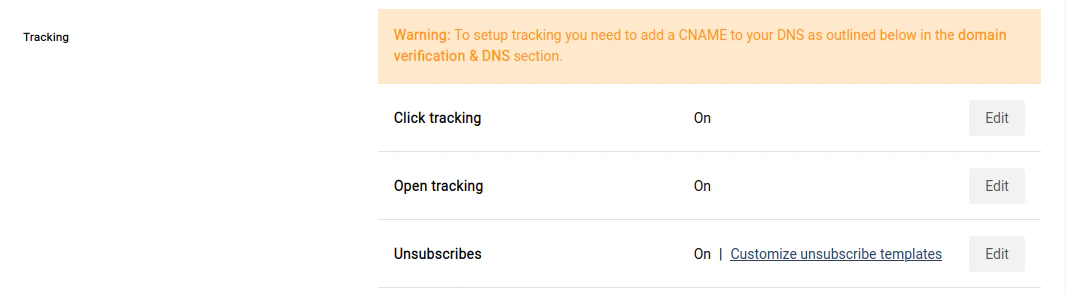
To receive *opened*, *clicked*, and *unsubscribed* events, you will need to activate **Click Tracking**, **Open Tracking**, and **Unsubscribes** in the Mailgun UI.
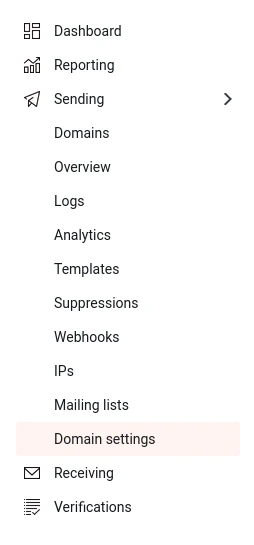
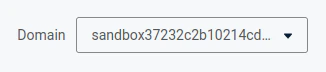
1. From the [Mailgun Dashboard](https://app.mailgun.com/mg/dashboard), navigate to `Domain Settings` in the `Sending` drop-down menu, and select the domain you will be sending from in the top right corner of the screen:
 2. Scroll down to the `Tracking` section of the domain settings page and turn on `Click Tracking`, `Open Tracking`, and `Unsubscribes`:
 ## Connecting Mailgun to Laudspeaker
Now that you are finished setting up your Mailgun account, it's time to start sending emails!
1. Navigate to the [Mailgun API keys page](https://app.mailgun.com/app/account/security/api_keys), and copy your **Private API key**:
## Connecting Mailgun to Laudspeaker
Now that you are finished setting up your Mailgun account, it's time to start sending emails!
1. Navigate to the [Mailgun API keys page](https://app.mailgun.com/app/account/security/api_keys), and copy your **Private API key**:
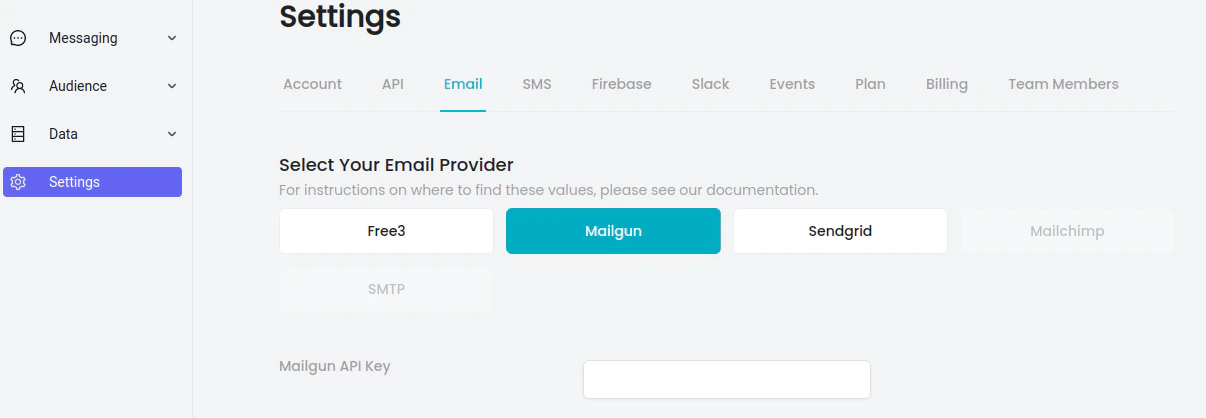
 2. Go to the [settings menu](https://app.laudspeaker.com/settings) in Laudspeaker, click on the `Email` tab, and then select `Mailgun` and input your API key in the `Mailgun API Key` field:
 3. Select the domain that you would like to send emails from using the Domain dropdown, and input the sending name and sending email.
4. Save your settings. This will automatically create all the webhooks you need to receive tracking events.
5. Start sending!
3. Select the domain that you would like to send emails from using the Domain dropdown, and input the sending name and sending email.
4. Save your settings. This will automatically create all the webhooks you need to receive tracking events.
5. Start sending!