> ## Documentation Index
> Fetch the complete documentation index at: https://laudspeaker.com/docs/llms.txt
> Use this file to discover all available pages before exploring further.
# Sending your first mobile push messages
> A complete tutorial on setting up laudspeaker for sending your first mobile push notifications
This tutorial shows an end to end example on how to trigger a mobile push campaign. It includes a very simple ios or android application, and shows how to use the laudspeaker mobile sdks, how to trigger events, connect a journey, and finally sends a push notification.
### Setting up firebase in Laudspeaker
The first step in being able to send push notificaitons is setting up firebase in Laudspeaker.
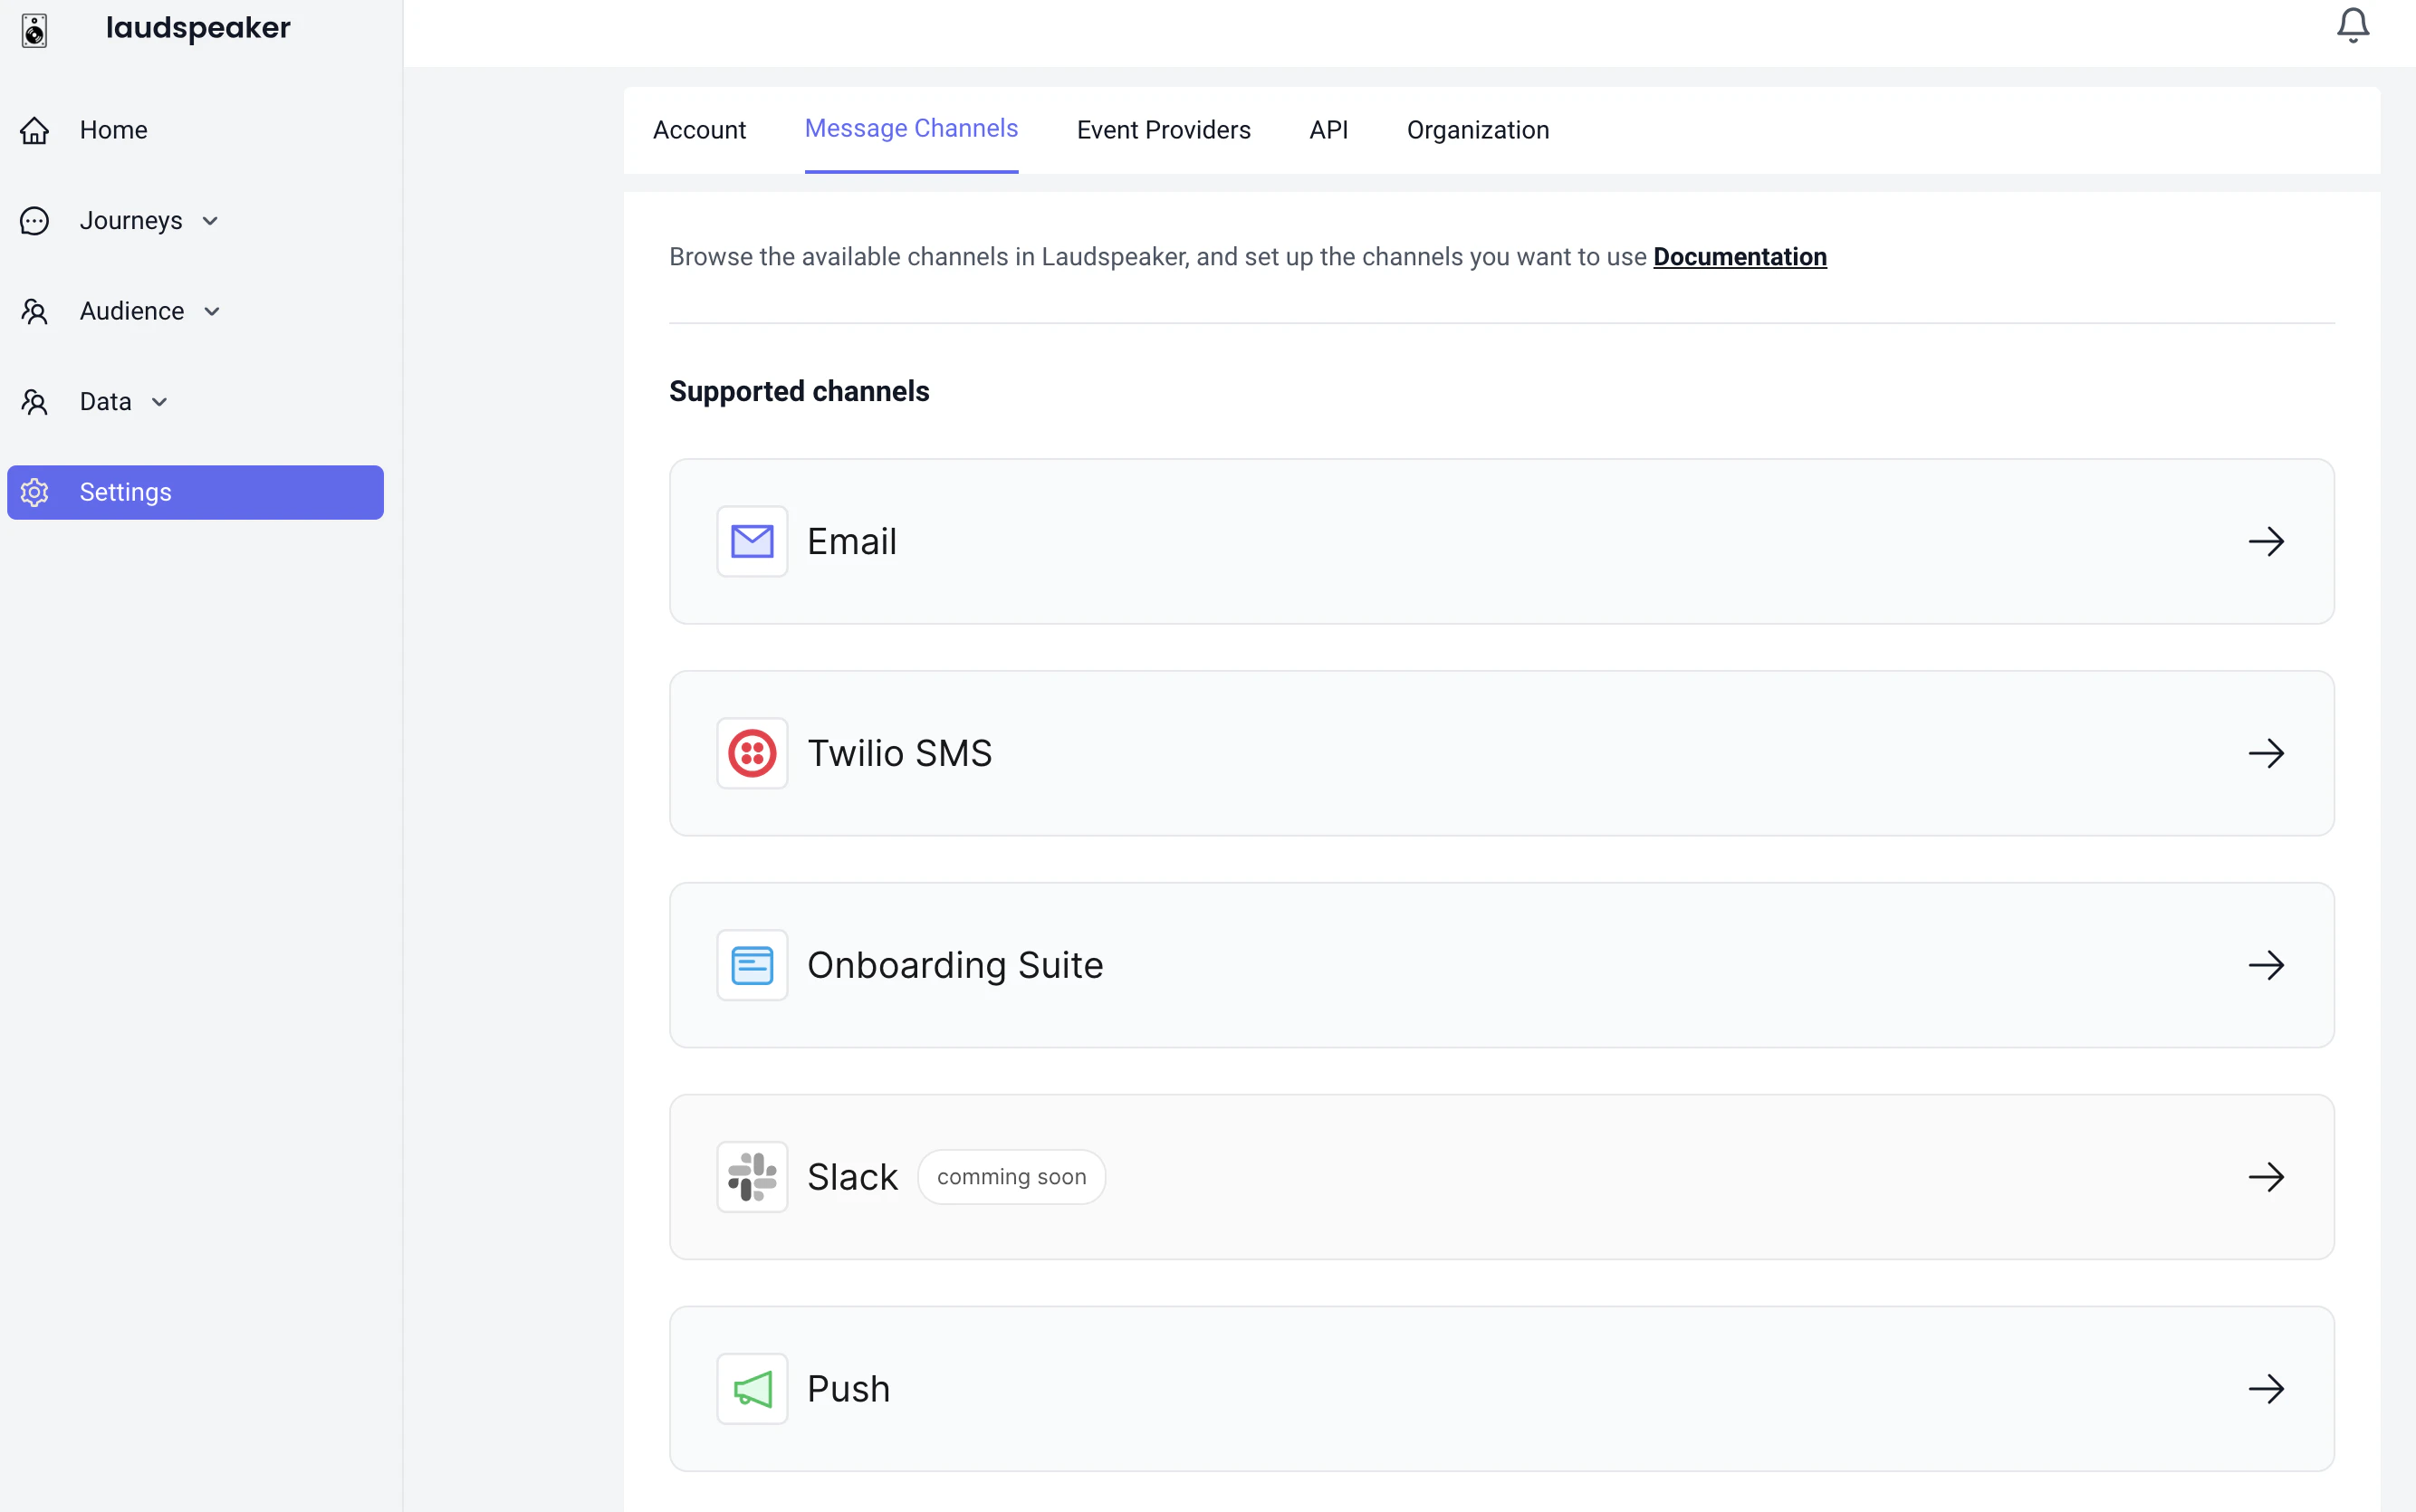
You need to navigate to the settings page, select push
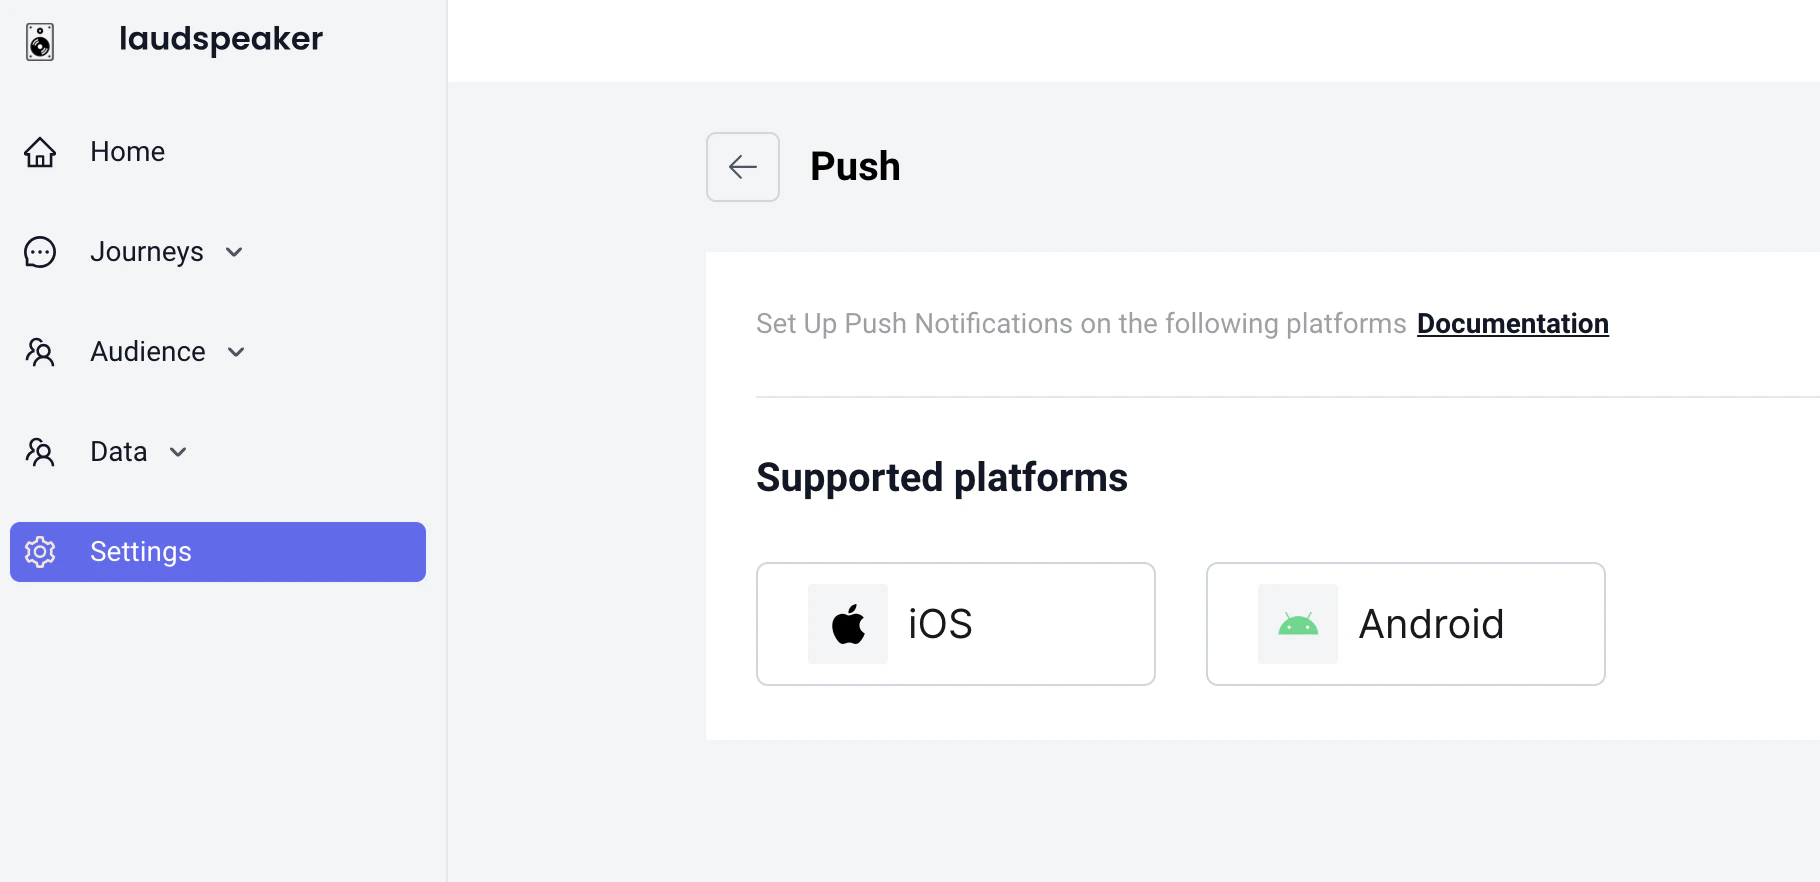
 Then you can select the platforms you will use (iOS and/or Android)
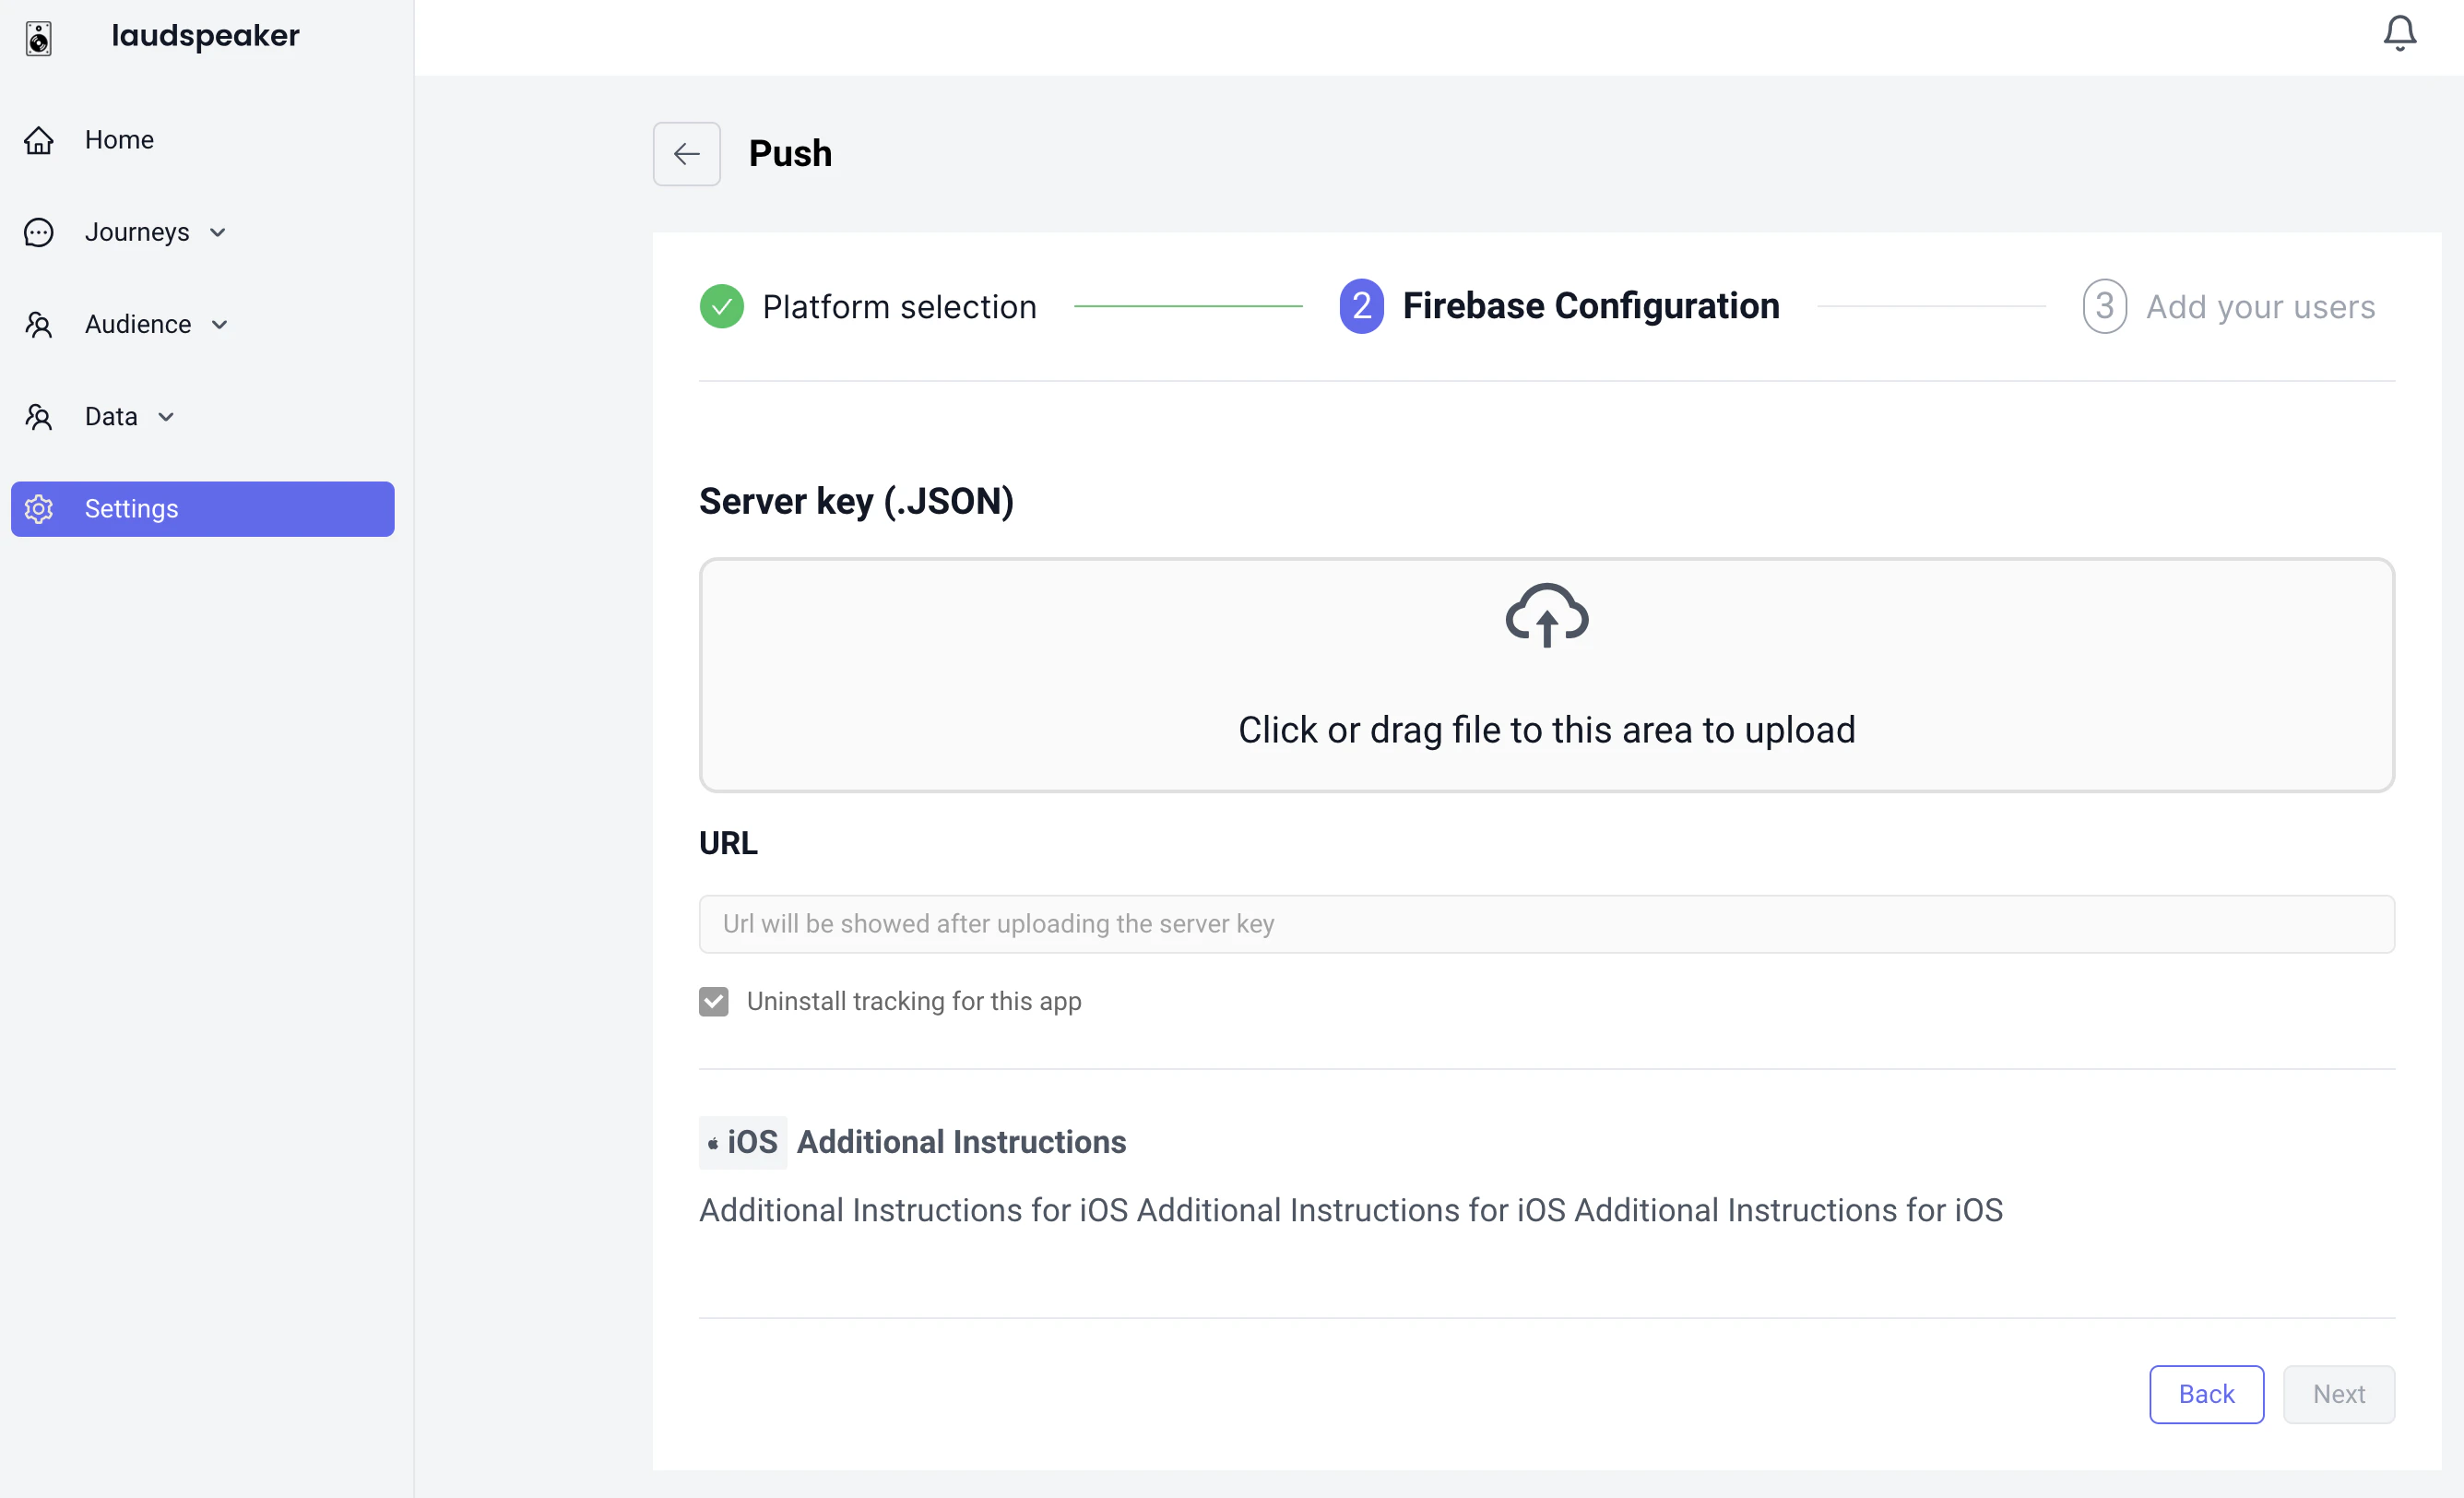
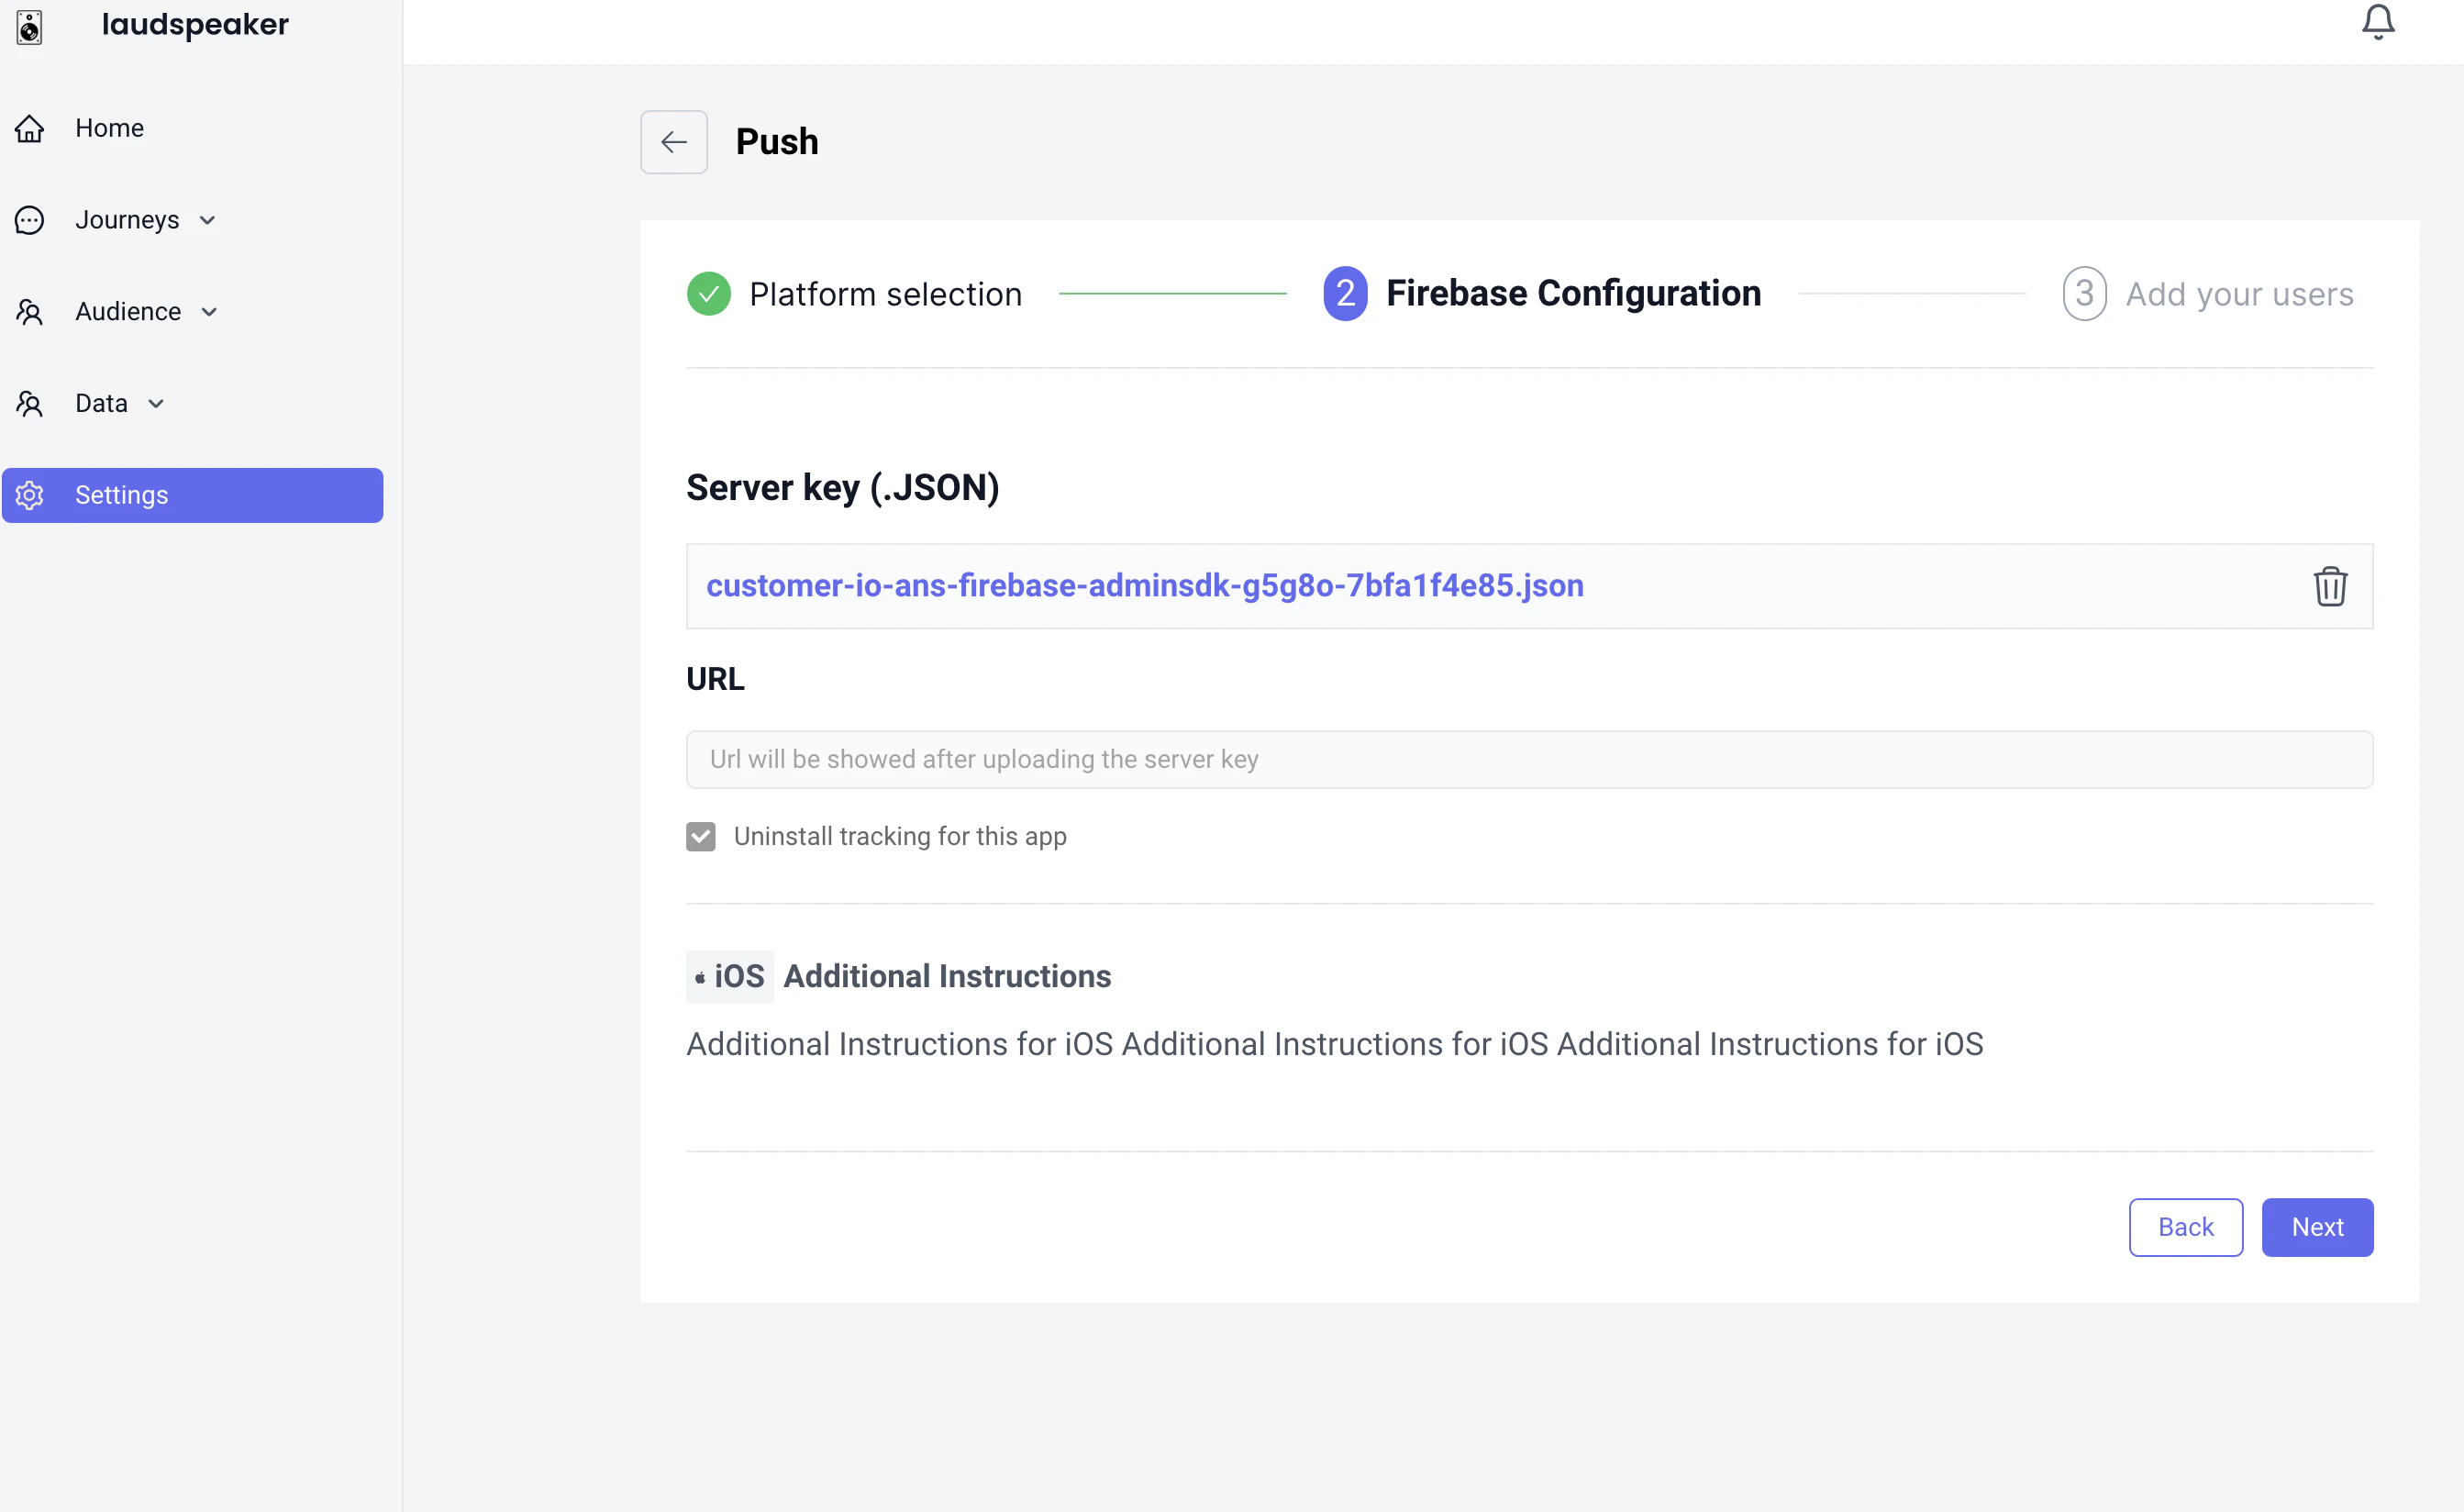
 After which you will be prompted to add the firebase service account JSON key file.
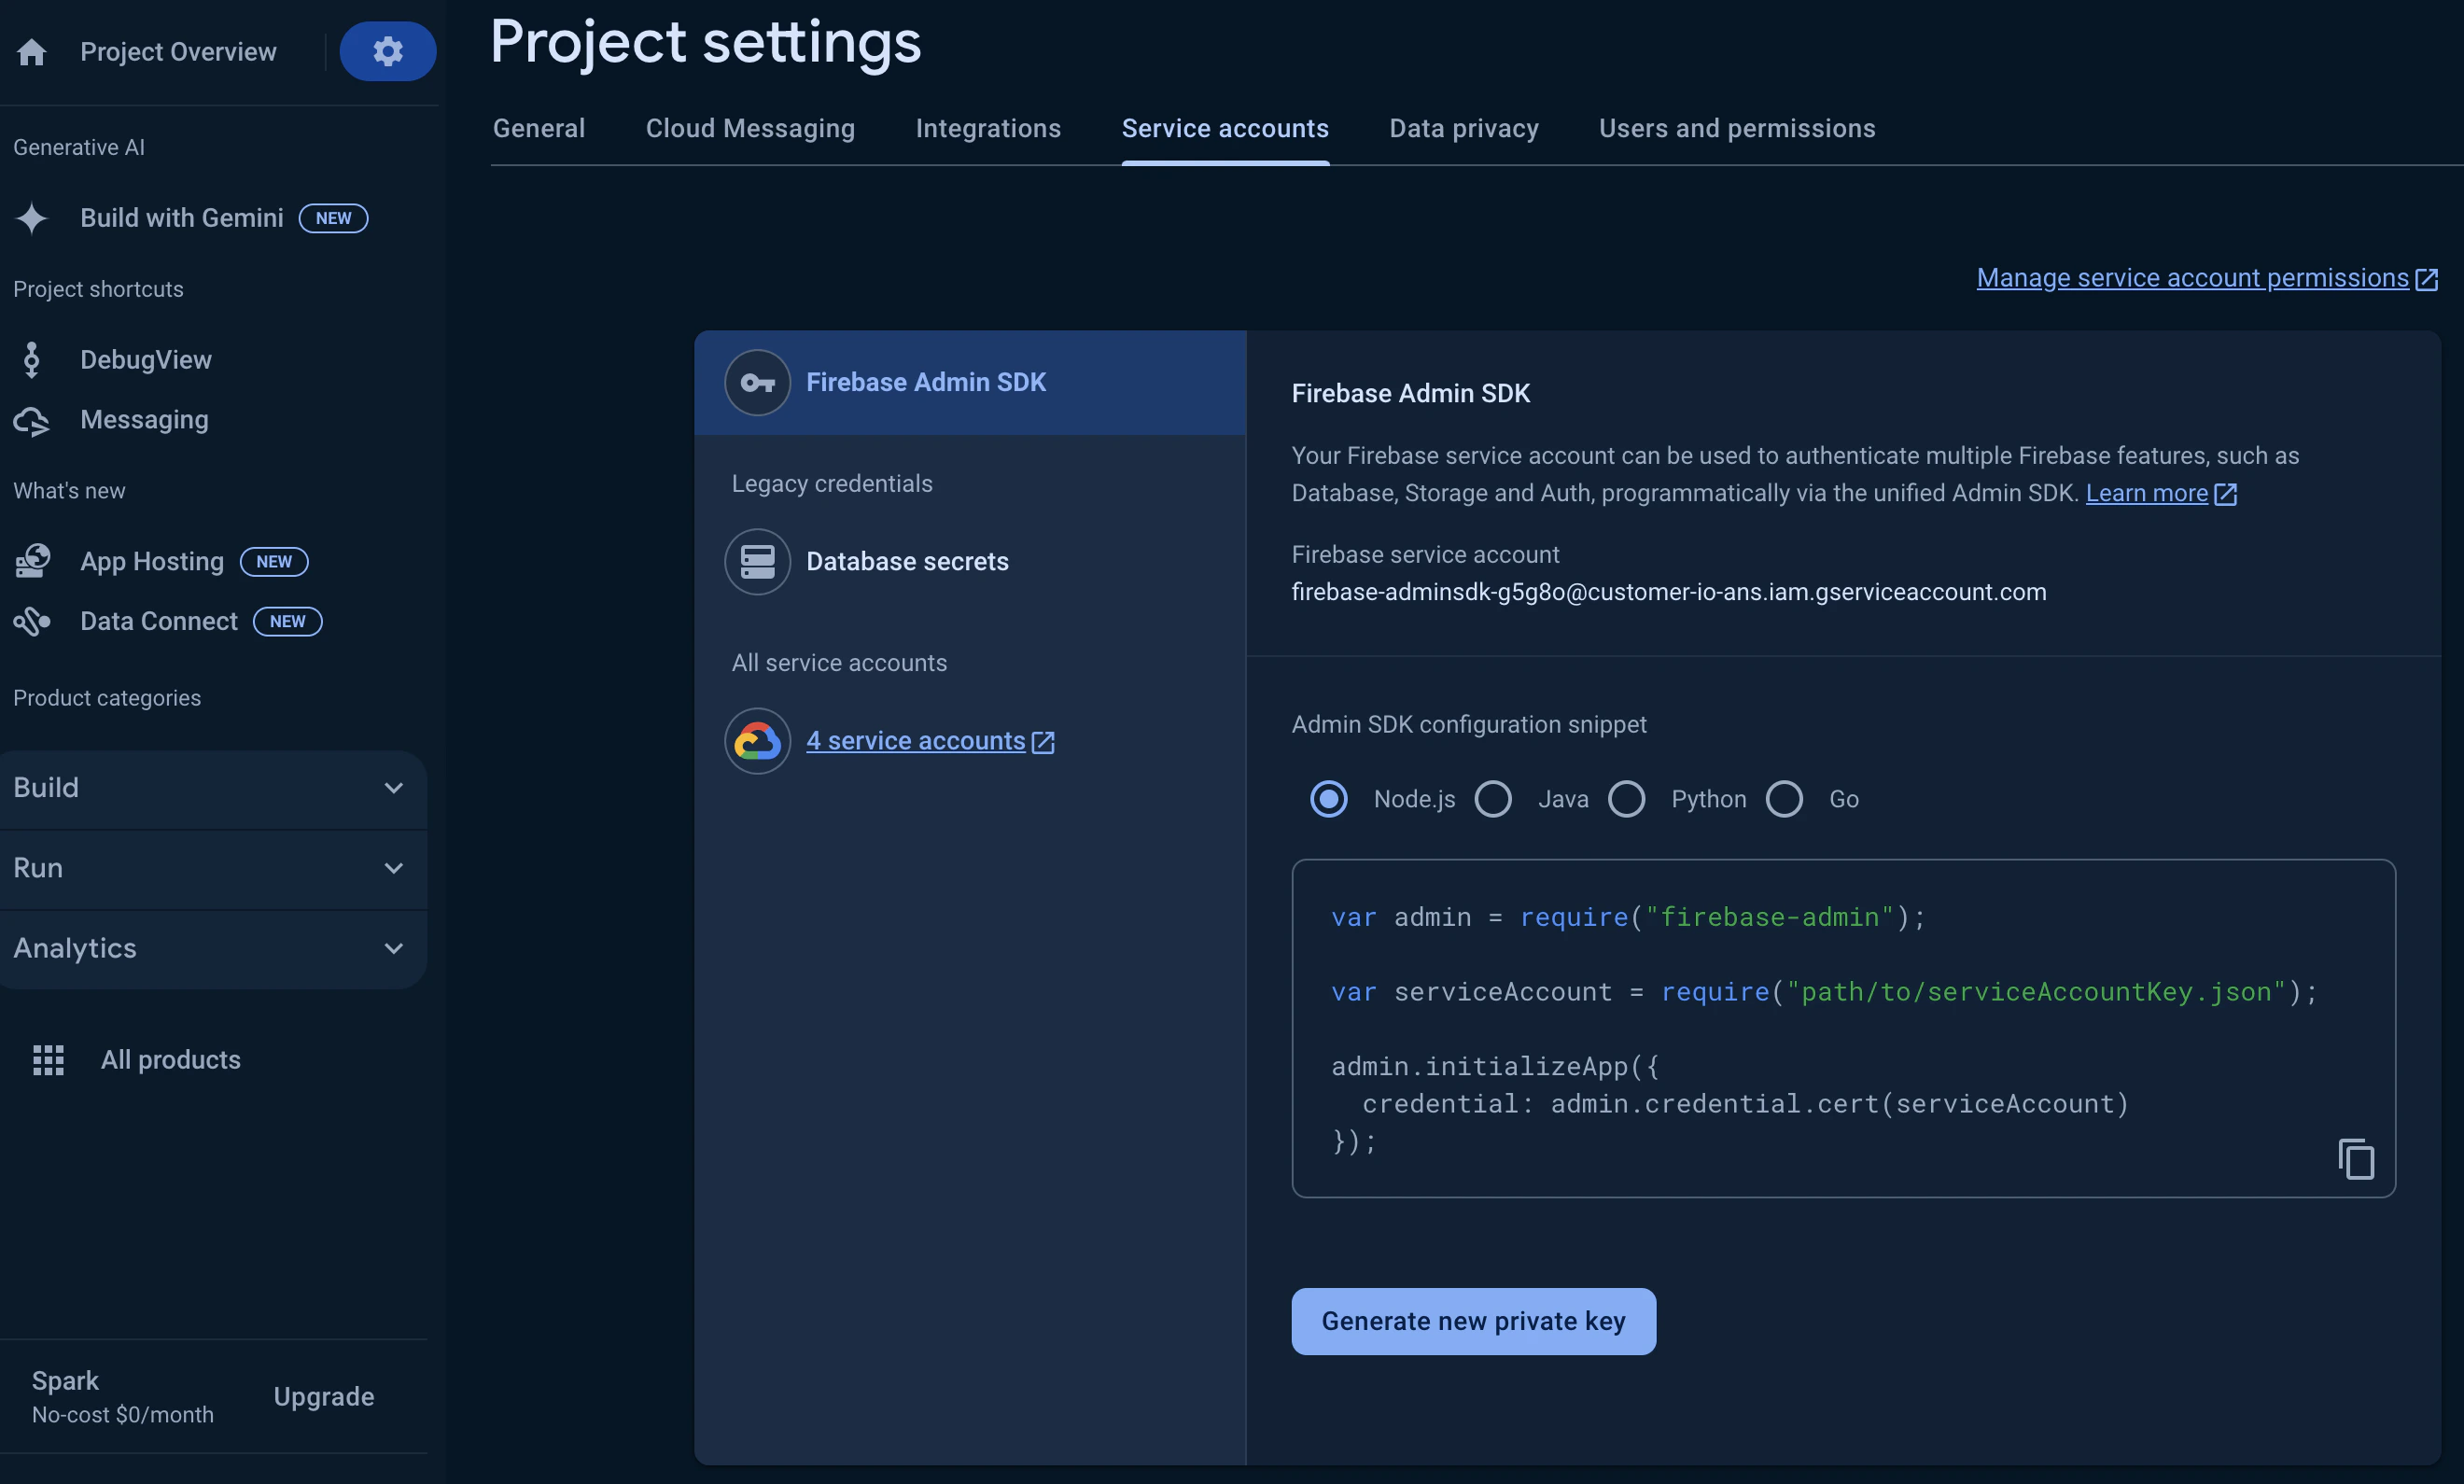
 This can be found in your firebase console: `https://console.firebase.google.com/u/0/project/[YOUR_PROJECT_NAME]/settings/serviceaccounts/adminsdk`. The page looks like the screenshot below and you generate the file by pressing the `Generate new private key` button
 Once uploaded the page should look something like this and you are good to go! You can skip uploading users at this point.
 ### Setting up your user schema and user primary key
To be able to add users you will need to tell Laudspeaker how you want to uniquely identify your users. For example you may have a special `user_id` field to uniquely define your users. To do this you need to navigate to the People page under Audience.
### Setting up your user schema and user primary key
To be able to add users you will need to tell Laudspeaker how you want to uniquely identify your users. For example you may have a special `user_id` field to uniquely define your users. To do this you need to navigate to the People page under Audience.
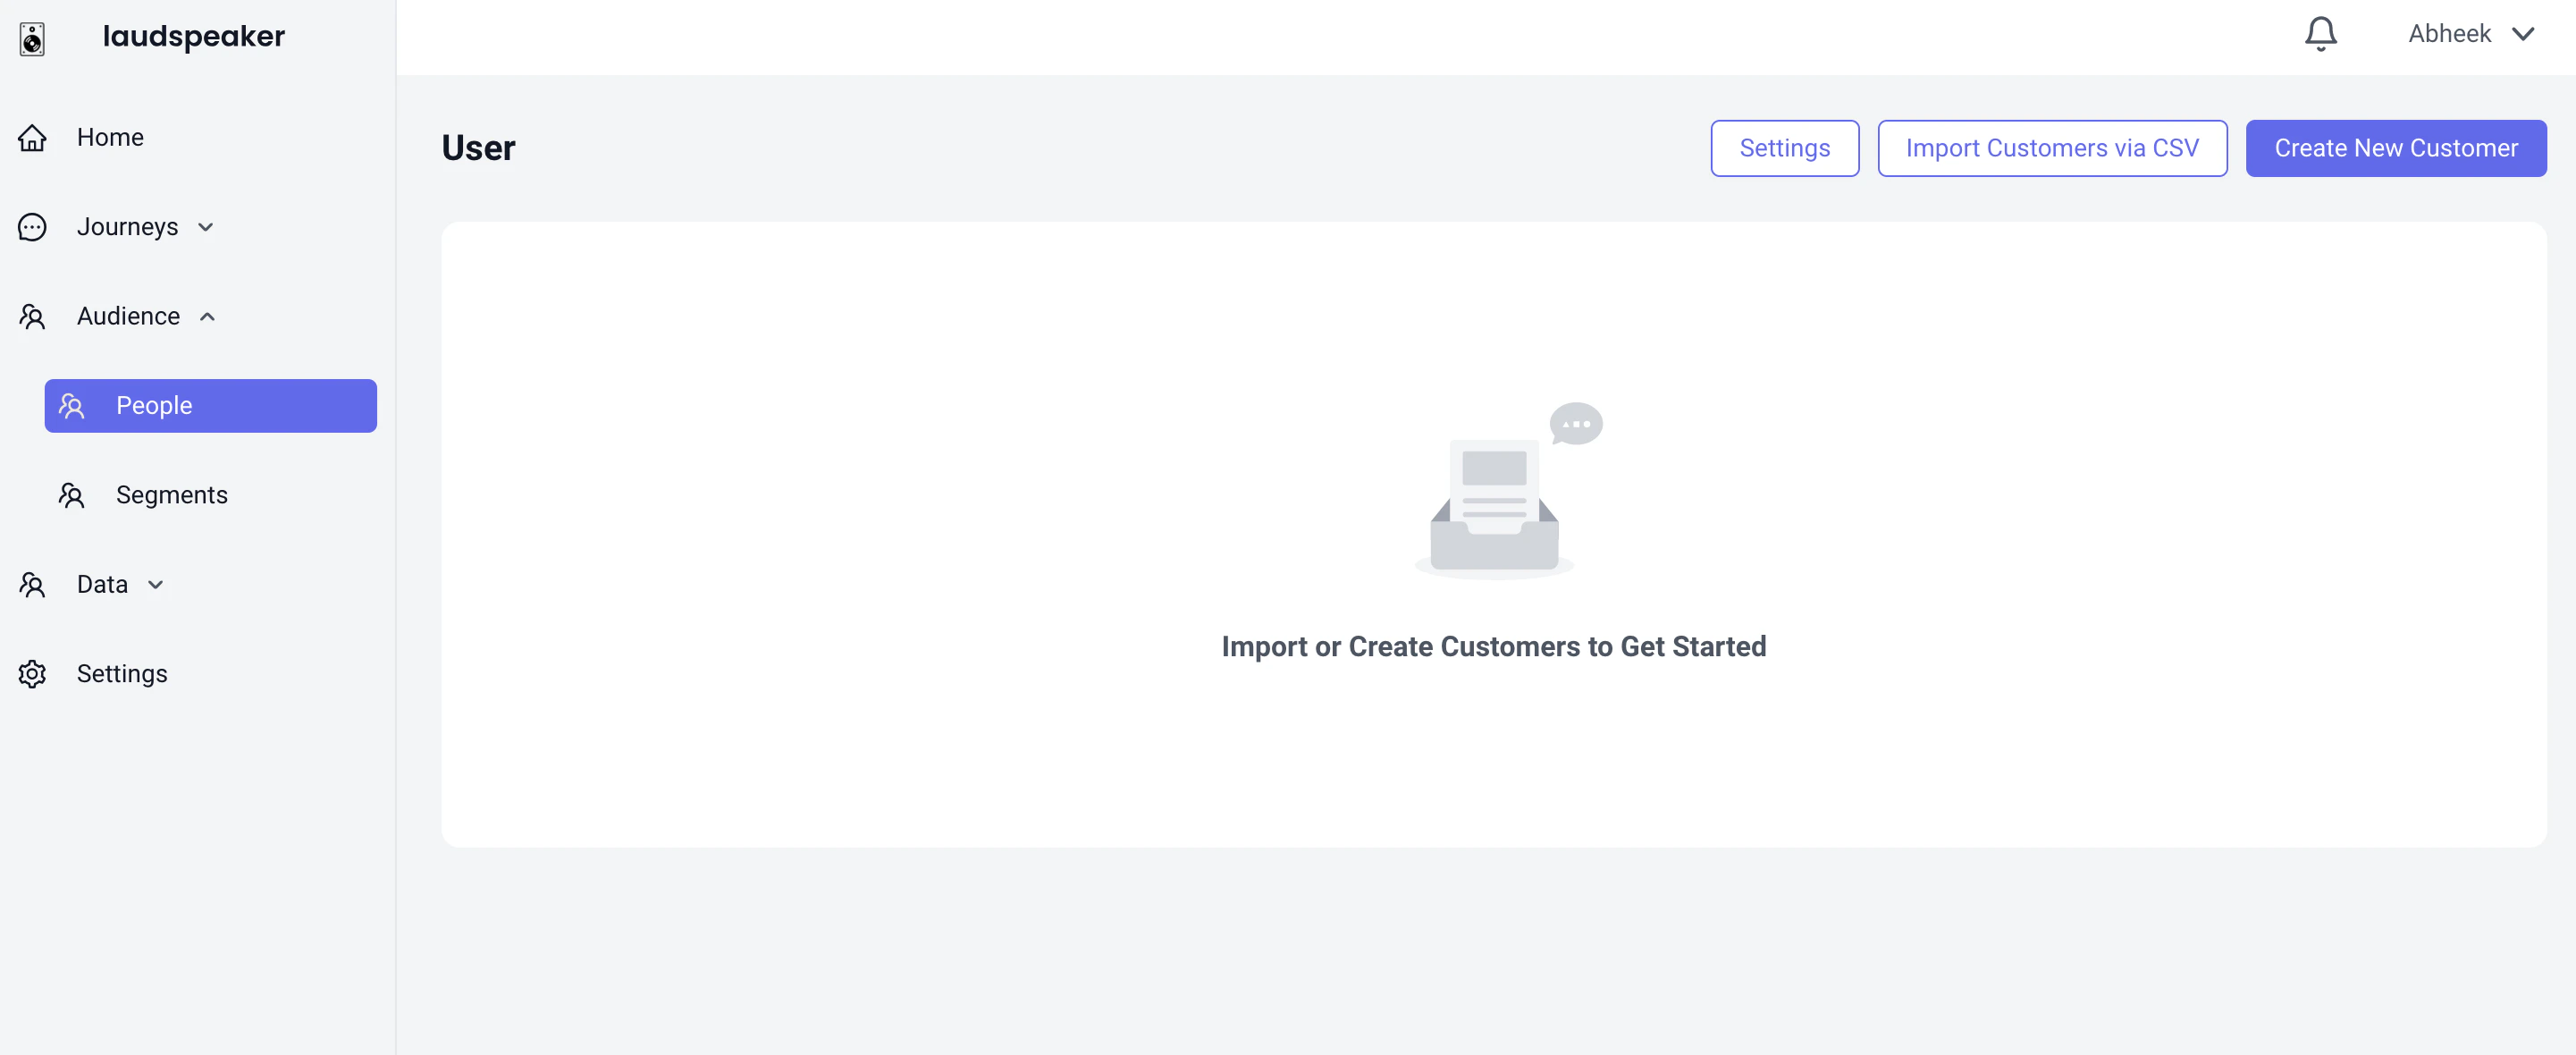 Then click on the Settings button.
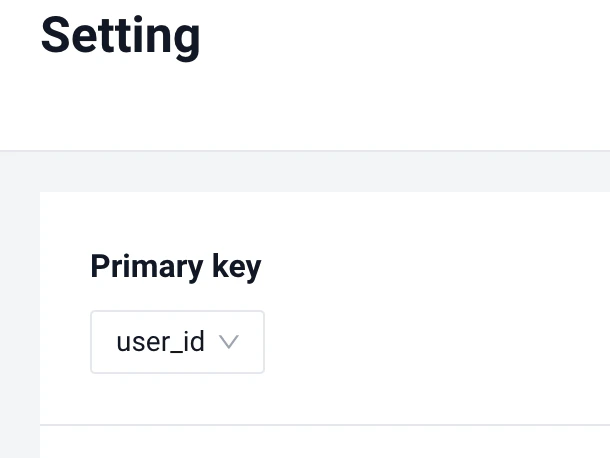
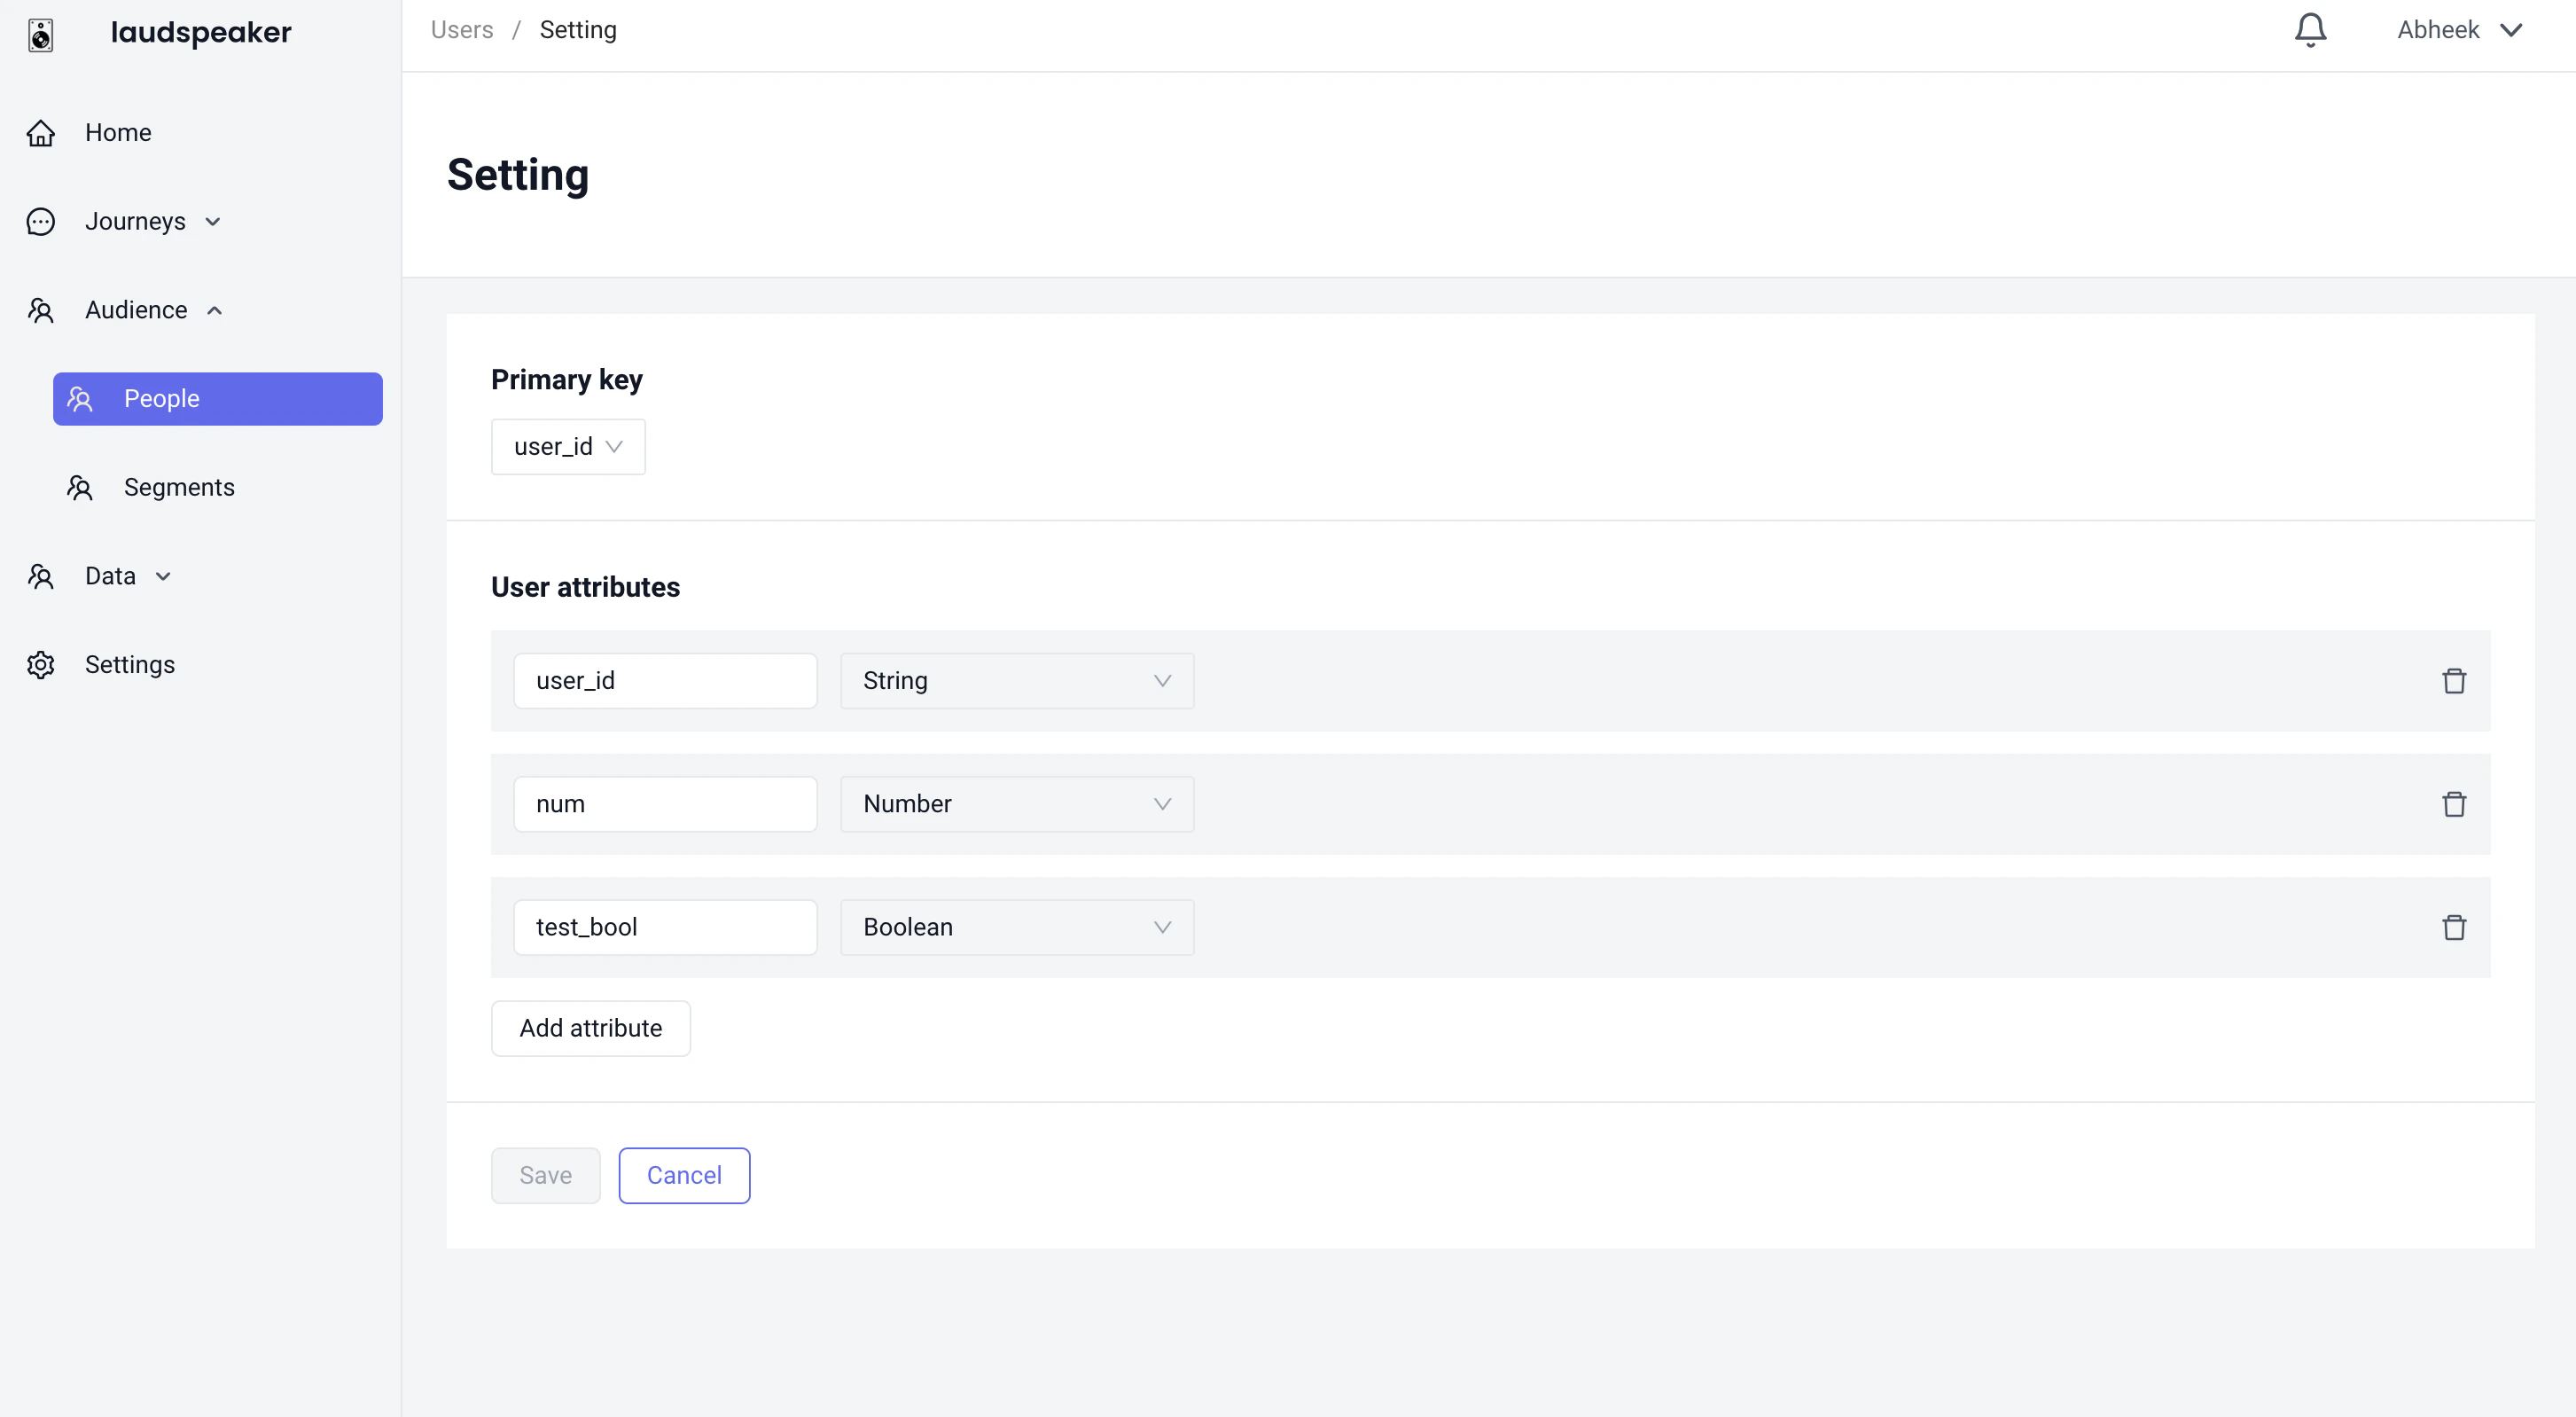 Here you can define your user's attributes and their types. Whats important for this tutorial is to add your unique identifier, and then make sure it is selected as primary key
 ### Starting up the tutorial app
We have two sample projects you can use, an ios: [https://github.com/laudspeaker/ios-sample-app](https://github.com/laudspeaker/ios-sample-app) or android one: [https://github.com/laudspeaker/android-sample-app](https://github.com/laudspeaker/android-sample-app) . This tutorial will use the ios sample as the example but you can easily substitute with the android.
You need to add the `GoogleService-Info.plist`, you can find this in the `General` tab of the `Project settings` in firebase
### Starting up the tutorial app
We have two sample projects you can use, an ios: [https://github.com/laudspeaker/ios-sample-app](https://github.com/laudspeaker/ios-sample-app) or android one: [https://github.com/laudspeaker/android-sample-app](https://github.com/laudspeaker/android-sample-app) . This tutorial will use the ios sample as the example but you can easily substitute with the android.
You need to add the `GoogleService-Info.plist`, you can find this in the `General` tab of the `Project settings` in firebase
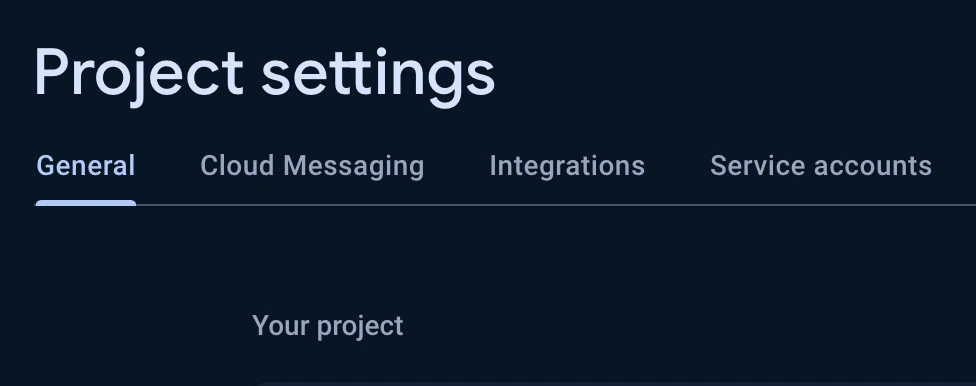 Then you can download the file here:
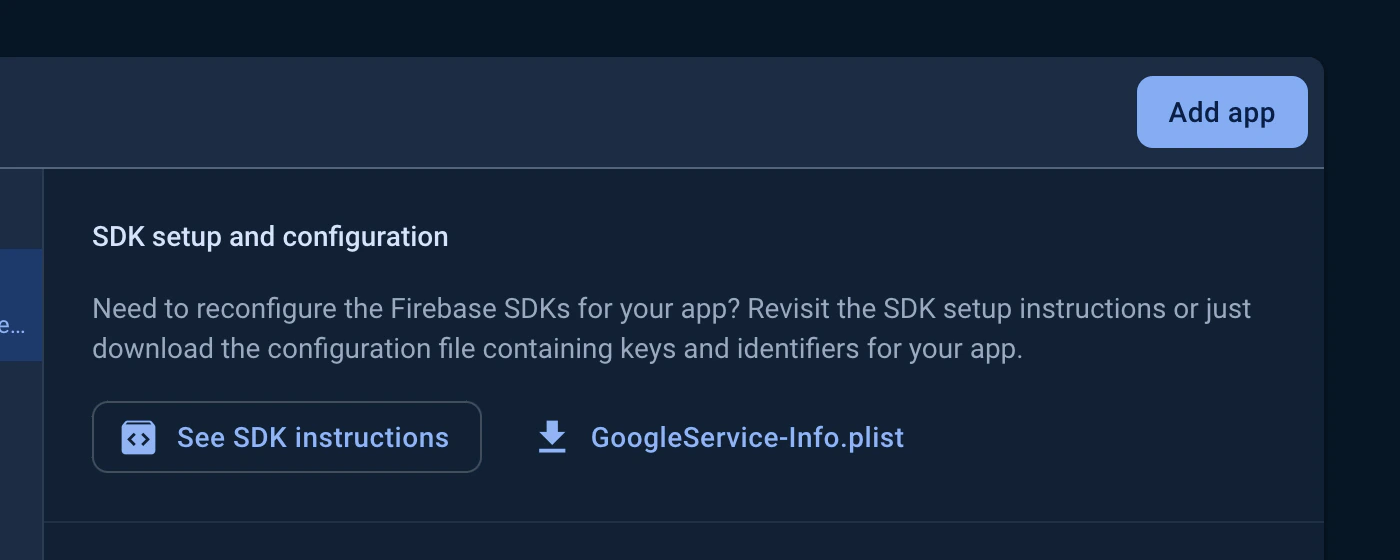 For ios, once you have the application set up in xcode it should look something like:
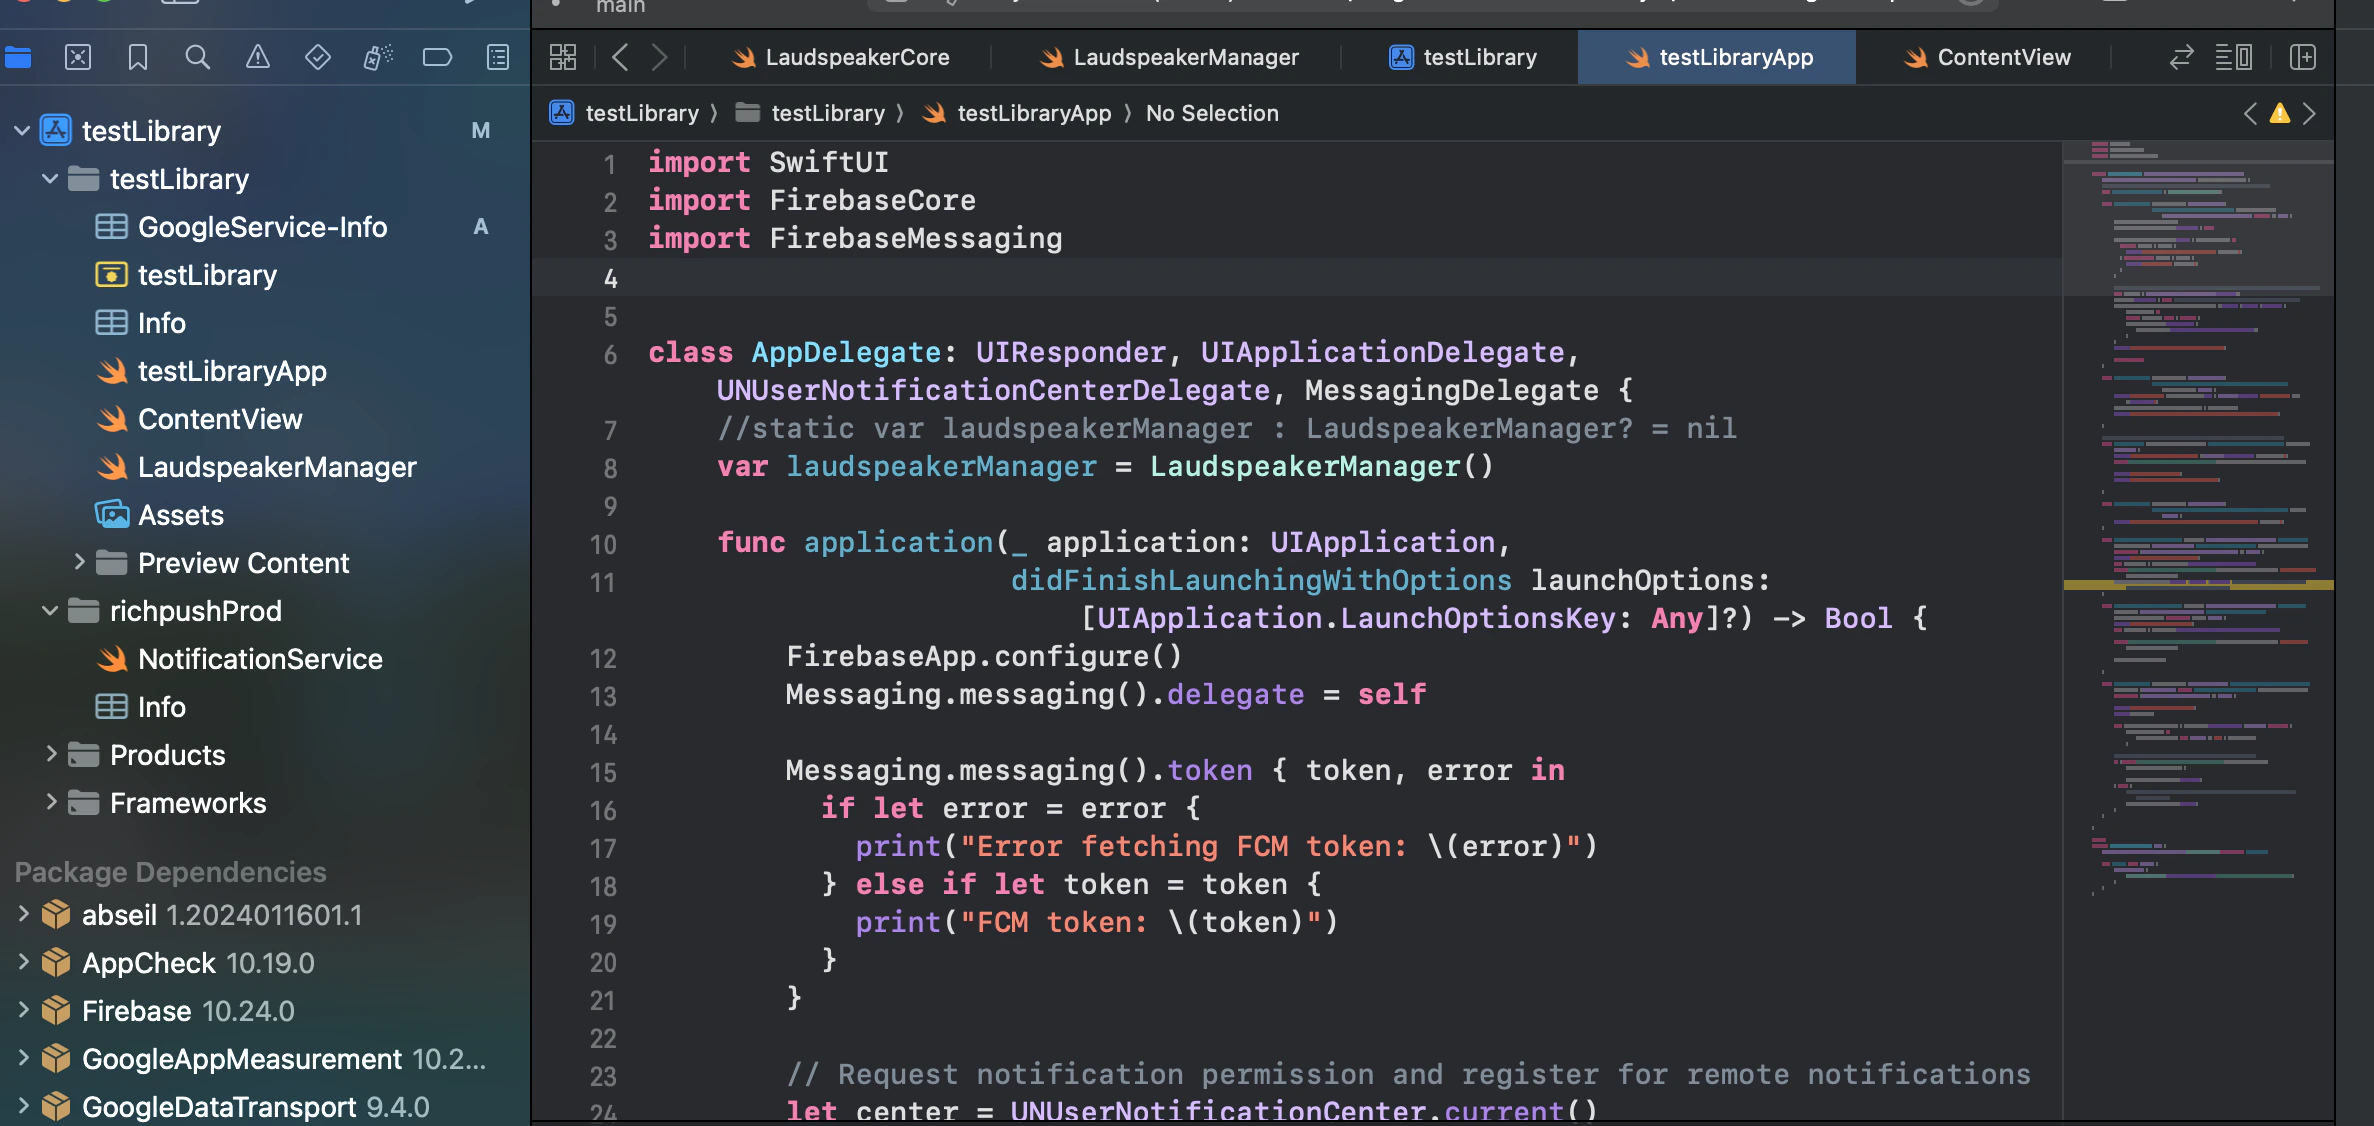 Finally don't forget to make sure push capabilities are turned on for the app, as well as background fetch and
 Next you will want to add the api key in the LaudspeakerManager file:
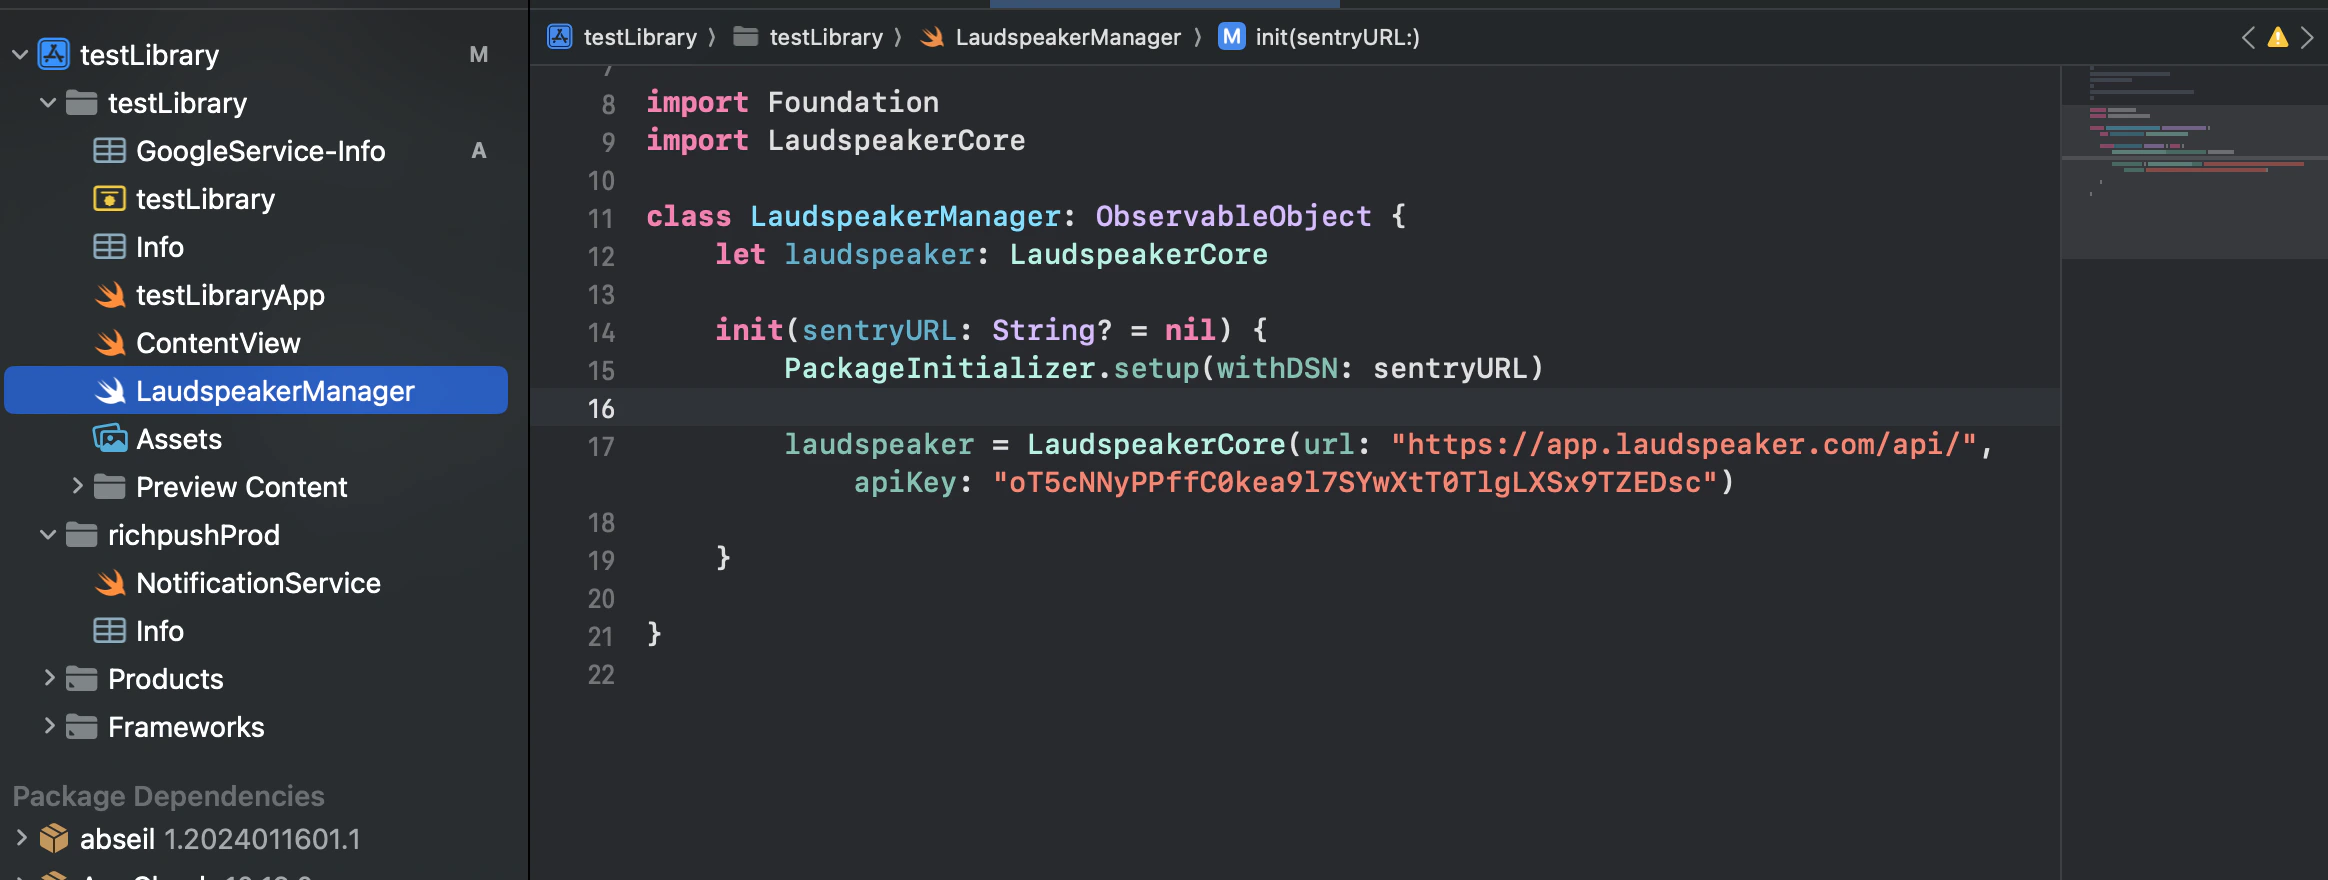 The relevant code is:
```
laudspeaker = LaudspeakerCore(url: "https://app.laudspeaker.com/api/", apiKey: "oT5cNNyPPffC0kea9l7SYwXtT0TlgLXSx9TZEDsc")
```
Now we are ready to start up the app!
Once you start it up it should look something like:
The relevant code is:
```
laudspeaker = LaudspeakerCore(url: "https://app.laudspeaker.com/api/", apiKey: "oT5cNNyPPffC0kea9l7SYwXtT0TlgLXSx9TZEDsc")
```
Now we are ready to start up the app!
Once you start it up it should look something like:
 Each button, triggers a specific sdk function. Go ahead and press on the button which says `identify`
Now that user should appear in laudspeakeer under the people tab:
Each button, triggers a specific sdk function. Go ahead and press on the button which says `identify`
Now that user should appear in laudspeakeer under the people tab:
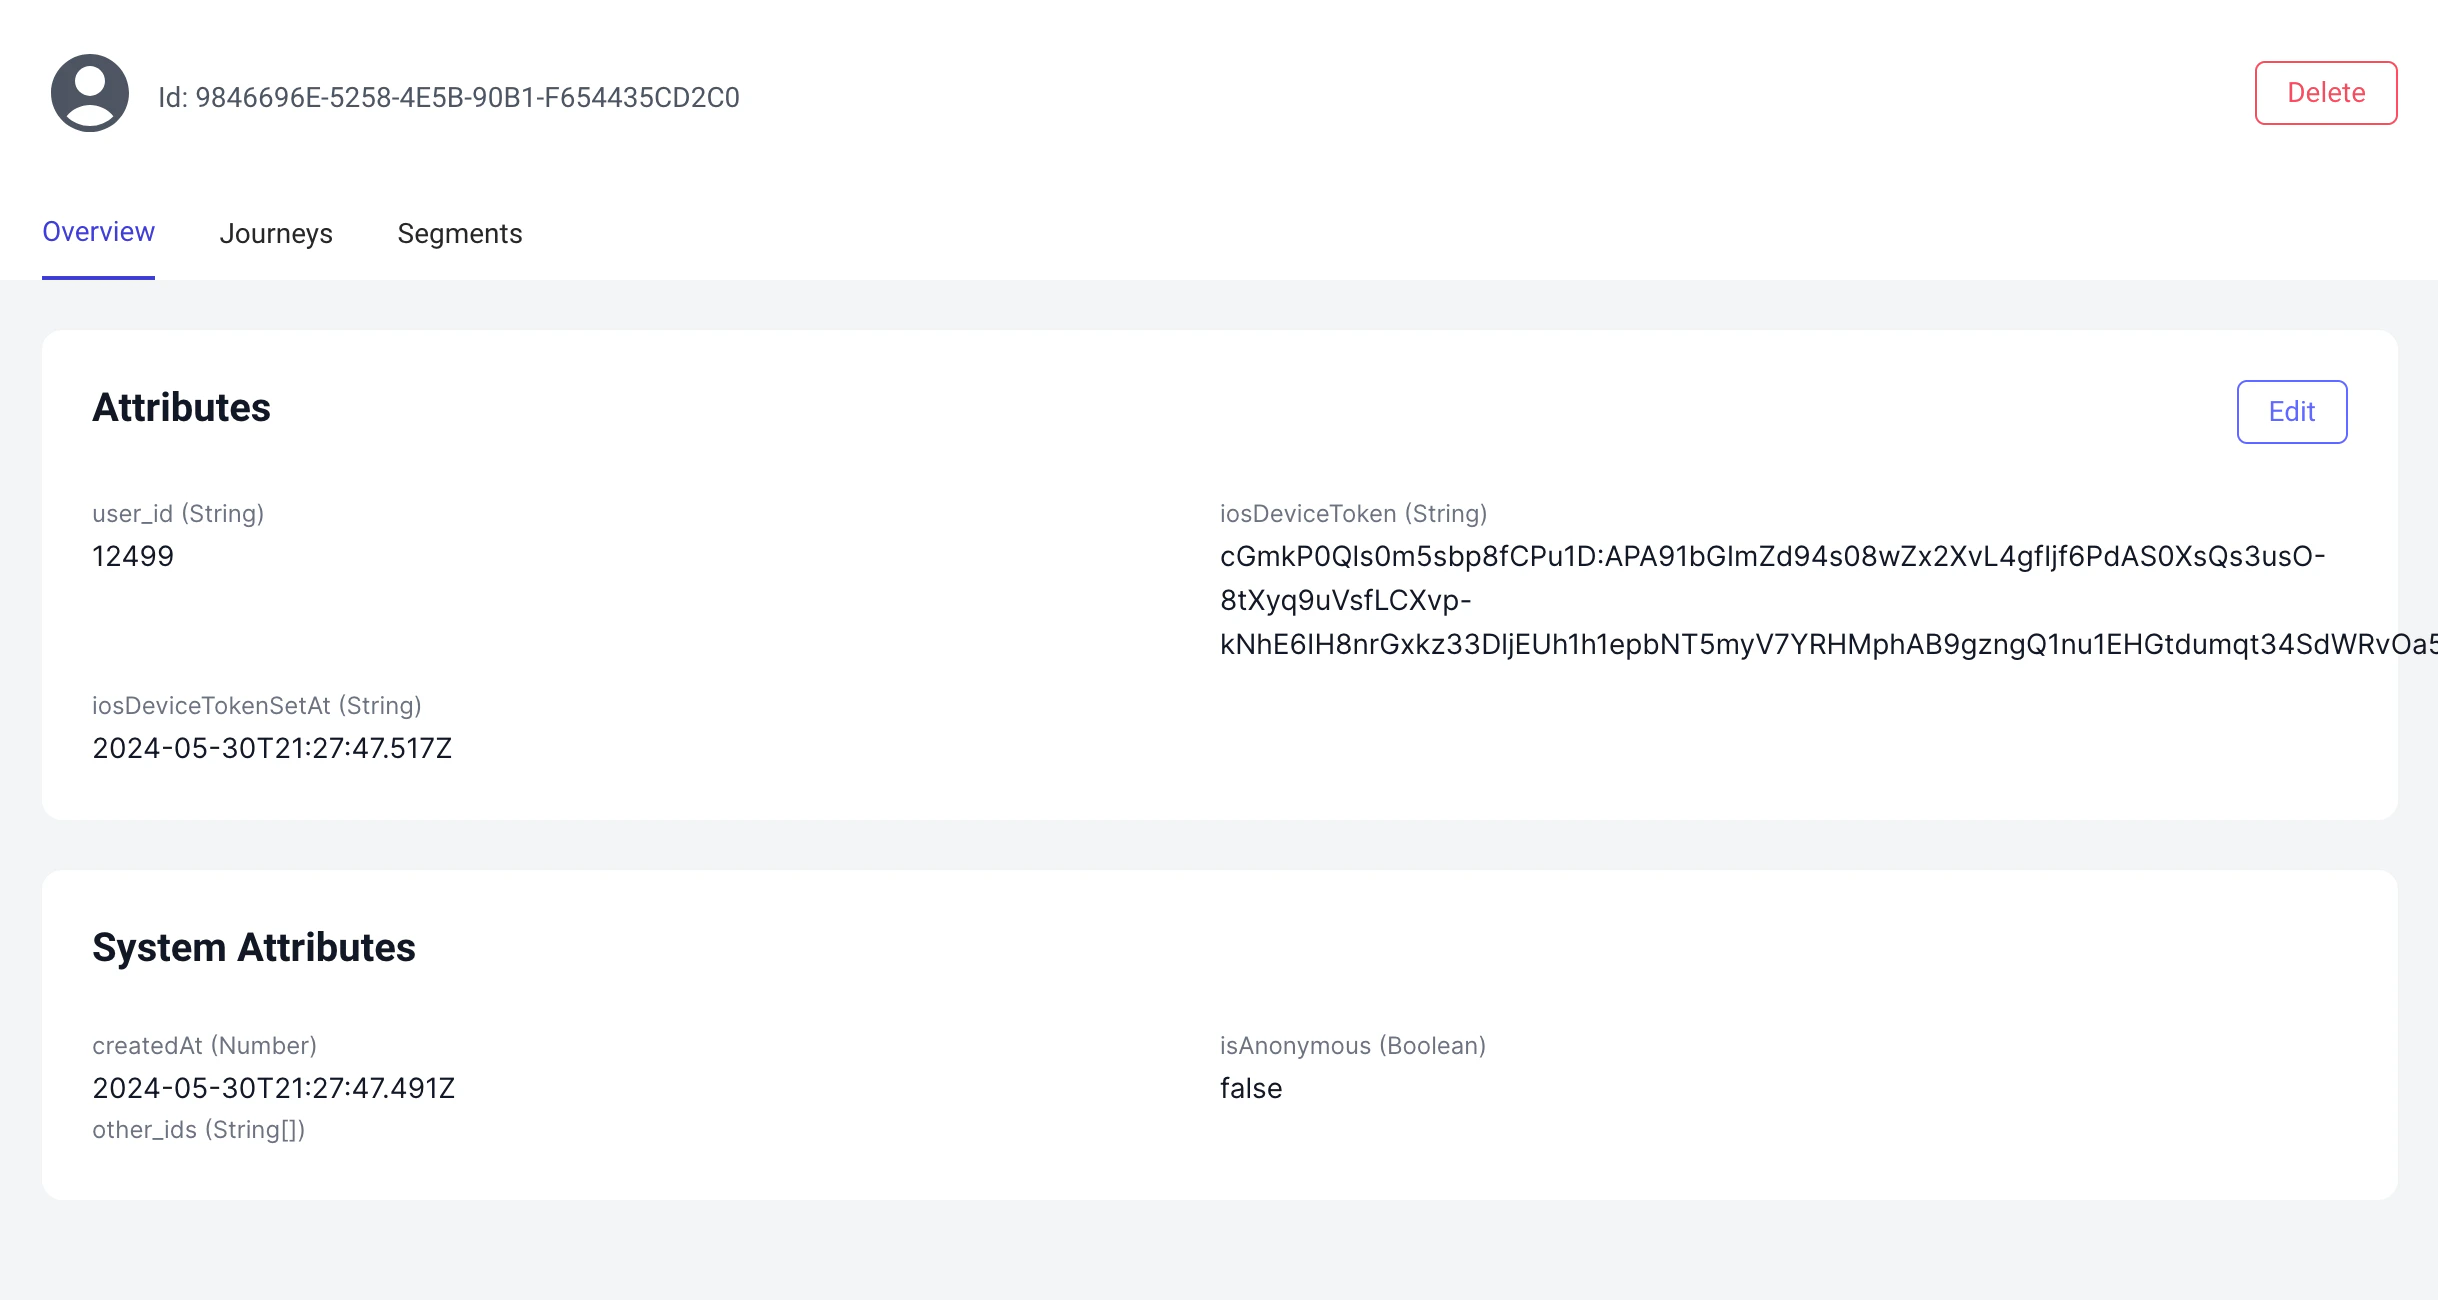
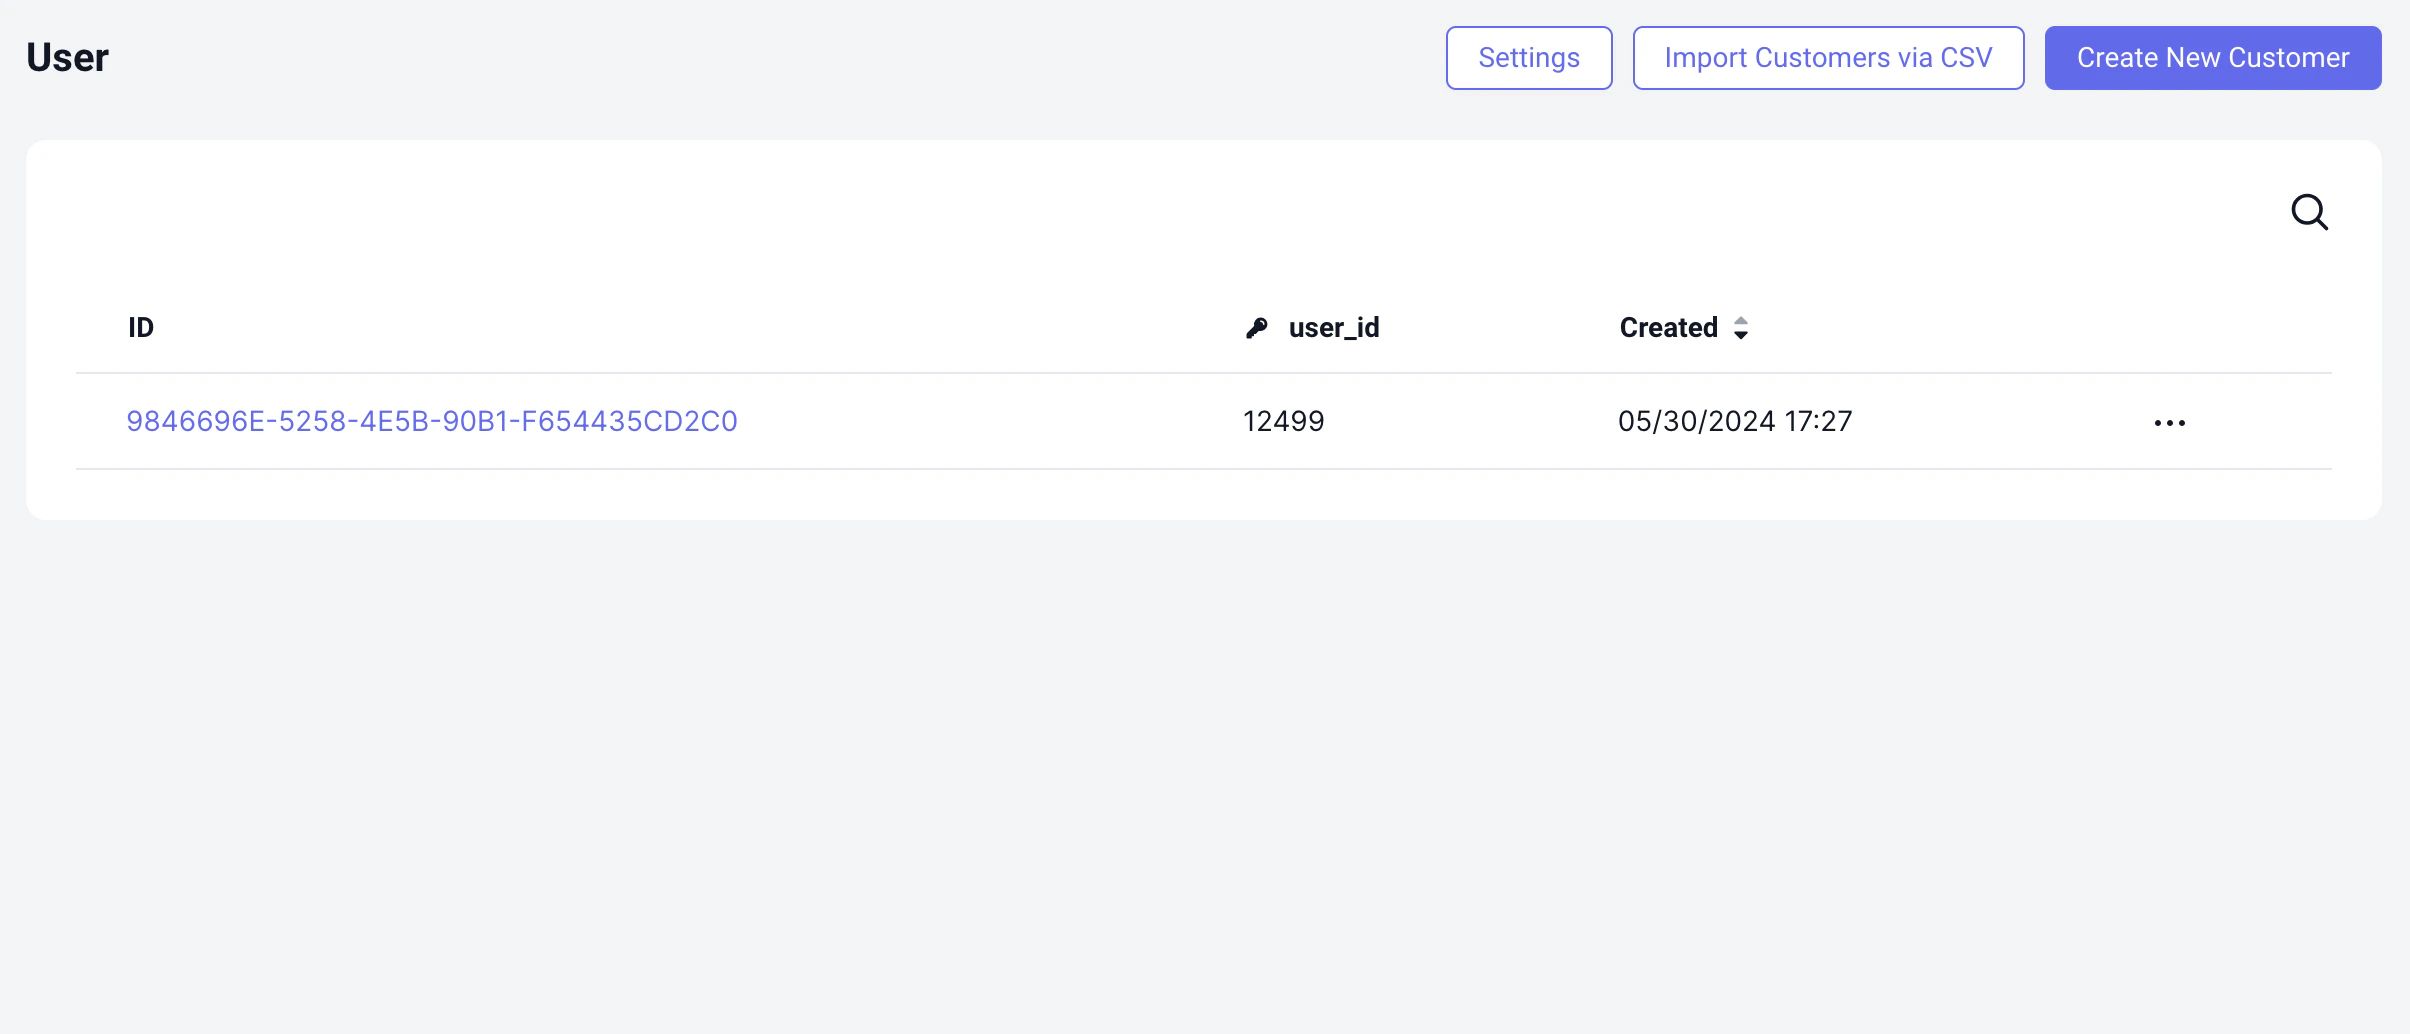 If you click the person you can see the details:
 ### Creating and starting our journey
Now we are ready to create a journey and send a push. We will keep it simple.
Go to the journey builder page and create a journey
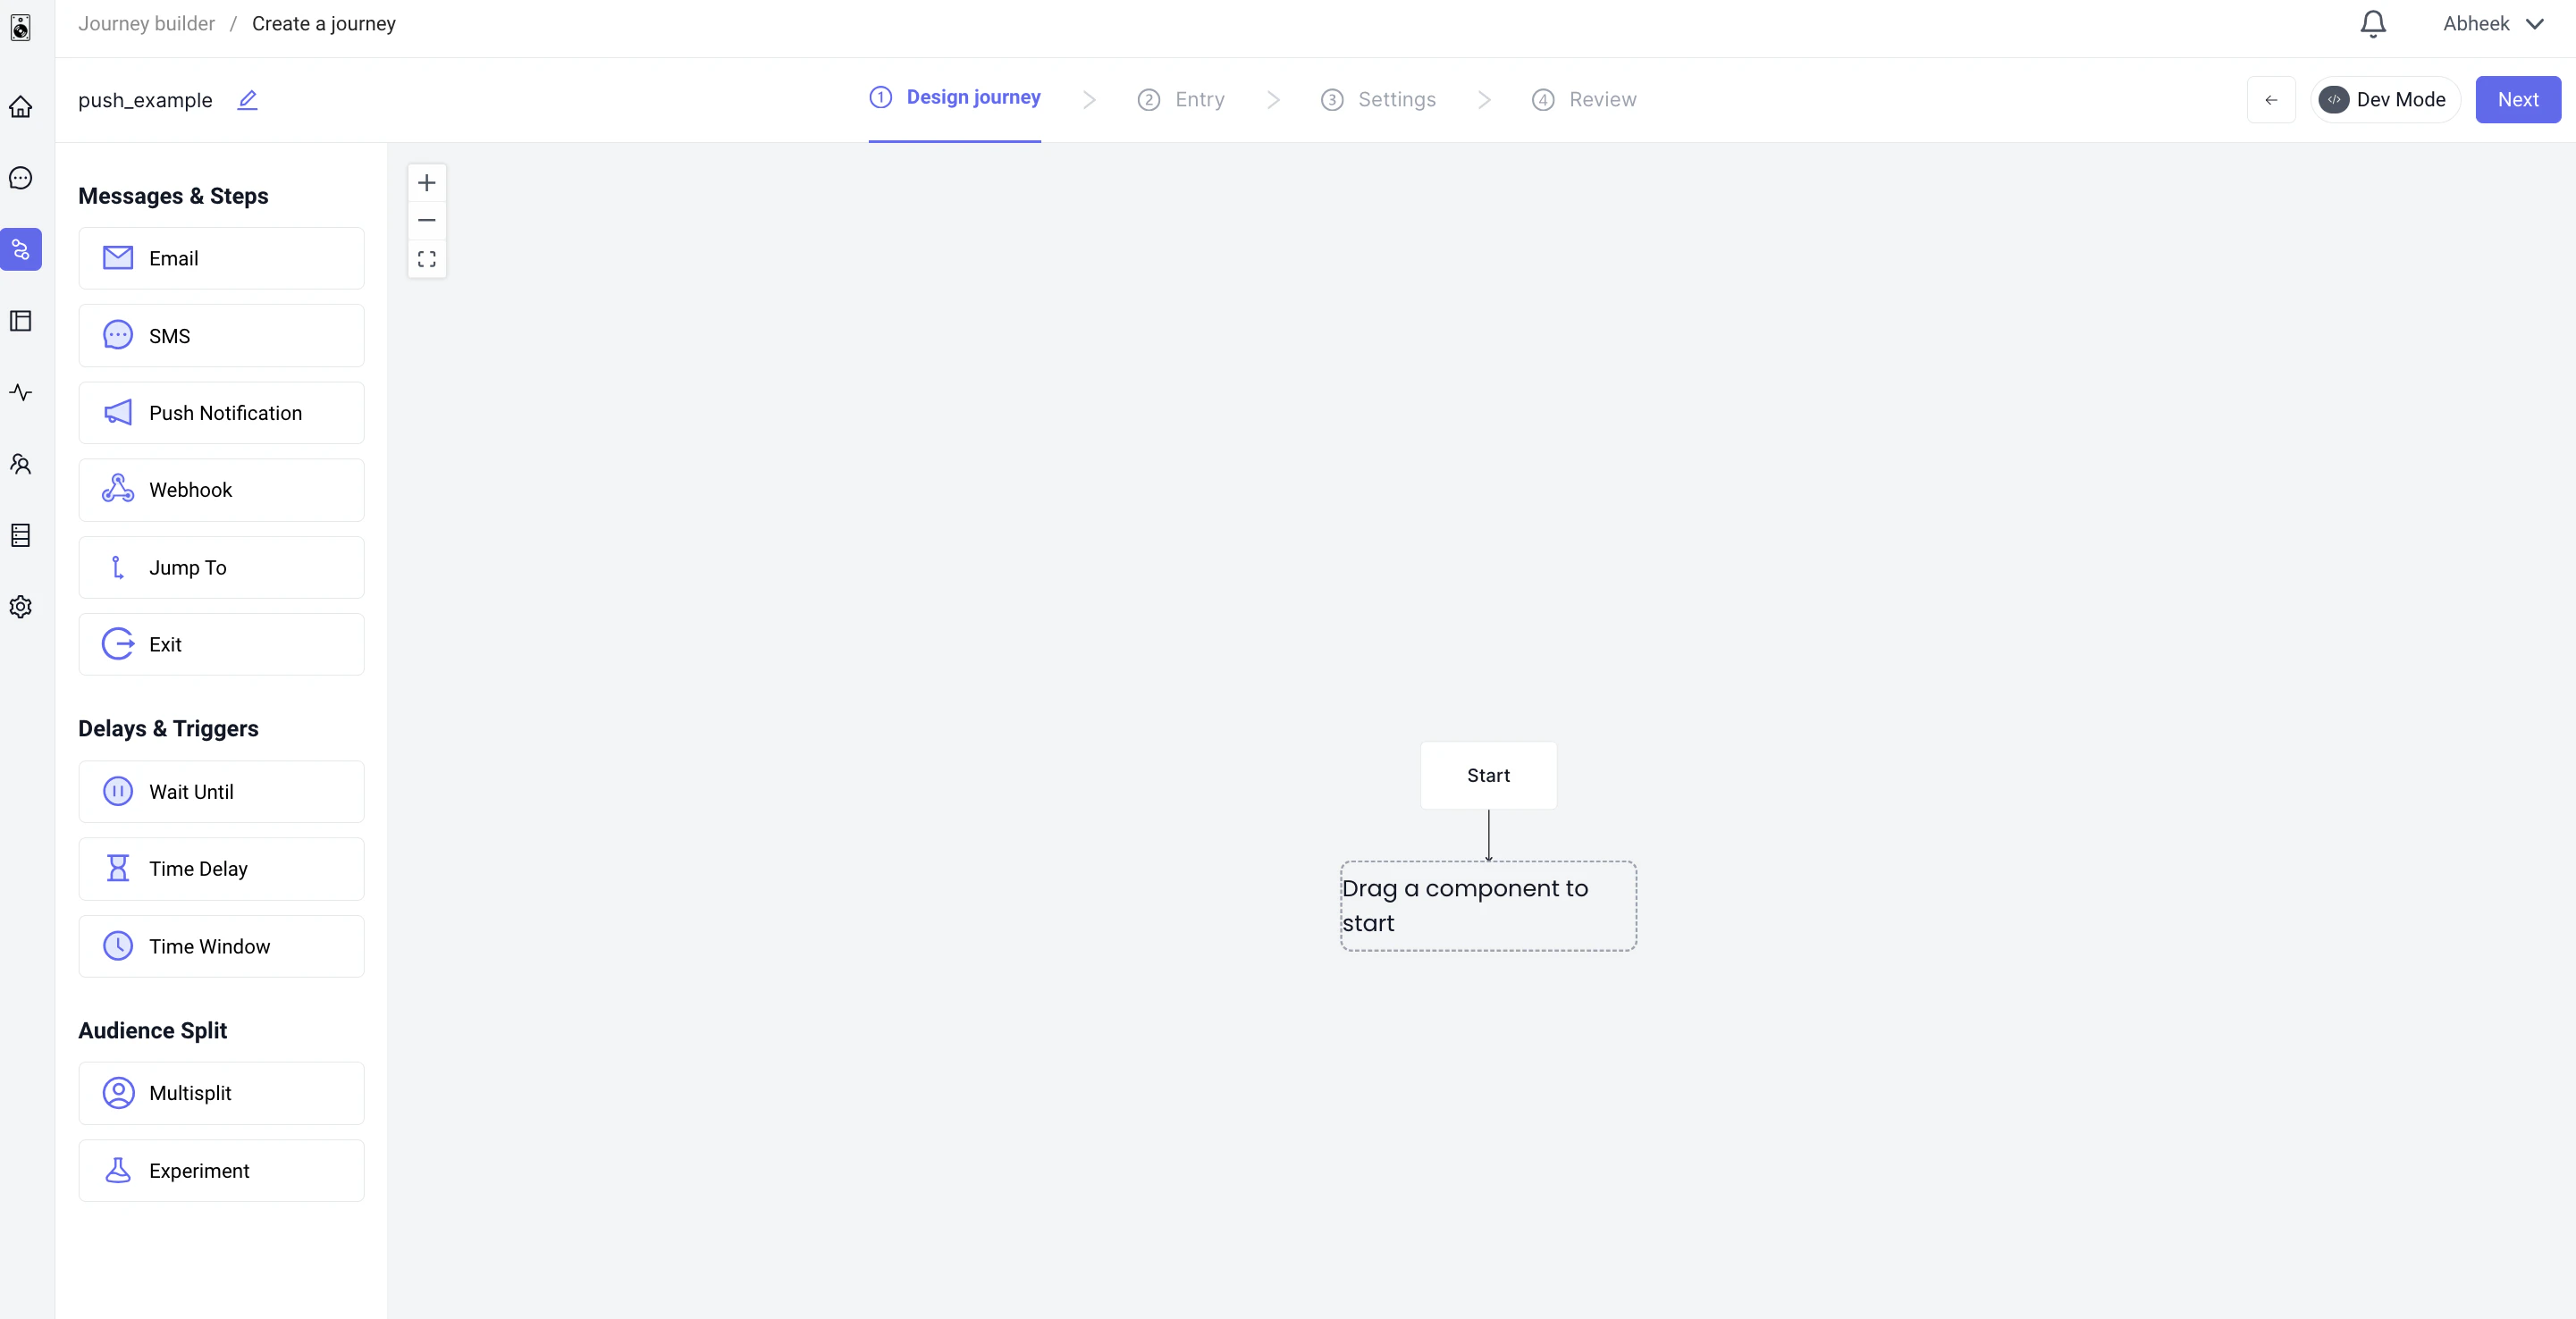
The empty journey should look like this:
### Creating and starting our journey
Now we are ready to create a journey and send a push. We will keep it simple.
Go to the journey builder page and create a journey
The empty journey should look like this:
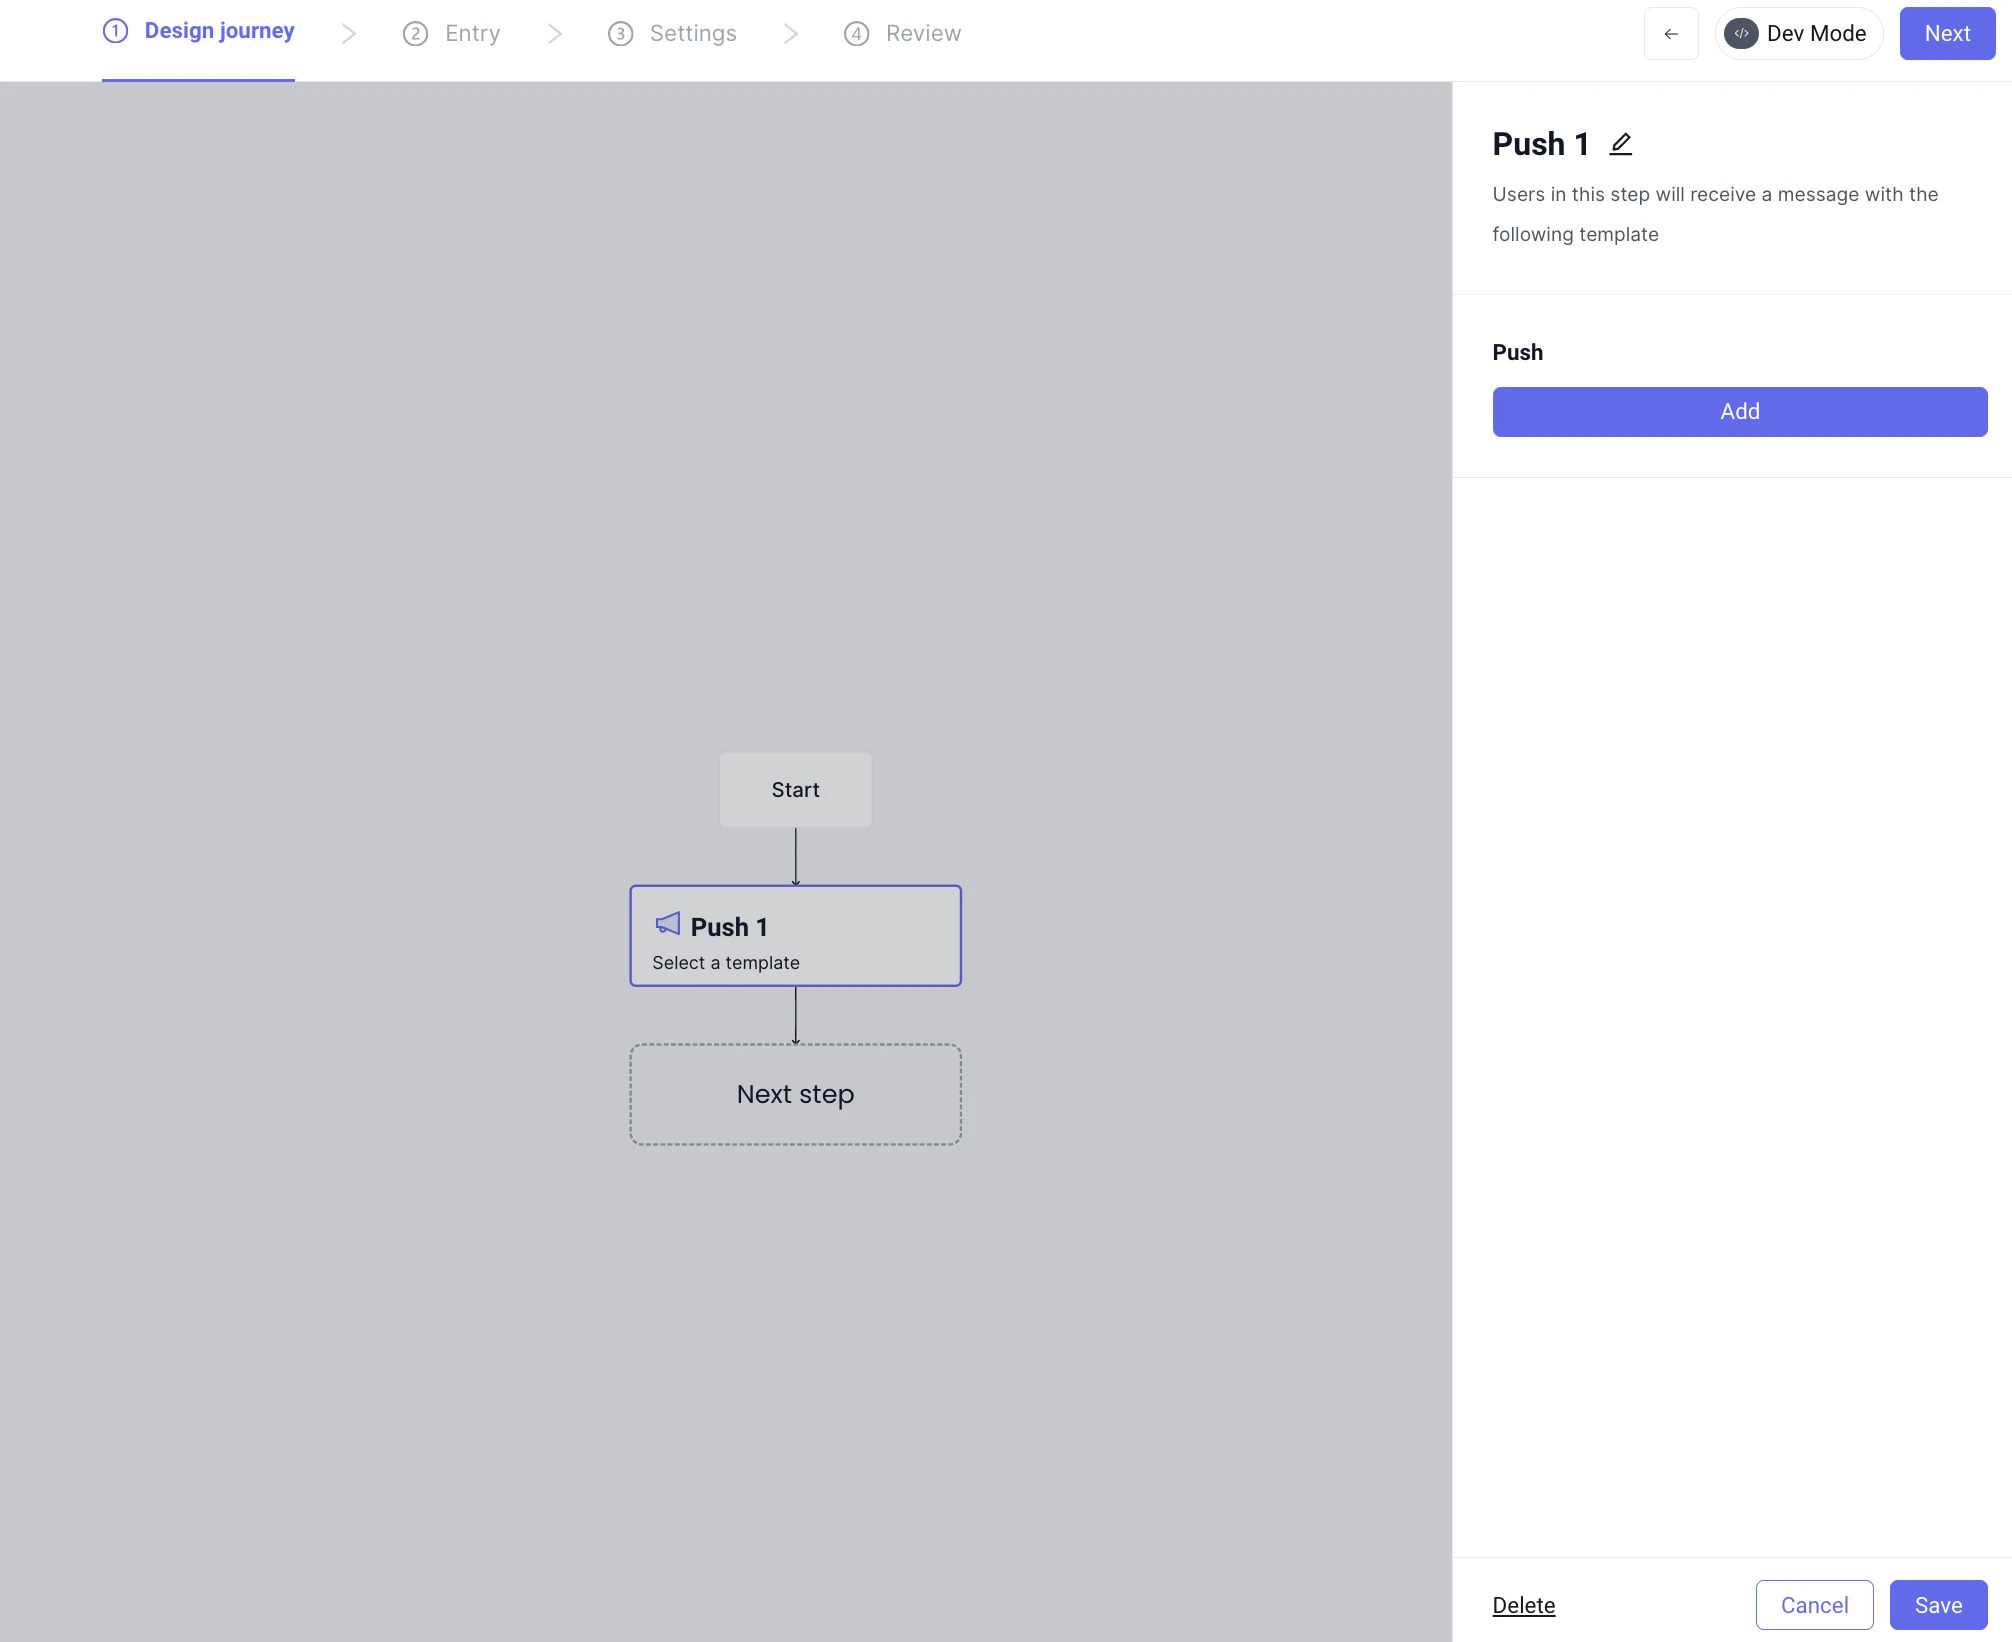
 Then simply drag a push step to the canvas:
You will then be prompted to add a push template:
Then simply drag a push step to the canvas:
You will then be prompted to add a push template:
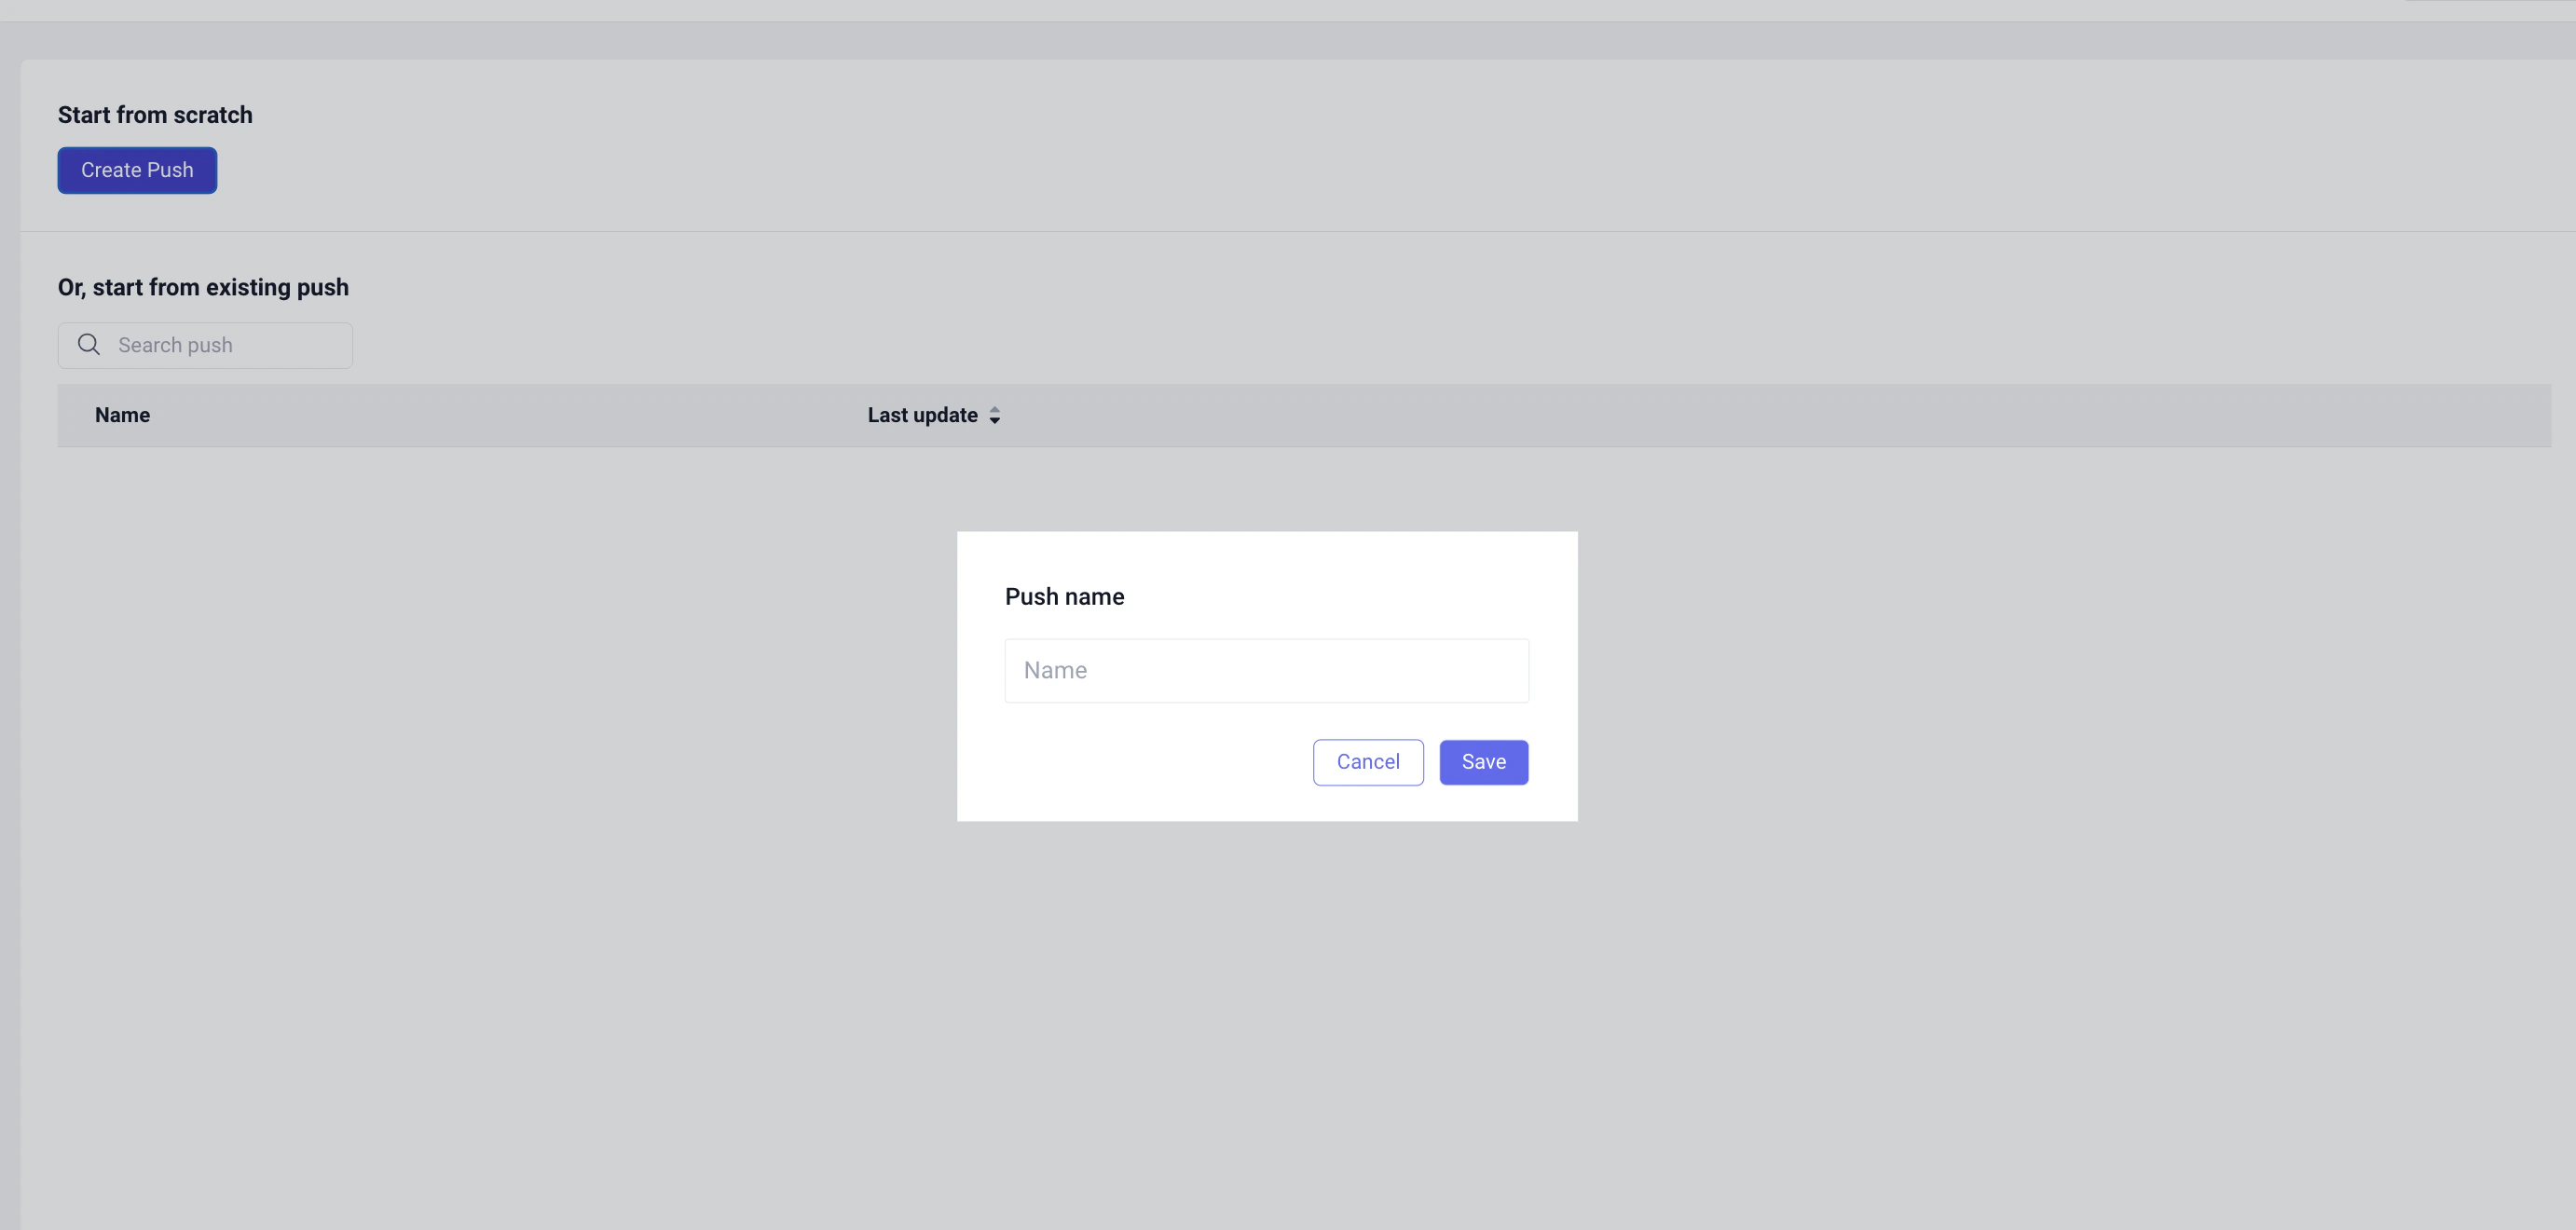
 Go ahead and name the template:
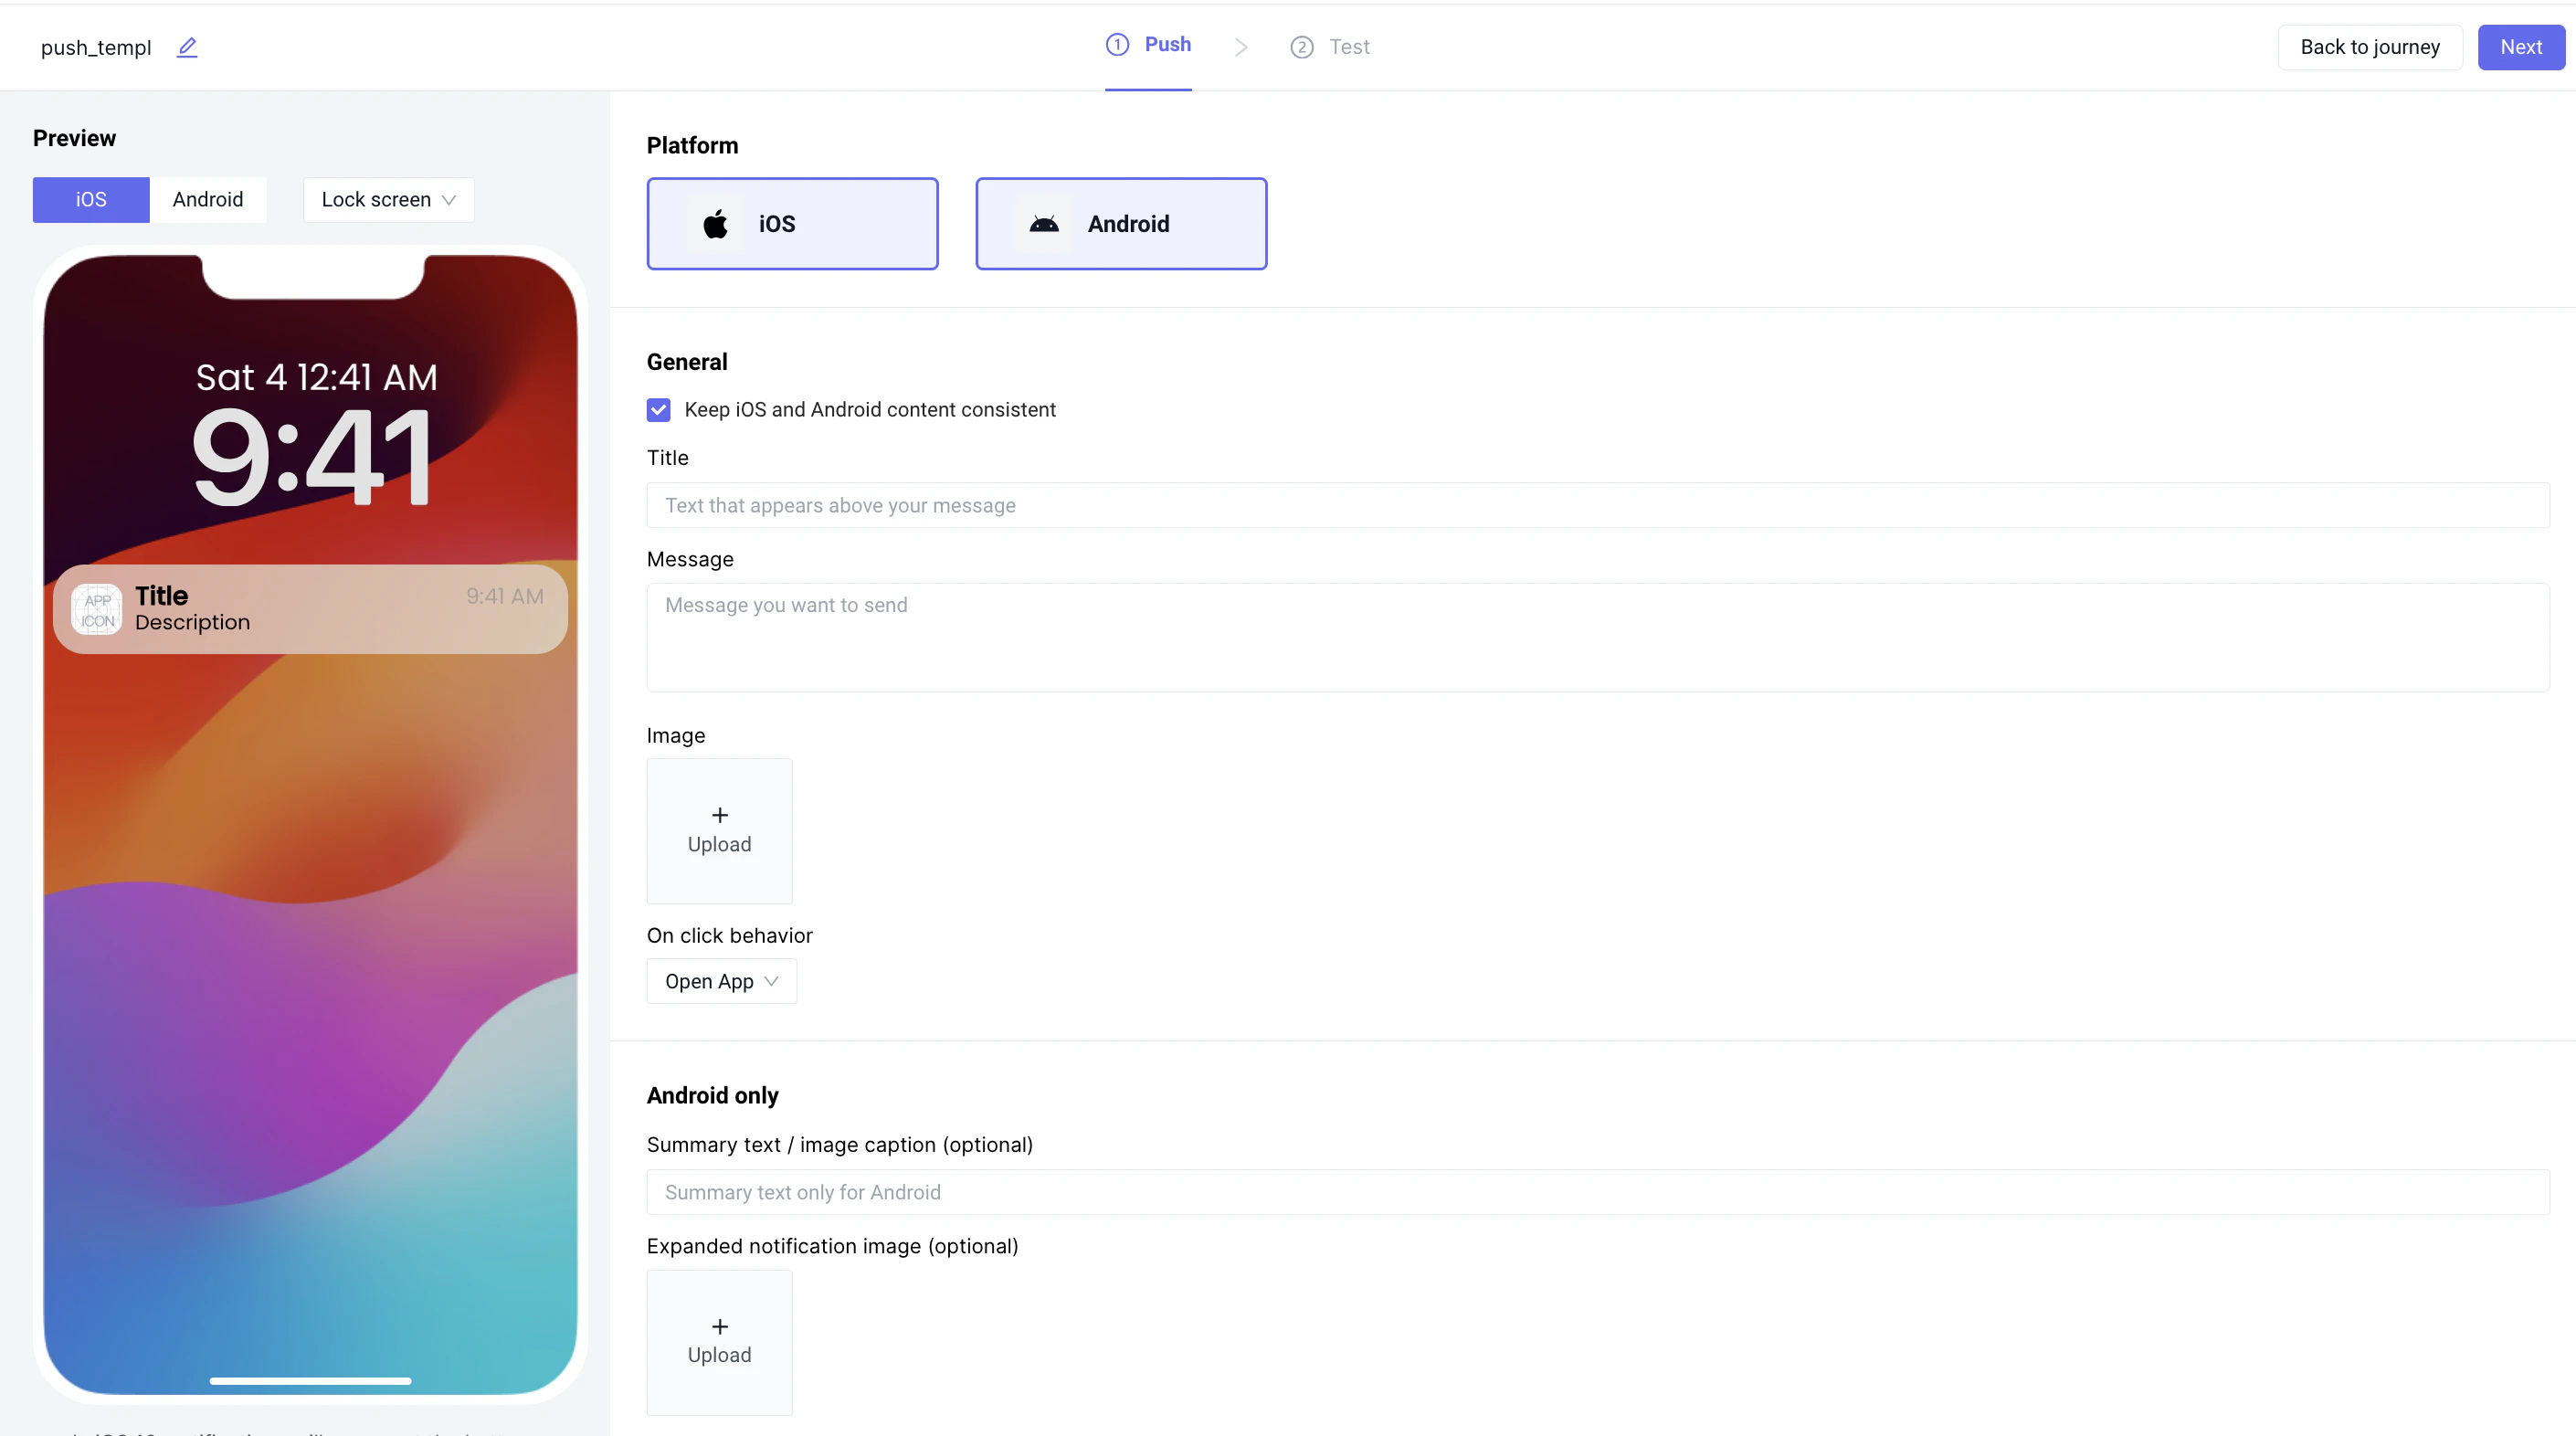
 Add a message that you want:
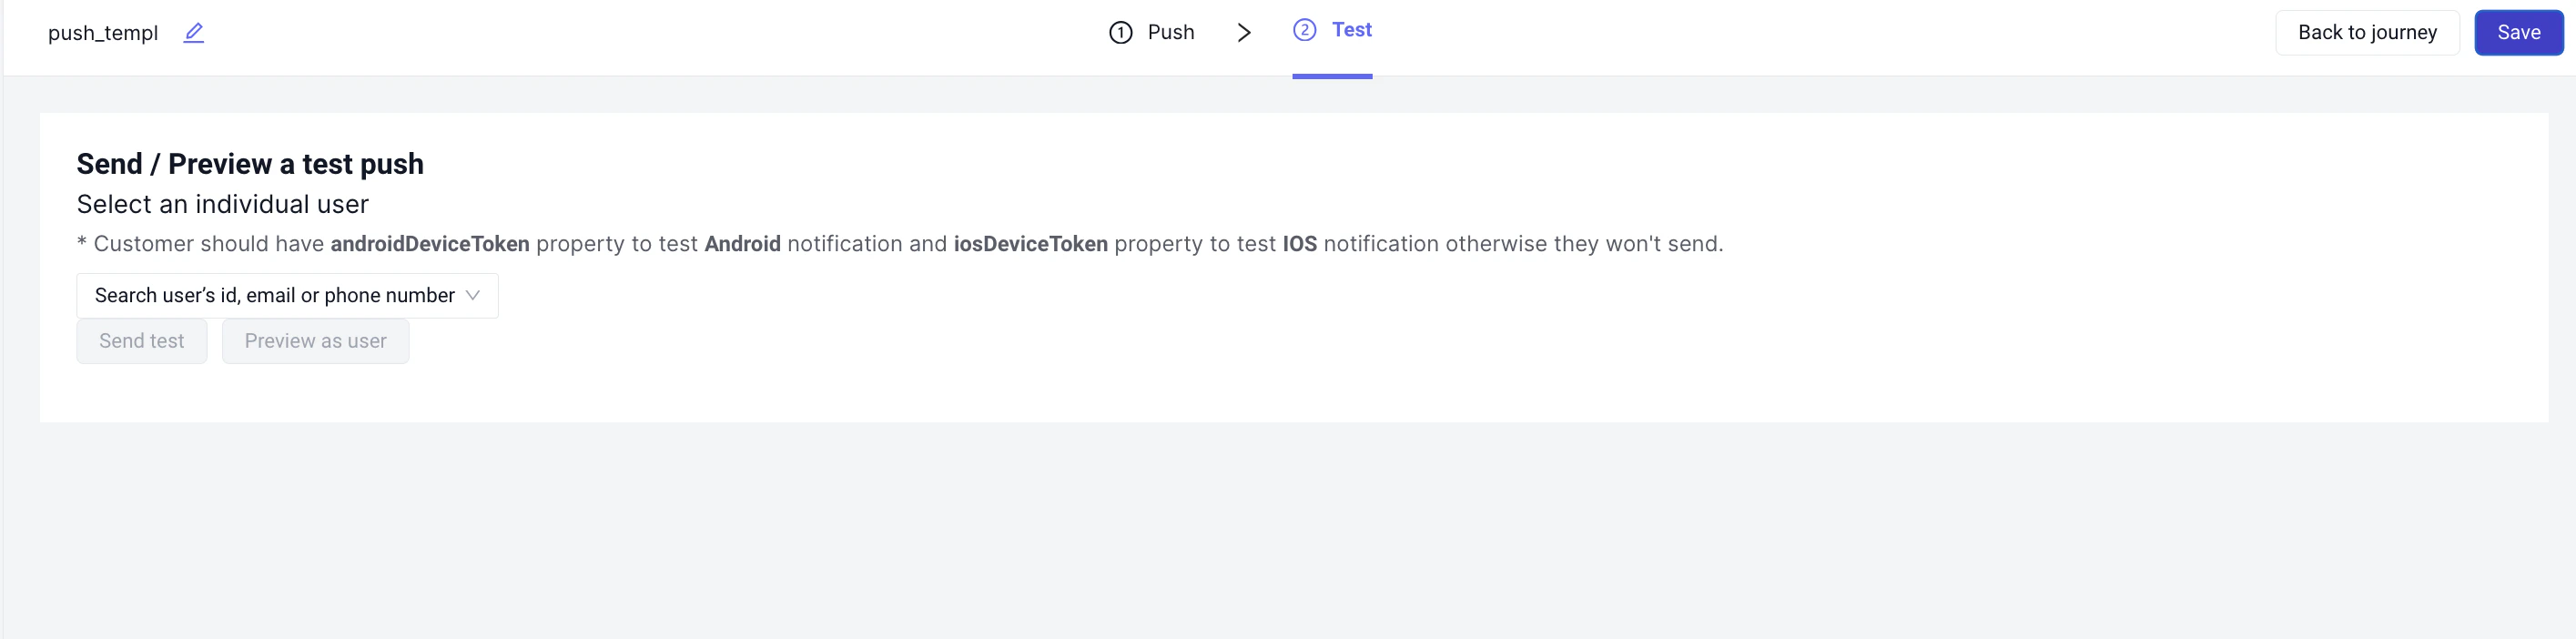
 Don't forget to save after finalizing the message:
 The journey should now look like:
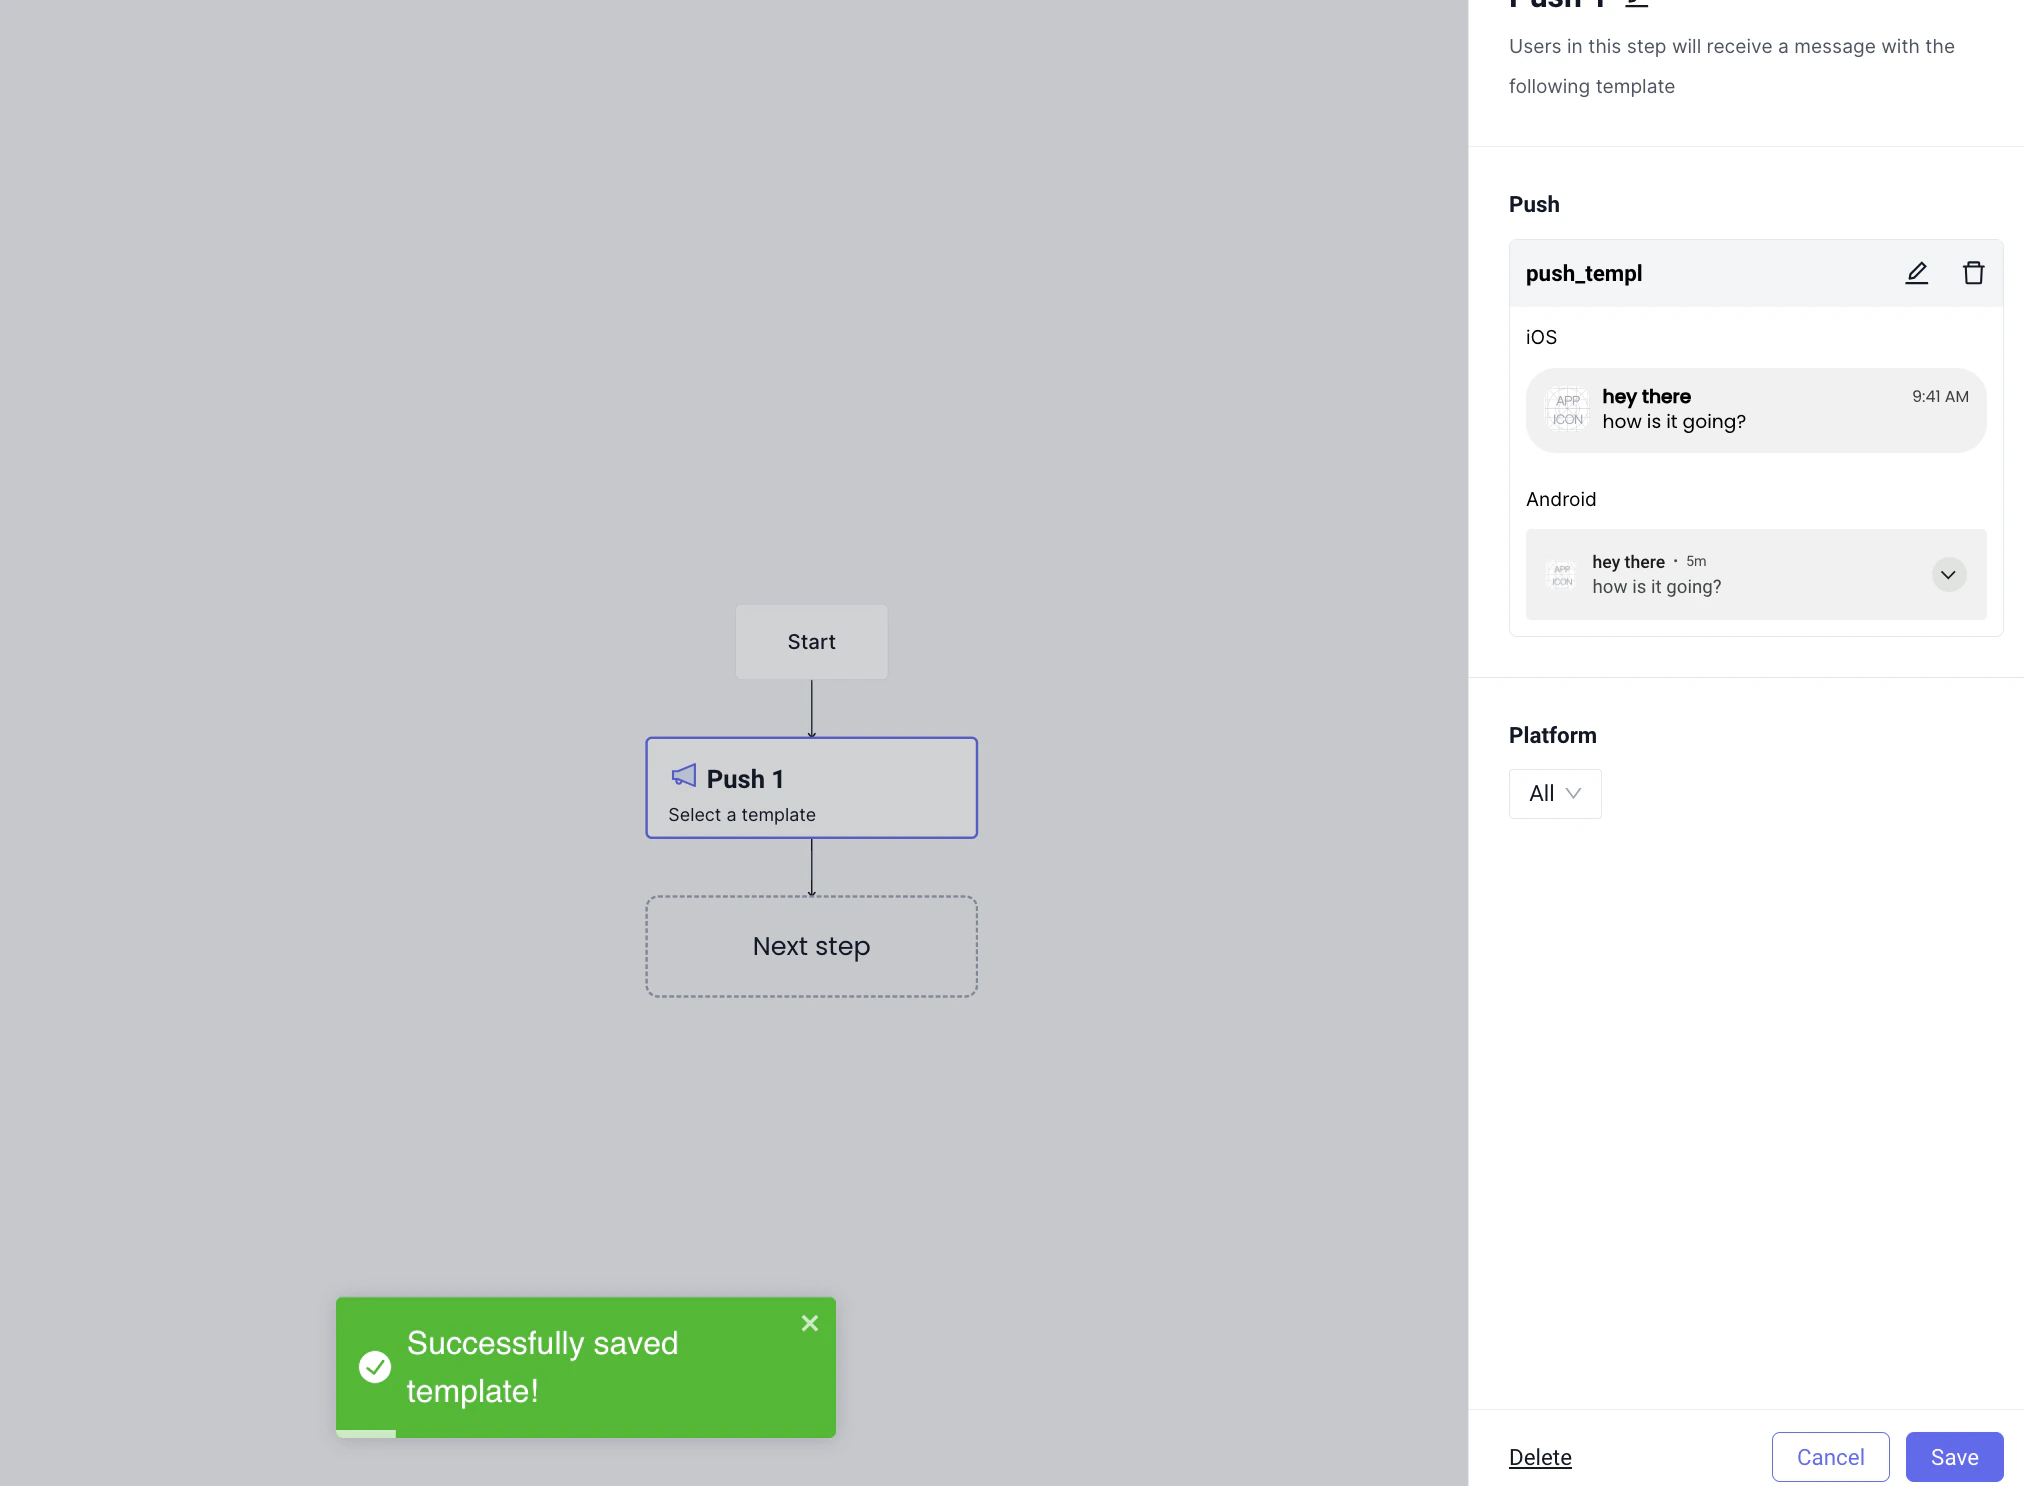 Don't forget to add an exit step
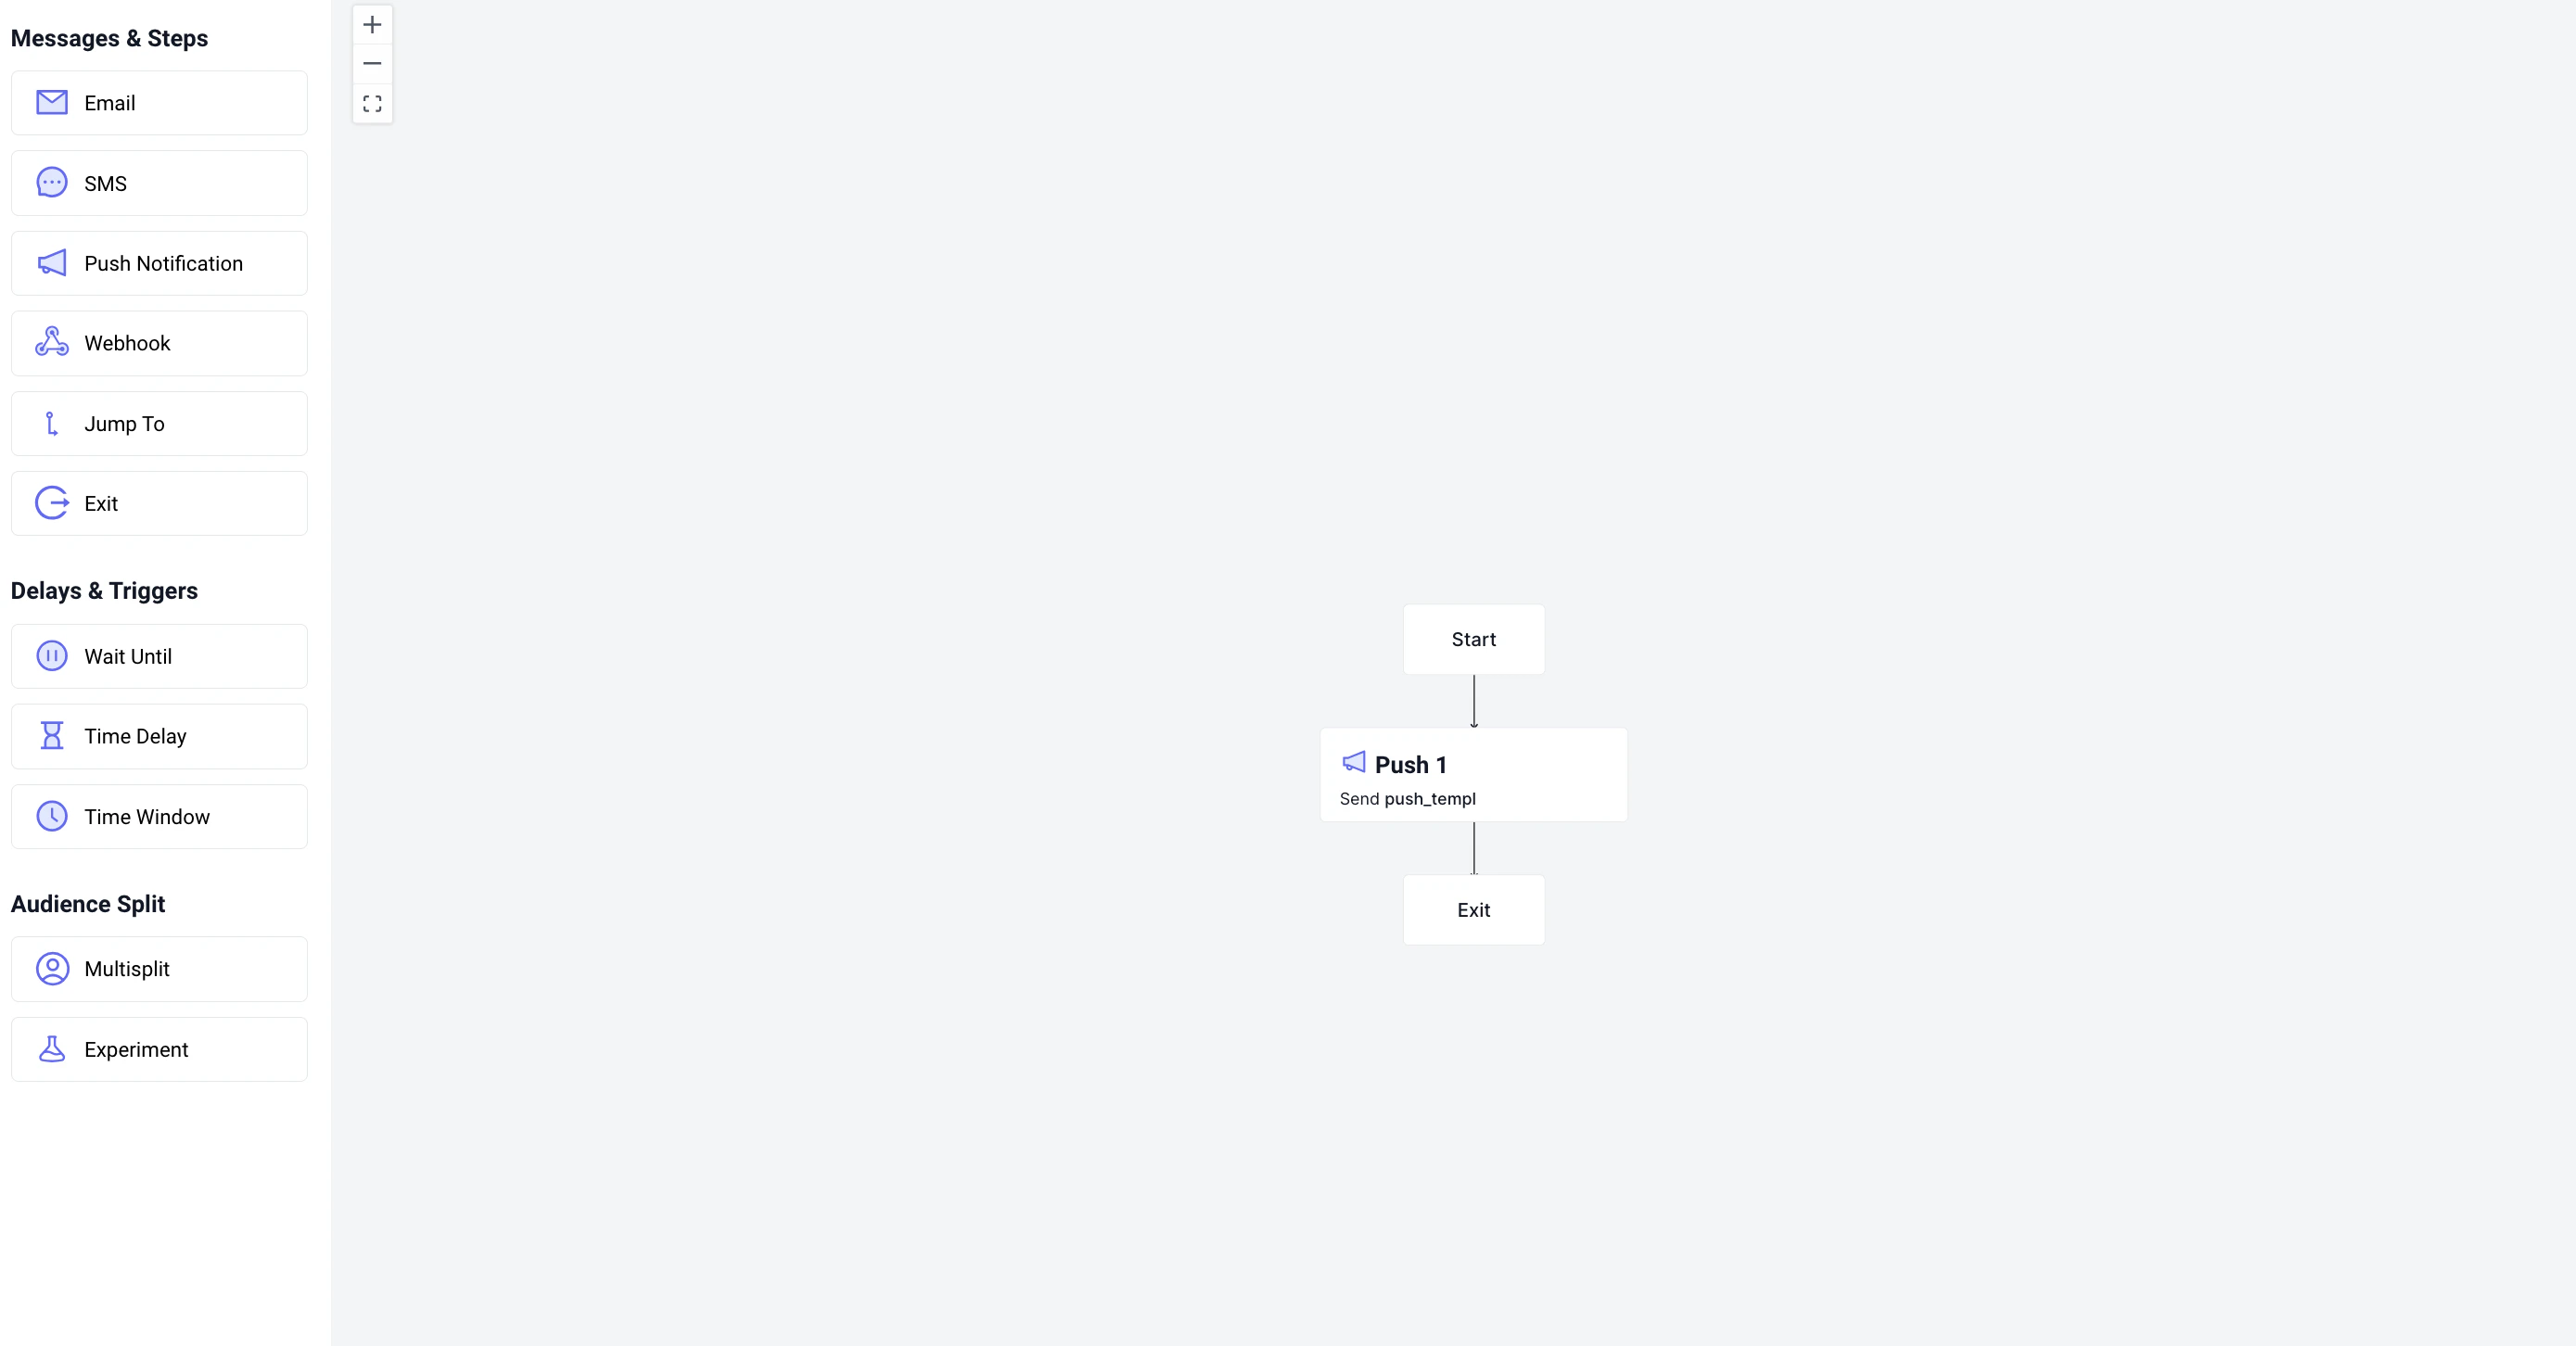 We will explain its structure.
When a user is enrolled in the journey, they start in the start step and then move to push step and receive the notification.
Now go ahead and start the journey, and you will receive your first push!
We will explain its structure.
When a user is enrolled in the journey, they start in the start step and then move to push step and receive the notification.
Now go ahead and start the journey, and you will receive your first push!